Lawn
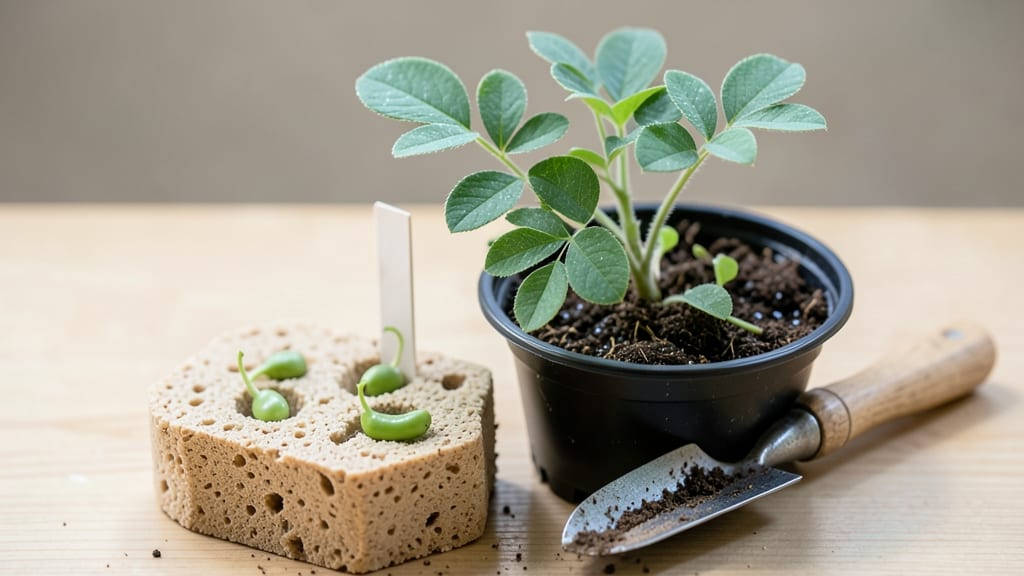
Peat seed starters cut my seedling struggles in half—no more tangled roots or transplant shock. 🌱 These biodegradable pots grow right into the soil, eliminating the need to disturb delicate roots when moving seedlings outdoors.
The secret lies in their perfect moisture balance, which keeps seeds from drying out while preventing that dreaded mold. I’ve tried everything from plastic cell trays to newspaper pots, but peat starters win for their simplicity and sustainability.
They’re pre-moistened and ready to use, so you can start seeds indoors without fuss. Just pop them into your seedling heat mat, add your seeds, and watch them sprout in just 10 days—no twisting required. What you’ll end up with are sturdy, well-established seedlings that transplant like pros.
No more wimpy stems or lost growth from root disturbance. The peat breaks down completely, so you’re not left with plastic waste or tangled roots to untangle. Works for herbs, veggies, and flowers alike, and they’re especially great for beginners who’ve struggled with seed starting before.
Let’s get those seeds growing the right way!
📚 In This Guide
- What you need
- Instructions
- Tips and common mistakes
- Wrapping up and next steps
What you need
- ● 1 bag of peat moss (2-3 cubic feet, sterilized and seed-safe).
- ● Seeds of choice (fast-growing varieties like radishes, lettuce, or herbs work best).
- ● 1 shallow tray or container (10x20 inches minimum, with drainage holes).
- ● Watering can or spray bottle (gentle misting function preferred).
- ● Newspaper or burlap (for lining the tray).
- ● Plastic wrap or a humidity dome (to retain moisture).
- ● Small hand trowel or spoon (for sowing seeds).
- ● Grow lights or sunny windowsill (if natural light is limited).
- ● Seedling heat mat (for cooler climates).
- ● Labeling tags or markers (to track seed varieties).
- ● Compost or worm castings (for added nutrients after germination).
Step-by-step instructions for peat seed starter
Here's how to grow strong seedlings without the fuss of twist ties or plastic trays.
🌱 Step 1: Prepare Your Peat Pots and Seeds
Start with 4 peat pots—they’ll break down when you transplant, so no waste. Fill each pot halfway with the seed-starting mix you’ve got ready. The mix should be moist but not soggy; squeeze a handful—it should hold together but not drip. I like to tap the pots gently on the table to settle the soil evenly before adding seeds.
For each pot, plant 1-2 seeds per the packet instructions, usually about ¼ inch deep. Press them lightly into the soil so they make good contact. If you’re sowing tiny seeds, I use a toothpick to place them precisely—this prevents overcrowding later. Water gently with a spray bottle until the soil surface looks damp but not wet.
💧 Step 2: Cover and Create a Humid Environment
Cover the pots with a clear plastic lid or wrap them in plastic wrap to trap moisture and warmth. This is where the magic happens—your seeds need a cozy, humid spot to germinate. Place them in a warm area, ideally between 70-75°F. I keep mine on top of my fridge, where it stays consistently warm.
Check daily for condensation on the plastic. If it’s foggy inside, you’re golden. If it’s dry, mist the soil lightly and reseal. Germination usually takes 5-10 days, but don’t rush it—patience here means stronger seedlings later. Once you see sprouts, remove the cover immediately to prevent mold.
☀️ Step 3: Move to Light and Monitor Growth
As soon as the first true leaves appear—those are the second set after the initial cotyledons—move the pots to a bright spot with 6-8 hours of indirect light daily. A south-facing window works, but if your light is weak, supplement with a grow light. Keep it 2-3 inches above the seedlings to avoid stretching.
Water from the bottom now—place the pots in a shallow tray of water for 10-15 minutes until the soil feels evenly moist. This prevents disturbing the delicate roots. You’ll know it’s time to water again when the top inch of soil feels dry to the touch. Avoid overhead watering after germination—it can spread disease.
✂️ Step 4: Thin and Harden Off Seedlings
When seedlings have 2-3 sets of true leaves, thin the weaker ones by snipping at the base with clean scissors. Keep the strongest seedling per pot—this gives it room to grow without competing. If you’re transplanting soon, you can skip thinning and just move the whole pot.
Start hardening off your seedlings 1-2 weeks before transplanting. Place them outside in a shaded spot for 1 hour the first day, then gradually increase their time outdoors over 7-10 days. This toughens them up so they don’t get shocked by the big move. Watch for wilting—they’re telling you to bring them back inside for another day.
Tips & tricks for perfect peat seed starters
Here's what nobody tells you about making peat pots work like a pro.
Soil Prep Tip: The seed-starting mix should feel like a damp sponge—not dripping, but not bone-dry either. I like to add a pinch of perlite to the mix before filling the pots; it improves drainage while keeping moisture where it belongs. This prevents those dreaded soggy bottoms that can rot your seeds before they even sprout.
Heat Control: That 70-75°F range is non-negotiable for germination, but here's the trick: if your kitchen runs cooler, place the covered pots on top of your refrigerator or near a sunny window. I've even used a heating pad set to low for stubborn seeds. The key is consistency—fluctuations slow down or even stop germination completely.
Light Placement: When you move those seedlings to light in Step 3, position the grow light or window so it's always on the same side. Plants grow toward light, and rotating them can cause them to stretch awkwardly. I mark the pots with a tiny dot to remind me which side goes where—it makes a big difference in straight, sturdy growth.
Harden Off Gradually: Don't rush the 1-2 week hardening process! I start with just 1 hour on day one, then add 30 minutes each subsequent day. Watch for wilting—it's your signal to bring them back inside. This slow acclimation prevents transplant shock, and your seedlings will thank you with vigorous growth after moving outdoors.
Pro Tips for Peat Seed Starter
- Here's what nobody tells you about making peat pots work like a pro.
- Soil Prep Tip: The seed-starting mix should feel like a damp sponge—not dripping, but not bone-dry either.
- Heat Control: That 70-75°F range is non-negotiable for germination, but here's the trick: if your kitchen runs cooler, place the covered pots on top of your refrigerator or near a sunny window.
Frequently asked questions
Got questions about peat seed starters?
You're not alone! Here are some of the most common ones—and their answers—to help you grow confidently with this eco-friendly method.
What exactly is a peat seed starter, and how is it different from other seed-starting methods?
A peat seed starter is a small, biodegradable pot made from compressed peat moss, designed to help seeds germinate quickly and easily. Unlike traditional seed-starting trays or soil blocks, peat starters break down naturally when planted, eliminating transplant shock. They’re also mess-free—no twist ties or fuss!
How long does it really take to sprout seeds using a peat starter?
Most seeds sprout in 5–10 days with peat starters, depending on the plant type and conditions. Fast growers like radishes or lettuce may appear in just 3–5 days, while slower ones (like carrots) take closer to 10–14 days. Keep them moist and warm for best results!
Are peat seed starters truly zero-waste? What happens when I plant them?
Yes! Peat starters are fully biodegradable. Once your seedlings are ready, simply plant the whole starter into the soil—it dissolves over time, providing nutrients and protecting roots. No peeling, no waste! Just dig and grow.
Can I reuse peat seed starters, or are they single-use only?
Peat starters are single-use but designed for convenience. While you can’t reuse them after planting, their eco-friendly breakdown makes up for it. For bulk planting, buy in packs—they’re affordable and reduce plastic waste compared to traditional pots.
My seeds aren’t sprouting—what’s going wrong?
Check these common issues:
- Not enough moisture: Keep the peat damp (not soggy) before and after planting.
- Wrong temperature: Most seeds need 65–75°F to germinate. Use a heat mat if needed.
- Old seeds: Test germination rates—some seeds lose viability after 1–2 years.
- Light exposure: Some seeds (like lettuce) need light to sprout; others (like beans) prefer darkness.
Wrapping up and next steps
Transforming your lawn into a lush, thriving garden starts with the right foundation—and peat seed starters make it effortless! 🌱 With just a few simple materials and a dash of patience, you’ve unlocked a zero-waste, fast-track method to grow healthy seedlings in just 10 days.
No more struggling with twist ties or weak sprouts—just pure, sustainable success!
Ready to take the next step? Grab your supplies, follow the steps, and watch your green thumb shine! Whether you’re a beginner or a seasoned gardener, this method proves that sprouting seeds doesn’t have to be complicated—just effective. Happy planting! 🌿