Propagation
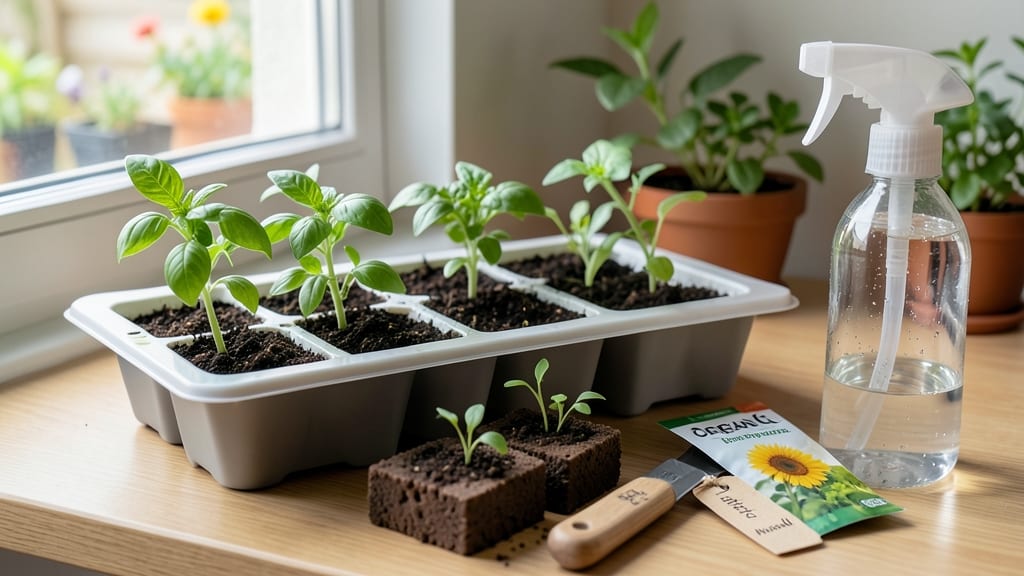
Soil blocks for seed starting changed how I grow seedlings—no more tangled roots or transplant shock. 🌱 These little loam cubes create strong, fibrous root systems that thrive when planted, cutting the stress that kills so many young plants in the nursery stage.
The secret lies in their simplicity: just a mix of compost, coconut coir, and a soil block maker (or even a DIY mold). You press dampened soil into the blocks, let them firm up, and plant seeds right into their surface.
No bottom watering, no fuss—just consistent moisture and gentle warmth. My first batch of tomatoes grew roots so robust they outpaced store-bought seedlings by weeks.
You’ll end up with seedlings that transplant like pros—no circling roots, no wilting shock. The blocks break down naturally in the soil, giving your plants a nutrient boost right when they need it. Plus, they’re lightweight, so handling is a breeze even for small hands or shaky fingers.
Works for everything from delicate herbs to hearty tomatoes, and the method adapts to any space—windowsills, greenhouses, or even under grow lights. The key? Keep them moist but not soggy, and give them bright light from day one. Let’s get those blocks made!
📚 In This Guide
- What you need
- Instructions
- Tips and common mistakes
- Wrapping up and next steps
What you need
- ● Soil block maker: A reusable mold (wooden, plastic, or metal) to shape your blocks. Size tip: 1.5"–2.5" diameter is ideal for most seeds.
- ● Soil mix: A lightweight, well-draining blend like: 50% coco coir or peat moss
- ● 30% perlite or vermiculite
- ● 20% compost or worm castings
- ● Water: Room-temperature, not tap water if heavily chlorinated (let it sit out for 24 hours or use filtered water).
- ● Seeds: Choose fast-growing varieties (e.g., lettuce, herbs, or flowers) for best results with soil blocks.
- ● Tray or flat surface: For drying blocks (elevated to allow airflow).
- ● Spray bottle or watering can: With a gentle nozzle to avoid displacing blocks.
- ● Seedling heat mat: For cooler climates or slow-germinating seeds.
- ● Grow lights: LED or fluorescent to supplement natural light (12–16 hours/day).
- ● Humidity dome: Clear plastic wrap or a mini greenhouse to retain moisture.
- ● Labeling tags: To track varieties (especially useful for mixed trays!).
- ● Compost tea or mycorrhizal fungi: Boosts microbial activity for stronger roots.
Step-by-Step instructions for starting seeds in soil blocks
Here's how I transform soil blocks into the perfect lightweight medium for strong, healthy seedlings.
🌱 Step 1: Prepare Your Soil Blocks
Start with compressed soil blocks (about 1.5 inches diameter) made from a mix of peat moss, compost, and clay. I like to soak them in warm water for 10-15 minutes until they expand to roughly 2.5 inches wide—this ensures they're hydrated and ready to hold seeds. Handle them gently; they're fragile when wet.
Place the soaked blocks on a tray lined with paper towels to catch any excess water. You'll want them damp but not dripping. The blocks should feel cool to the touch, like a damp sponge. If they're too dry, they'll crumble when you handle them; if too wet, they'll feel heavy and slippery.
🌱 Step 2: Plant Seeds at the Right Depth
Use your finger to create a small dimple in the top of each block—just deep enough to hold your seed. I tap the seed packet gently to release one seed at a time, then place it in the dimple. Cover it lightly with a pinch of the same soil mix used to make the blocks, just enough to hide the seed but not bury it too deep.
For tiny seeds like lettuce or carrots, I use a toothpick to make the hole and a fine spray bottle to mist the area afterward. Larger seeds like beans or peas go in a bit deeper—about ½ inch. Press the soil around the seed lightly to ensure good contact with the block.
💧 Step 3: Provide Moisture and Warmth for Germination
Place the planted blocks in a shallow tray and cover them with a clear plastic dome or wrap them in plastic wrap to retain moisture and warmth. I keep them in a warm spot, like on top of the fridge or near a sunny window, where the temperature stays around 70-75°F. This warmth speeds up germination without overheating the seeds.
Check the blocks daily for moisture. You'll know they're ready for a light misting when the surface feels dry to the touch. Avoid overwatering—soaked blocks can suffocate seeds and encourage mold. Once you see the first signs of sprouts, remove the plastic cover immediately to prevent damping-off disease.
☀️ Step 4: Move to Bright Light and Monitor Growth
When seedlings emerge, place the blocks under grow lights or in a south-facing window where they'll get 12-14 hours of light daily. I use a simple LED grow light on a timer to ensure consistent lighting. Keep the blocks in the same tray for now—they'll need to stay hydrated as they grow.
Watch for the first true leaves to appear, which signals that the seedlings are ready for a bit more space. You'll notice the stems thickening and the leaves turning a deeper green. At this stage, you can gently separate the blocks if they're touching, but don't disturb the roots more than necessary.
⏰ Step 5: Harden Off and Transplant
About 2-3 weeks after germination, start hardening off your seedlings by placing them outside in a shaded, sheltered spot for 1-2 hours the first day. Gradually increase their time outside over 7-10 days
When the seedlings are sturdy and the weather is mild, transplant them directly into the soil or larger containers. The soil blocks break down naturally, so there's no need to remove them—they'll enrich the soil as they decompose. Water the seedlings well after transplanting to help them settle in.
Tips & tricks for perfect soil block seed starting
Here's what nobody tells you about working with these lightweight growing mediums—tricks that'll make all the difference between flimsy seedlings and sturdy plants.
Block Selection Tip: For best results, choose blocks that expand to about 2.5 inches when soaked. I've found that blocks made with a higher compost ratio (around 30-40% compost) break down more slowly, giving your seedlings more time to establish roots before transplanting. Avoid blocks that feel too dense—they'll slow down germination.
Seed Placement Technique: When planting tiny seeds like lettuce or carrots in Step 2, I use a toothpick to create the planting hole instead of my finger. This gives me more precision and prevents accidentally crushing the delicate seeds. For larger seeds, press them just ½ inch deep—this ensures they have good soil contact while still allowing room to grow upward.
Germination Environment: The 70-75°F temperature range in Step 3 is crucial—too hot and seeds may rot, too cool and they'll take forever to sprout. I place my seed trays on top of my fridge (which stays around 72°F) for consistent warmth. If your kitchen runs cooler, consider using a seedling heat mat for the first few days to maintain that ideal range.
Light Transition Strategy: When moving seedlings to 12-14 hours of light in Step 4, I gradually increase their exposure over 3-4 days rather than moving them all at once. Start with 6 hours of light on day one, then add 2 hours each day. This prevents sunburn and gives seedlings time to adjust to the brighter conditions.
Pro Tips for Soil Blocks Seed Starting
- Here's what nobody tells you about working with these lightweight growing mediums—tricks that'll make all the difference between flimsy seedlings and sturdy plants.
- Block Selection Tip: For best results, choose blocks that expand to about 2.5 inches when soaked.
- Seed Placement Technique: When planting tiny seeds like lettuce or carrots in Step 2, I use a toothpick to create the planting hole instead of my finger.
Frequently asked questions
Got questions about soil blocks for seed starting?
You’re not alone! Here are answers to the most common queries to help you get started with confidence.
What are soil blocks made of, and can I make them at home?
Soil blocks are typically made from a mix of coco coir, compost, and clay (or perlite for lighter blocks). Yes, you can DIY them! Use a soil block maker (or a sturdy container) with a 1:1:1 ratio of coco coir, compost, and clay. Mix with water until it holds shape but isn’t sticky. Pro tip: Avoid peat moss—it’s less sustainable.
How long does it take for seeds to germinate in soil blocks?
Germination time varies by plant, but soil blocks usually speed it up due to better aeration and moisture retention. Most seeds sprout in 5–14 days, just like in traditional pots. Check your seed packet for specifics—cool-season crops (like lettuce) may take longer than warm-season (like tomatoes).
Can I reuse soil blocks after transplanting?
No, soil blocks aren’t reusable—they break down when transplanted. However, you can compost the blocks after use! The decomposed material enriches your garden soil. For cost savings, replenish your mix with fresh coco coir or compost for new blocks.
What’s the best alternative if I don’t have a soil block maker?
No block maker? No problem! Use ice cube trays, egg cartons, or small plastic containers to shape blocks manually. Press the mix firmly into molds, then let them dry slightly before removing. For larger blocks, a sturdy cup or even your hands work in a pinch!
Why are my soil blocks cracking or falling apart?
Cracking or crumbling often means too much clay or not enough moisture during mixing. Fix it by adjusting your ratio: reduce clay by 10% or add a splash of water. Over-drying before use can also cause issues—keep blocks slightly damp until planting.
Still stumped? Drop your question in the comments—we’re happy to help!
Wrapping up and next steps
Soil blocks for seed starting are a game-changer for gardeners looking to boost root growth while keeping things simple and eco-friendly! 🌱 By using lightweight, biodegradable loam, you’re giving your seedlings a strong foundation—literally.
Whether you’re a beginner or a seasoned pro, these blocks reduce waste, improve aeration, and make transplanting a breeze.
Ready to take the next step? Start small—try a batch of soil blocks with your next round of seeds and watch your plants thrive. Happy growing, and may your garden flourish! 🌿