Lawn
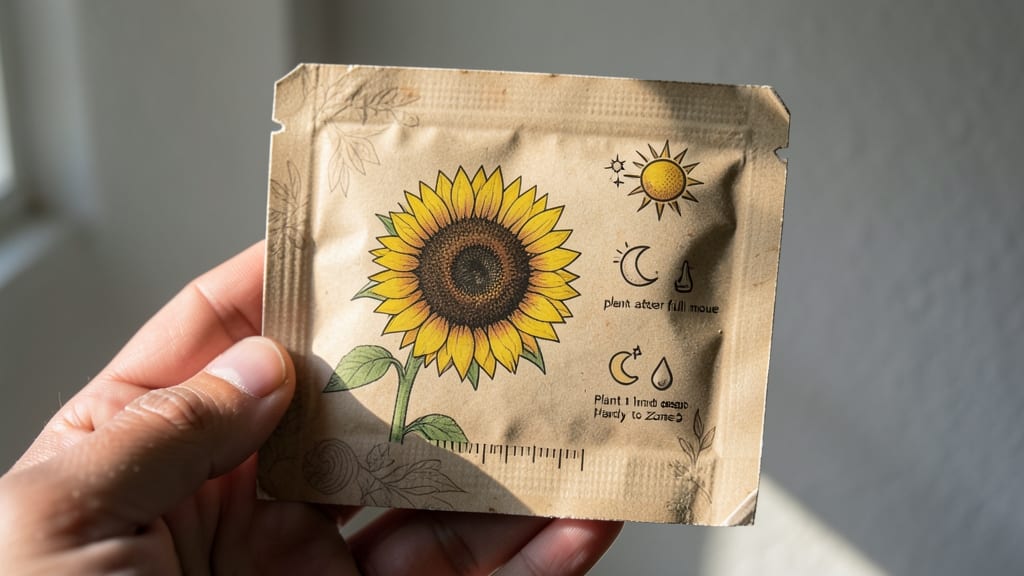
The back of every seed packet holds the secret to growing your plants right—no guesswork needed. 🌱 I’ve planted hundreds of seeds over the years, and those tiny details (like "plant 1/4 inch deep" or "needs 6+ hours of sun") saved me from wasted effort and wilted seedlings.
Ignore them, and you’re basically rolling the dice with your garden’s success.
Here’s what you’ll always find: planting depth (how deep to bury seeds), spacing (how far apart to place them), sunlight needs (full sun, partial shade, etc.), and soil type (loamy, sandy, or well-draining). Some packets even include days to germination or maturity dates—critical info for planning harvests.
For example, my basil packet warned me it needed "rich, well-draining soil," so I mixed compost into the bed before planting, and the difference was night-and-day.
Follow these guidelines, and you’ll see stronger, healthier plants with fewer pests and diseases. Miss them, and you might end up with leggy seedlings or stunted growth—like when I planted my peppers too deep and they struggled to emerge.
The good news? Most packets include troubleshooting tips (like "keep soil moist but not soggy") to help you avoid common pitfalls.
Pro tip: If a packet is missing key details (happens more often than you’d think), check the seed company’s website or look for similar varieties online. And always read the fine print—some seeds need stratification (a cold period) or scarification (scratching the seed coat) to germinate.
Your packet’s instructions are your gardening roadmap—don’t skip them!
📚 In This Guide
- What you need
- Instructions
- Tips and common mistakes
- Wrapping up and next steps
What you need
- ● Seed packet – Your starting point! Choose a variety suited for your climate and lawn goals.
- ● Garden soil or potting mix – 2–3 cubic feet (or enough to fill your planting area to a depth of 6–12 inches). Opt for a mix with good drainage.
- ● Watering can or hose with a gentle spray nozzle – Keep seeds consistently moist without oversaturating.
- ● Gloves – A pair of gardening gloves to protect your hands from dirt and sharp tools.
- ● Trowel or small shovel – For digging planting holes or creating furrows (if sowing in rows).
- ● Ruler or measuring tape – To follow spacing instructions on the seed packet.
- ● Sunlight access – A spot that matches the sunlight requirements listed on the packet (e.g., full sun, partial shade).
- ● Seedling trays or biodegradable pots – For starting seeds indoors before transplanting.
- ● Mulch or compost – To retain moisture and improve soil quality as plants grow.
- ● Plant labels – If growing multiple varieties, labels keep things organized.
- ● Fertilizer (balanced or organic) – Check the packet for recommendations, but avoid over-fertilizing young seeds.
- ● Row cover or shade cloth – Protects seedlings from harsh weather or pests if needed.
- ● Knee pad or small stool – Makes planting and tending to seeds more comfortable.
Step-by-Step growing guide for any seed packet
Every seed packet hides a growing blueprint—here's how to decode and follow it.
🌱 Step 1: Decode the Seed Packet Requirements
Start by reading the light, temperature, and spacing recommendations on the back of the packet. These are your non-negotiable growing parameters. For example, tomatoes need 6-8 hours of full sun daily, while parsley thrives in partial shade. Note the days to maturity—this tells you when to expect harvests or when to start seeds indoors for outdoor planting.
Check the soil type preference (sandy, loamy, or clay). Most seed packets recommend well-draining, fertile soil with a pH between 6.0 and 7.0. If your garden soil is heavy clay, amend it with 2-3 inches of compost before planting. The packet may also specify whether the plant is annual or perennial, which affects how you'll care for it long-term.
💧 Step 2: Prepare the Planting Site or Containers
For outdoor planting, loosen the soil to a depth of 12 inches to encourage root growth. Remove weeds or debris, then mix in 1-2 inches of compost or aged manure to enrich the soil. If the packet recommends direct sowing, plant seeds at the depth and spacing listed—usually ¼ to ½ inch deep, depending on the seed size.
For container growing, use a pot at least 6 inches deep (deeper for root crops like carrots). Fill with a sterile potting mix (not garden soil) and moisten it until damp but not soggy. Plant seeds at the same depth as recommended on the packet, then cover lightly with additional mix. Tap the container gently to settle the soil without compacting it too much.
☀️ Step 3: Water and Maintain Ideal Conditions
Water seeds immediately after planting, keeping the soil evenly moist but not waterlogged. Use a fine mist spray bottle for tiny seeds to avoid washing them away. Most seed packets recommend watering once daily until germination occurs, then adjusting based on weather. After seeds sprout, water at the base of the plant to prevent fungal diseases like damping-off.
Monitor the temperature and light conditions closely. If the packet specifies a minimum soil temperature (like 60°F for peas), use a soil thermometer to confirm. For indoor seedlings, place them under a grow light if natural light is insufficient—most young plants need 14-16 hours of light daily to prevent leggy growth.
✂️ Step 4: Thin and Support as Needed
The packet will often include thinning instructions—this means removing weaker seedlings to give stronger ones room to grow. For example, carrots should be thinned to stand 2-3 inches apart. Use scissors to snip seedlings at soil level rather than pulling to avoid disturbing roots. If the packet mentions staking or trellising, set up supports early—tomatoes and pole beans need 6-foot stakes or cages to prevent sprawling.
Watch for pests or diseases listed on the packet, like aphids on roses or powdery mildew on squash. Address issues promptly—many seed packets suggest organic remedies like neem oil or companion planting. Fertilize according to the packet’s recommendations, usually starting 4-6 weeks after germination with a balanced, slow-release fertilizer.
⏰ Step 5: Harvest at the Right Time
The packet’s days to maturity is your harvest timeline. For example, if it says 50 days to harvest, count backward from your last frost date to determine when to plant. Harvest leafy greens like lettuce when leaves reach 4-6 inches tall, and root vegetables when they reach the size listed (e.g., 2 inches in diameter for radishes).
Use the packet’s harvest tips to extend production. For instance, cutting basil stems just above a leaf node encourages bushier growth, while picking zucchini early prevents them from becoming woody. Store harvested produce as suggested—some vegetables (like tomatoes) ripen better at room temperature, while others (like herbs) last longer in the fridge.
Tips & tricks for perfect seed packet success
These practical insights will help you decode seed packets like a pro and avoid common gardening pitfalls.
Light Conditions Matter: Pay close attention to the sun requirements on the packet—those 6-8 hours of full sun for tomatoes means placing them in the brightest spot you have, not just "some sun." I've seen beginners put tomato plants in partial shade and wonder why they produce small, tasteless fruits. Use a light meter app to verify if your spot meets the requirements, especially in urban areas where buildings can block sunlight. Morning sun is gentler than afternoon heat, so position plants accordingly.
Soil Prep is Non-Negotiable: The 12-inch deep soil loosening in Step 2 isn't just about aesthetics—it creates room for roots to spread and access nutrients. If you're working with heavy clay soil, don't just scratch the surface. Dig down and thoroughly mix in that 2-3 inches of compost until you can form a loose ball that crumbles easily. I learned this the hard way when my carrots grew crooked because the soil was too compacted. A simple soil test kit ($10) will tell you if your pH needs adjustment before planting.
Germination Timing is Critical: That once daily watering recommendation until germination isn't just a suggestion—it's the difference between success and failure. Use a spray bottle for tiny seeds to avoid displacing them, and keep the soil consistently moist like a wrung-out sponge. I've seen seeds rot from overwatering or dry out from inconsistent watering. Place a humidity dome or plastic wrap over containers until sprouts appear, then remove it to prevent fungal issues. Most seeds germinate within 7-14 days, but check your packet for specific expectations.
Support Systems Save the Day: When the packet mentions 6-foot stakes or cages for tomatoes, don't skip this step! I've watched tomato plants sprawl across garden beds, making harvesting difficult and increasing disease risk. Install supports at planting time so roots don't get disturbed later. For vining plants like cucumbers, use trellises to save space and improve air circulation. Even leafy greens benefit from small stakes if they get top-heavy—just a few inches of support prevents them from flopping over.
Pro Tips for Back Of A Seed Packet
- These practical insights will help you decode seed packets like a pro and avoid common gardening pitfalls.
- Light Conditions Matter: Pay close attention to the sun requirements on the packet—those 6-8 hours of full sun for tomatoes means placing them in the brightest spot you have, not just "some sun."
- Soil Prep is Non-Negotiable: The 12-inch deep soil loosening in Step 2 isn't just about aesthetics—it creates room for roots to spread and access nutrients.
Frequently asked questions
Got questions about decoding the back of a seed packet?
You’re not alone! Here are the most common ones—and their easy answers to get your lawn or garden growing like a pro.
What does “days to maturity” mean on a seed packet?
This tells you how long it takes from planting to harvest (or full growth). For lawn seeds, it’s usually days to germination (when sprouts appear) or days to establishment (when grass is ready to mow). Check this to plan your planting schedule—especially if you’re sowing in stages!
Can I plant seeds too early or too late based on the packet?
Yes! Seed packets list optimal planting times (e.g., “plant after last frost” or “sow in spring/fall”). Ignoring these can lead to slow growth, poor germination, or even seed rot. Pro tip: Use a local frost date guide to adjust timing if needed.
What if my seeds don’t germinate even after following the packet?
Try these fixes:
- Check soil moisture: Keep it consistently damp (not soggy) until sprouts appear.
- Test seed viability: Soak a few seeds in water—if they sink, they’re likely good. If not, order fresh seeds!
- Adjust depth: Some seeds (like tiny lettuce) need light to germinate—plant them shallow or on top of soil.
Can I save seeds from my homegrown plants for next year?
Maybe! Some seeds (like heirloom tomatoes or marigolds) are easy to save, but others (like hybrids or F1 varieties) may not grow true to type. The packet often notes “save seeds” or “hybrid”. If unsure, ask a local nursery or seed-saving group for tips!
Do I need to use the exact soil mix or conditions listed?
Not always! Seed packets provide ideal conditions, but many seeds adapt. For example, lawn grass can tolerate slightly acidic soil, even if the packet says “neutral pH.” Start with the basics, then tweak based on your yard’s natural conditions. Soil tests are your best friend here!
Still curious? Drop your question in the comments—we’ve got answers!
Wrapping up and next steps
The back of a seed packet isn’t just fine print—it’s your gardening roadmap! From soil prep to sunlight needs, those details unlock the secrets to thriving plants. Whether you’re a beginner or a seasoned green thumb, trust the guidance to grow confidently.
Ready to plant your success? Grab those seeds, follow the steps, and watch your garden flourish! 🌱 Next up: Mark your calendar for planting dates and start sowing your dreams today.