Planting
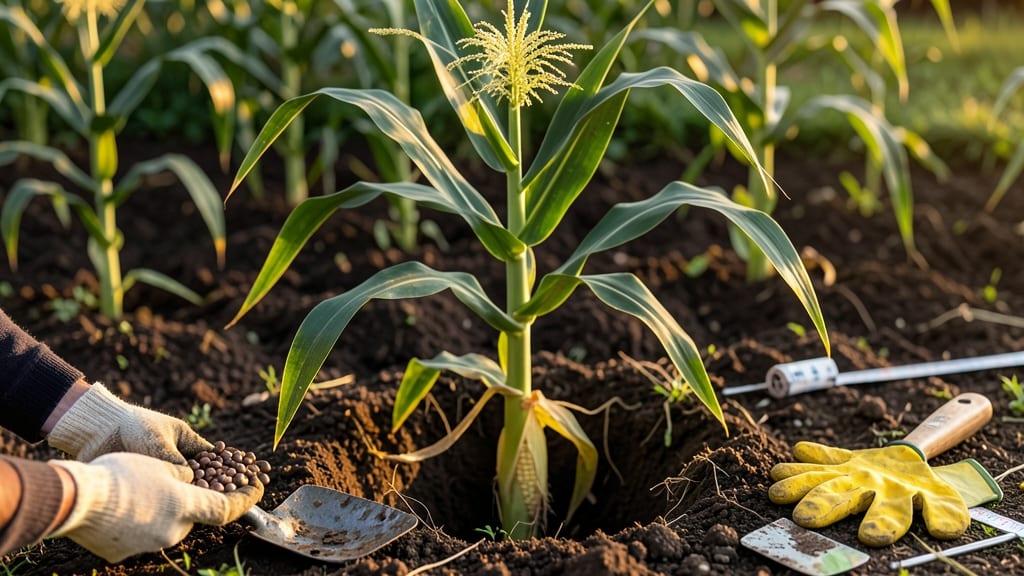
Proper corn seed spacing turns a good harvest into a record-breaking one. 🌽 I learned the hard way—crowded corn plants compete for sunlight, water, and nutrients, leaving you with stunted ears instead of bushels.
The science is simple: give each plant enough room to grow strong stalks and fully developed kernels. Most corn varieties need 12-18 inches between plants and 24-36 inches between rows. Dwarf varieties like 'Silver Queen' thrive at the closer end, while tall varieties like 'Country Gentleman' need extra space.
Loose soil and proper depth (1-2 inches) help roots establish quickly, setting the stage for bigger yields. You’ll see the difference in just a few weeks—plants stand tall instead of leaning, and ears fill out without crowding. Proper spacing also reduces disease risk by improving airflow.
The payoff? 20-30% more ears per plant compared to tight spacing. Works for home gardens, small farms, and even container growing with dwarf varieties. Here’s how to get it right the first time!
📚 In This Guide
- What you need
- Instructions
- Tips and common mistakes
- Wrapping up and next steps
What you need
- ● Corn seeds: High-quality, non-GMO seeds (quantity depends on field size; ~15,000–20,000 seeds per acre for optimal spacing).
- ● Seed planter or drill: A mechanical or manual planter (e.g., Great Plains or John Deere models) for precise row spacing (30–38 inches apart, depending on variety).
- ● Measuring tape or spacing wheel: 50+ feet long for marking rows accurately.
- ○ GPS or laser-guided equipment (optional but helpful): For large-scale planting to ensure uniformity.
- ● Fertilizer: Balanced NPK (e.g., 10-10-10) or starter fertilizer (e.g., Monoammonium Phosphate) for seed placement.
- ● Soil tester kit: To check pH (ideal: 6.0–6.5) and nutrient levels before planting.
- ● Water source: Hose, sprinkler, or irrigation system for post-planting hydration.
- ● Seed treatment: Fungicides or insecticides (e.g., Apron XL) to protect young seedlings.
- ● Row markers or flags: Brightly colored stakes to visualize spacing in large fields.
- ● Planting depth gauge: Ensures seeds are planted 1.5–2.5 inches deep (adjust for soil type).
- ● Weather forecast app: To avoid planting during rain or extreme heat.
Step-by-step instructions for planting corn with optimal spacing
Here's how to space corn seeds for the healthiest plants and biggest harvests—no guesswork involved.
🌱 Step 1: Choose Your Planting Configuration
Corn thrives in a hill system where seeds are planted in small mounds rather than straight rows. This improves drainage and helps support the heavy stalks. For a 4-row planting, arrange them in a square pattern—each row should be 30 inches apart, and within each row, hills should be spaced 12 inches apart. This creates a balanced structure that maximizes sunlight exposure and air circulation.
I like to sketch the layout first on paper. A 4-foot by 4-foot square gives you exactly 16 planting points (4 rows × 4 hills per row), which works perfectly for a small home garden. Mark the corners with stakes so you don’t misalign the hills when planting.
🌱 Step 2: Plant Seeds at the Right Depth and Spacing
Plant 2-3 seeds per hill at a depth of 1-1.5 inches—deeper than most gardeners realize. Corn seeds need warmth to germinate, and planting too shallow can dry them out. Use your finger to make a small hole in the center of each hill, then drop the seeds in and cover lightly with soil. Press gently to ensure good soil contact.
Here’s the thing—don’t overcrowd. If you plant more than 3 seeds per hill, you’ll end up with weak, competing stalks. I’ve seen gardeners plant 5-6 seeds per hill, thinking they’ll get more corn, but the result is always stunted growth. After germination, thin to 1 strong seedling per hill once they’re 4-6 inches tall. Use scissors to snip the extras at soil level to avoid disturbing the roots of the remaining plants.
☀️ Step 3: Space Rows for Pollination Success
Corn is wind-pollinated, so proper row spacing is critical for fertilization. If rows are too far apart, pollen won’t transfer effectively, and you’ll get barren ears. For 4 rows, keep them 30 inches apart—this is the sweet spot for most home gardens. If you’re planting more than 4 rows, space them 36 inches apart to ensure cross-pollination between rows.
Watch for silking—those fuzzy white strands that emerge from the top of the plant. If silks aren’t pollinated within 24 hours, they’ll dry up, and you’ll lose that ear. Proper spacing ensures wind carries pollen efficiently, so you’ll see vibrant, healthy silks and eventually plump, well-filled ears.
💧 Step 4: Maintain Consistent Moisture and Monitor Growth
Corn needs 1-1.5 inches of water per week, especially during tasseling (when the pollen-producing flowers appear). Keep the soil evenly moist but not soggy—drought stress at this stage can reduce yield. Water deeply at the base of the plants in the morning to allow foliage to dry quickly, which prevents fungal diseases like leaf blight.
As the plants grow, watch for competition. If stalks in the same hill start shading each other, thin again to leave the strongest, straightest plant. You’ll know it’s the winner by its thick stem and vigorous leaves. Remove the others carefully to avoid damaging the remaining plant’s roots.
⏰ Step 5: Time Harvest for Peak Flavor
Corn is ready to harvest when the silks turn brown and the kernels are milky white when pierced with a fingernail. This usually happens 18-22 days after silking, but check daily—corn goes from perfect to starchy in 24 hours. Use a sharp knife to cut the stalk 6-8 inches below the ear to preserve the plant’s energy for any remaining ears.
Here’s a pro tip: Harvest in the morning when sugars are at their peak. If you can’t eat them all fresh, blanch and freeze the ears whole—they’ll taste almost as good months later. And if you have extra space, save some seeds from your best ears for next year’s planting!
Tips & tricks for perfect corn planting layouts
These simple tricks will help you maximize your corn harvest with minimal effort.
Visual Planning Pays Off: Before digging, sketch your 4-foot by 4-foot square on paper with the 16 planting points clearly marked. I use a ruler to draw the 30-inch row spacing and 12-inch hill spacing—this ensures perfect alignment when you transfer to your garden. The visual helps you spot potential issues like uneven corners before you start planting.
Soil Warmth is Non-Negotiable: Corn seeds need soil temperatures above 60°F to germinate properly. Plant when your soil thermometer reads consistently 65°F or warmer—this usually happens after your last frost date. If your soil is cool, consider using black plastic mulch a week before planting to warm the soil faster. The 1-1.5 inch depth recommendation assumes warm soil; cooler soils may need slightly deeper planting.
Thinning Technique Matters: When thinning to one strong seedling per hill at the 4-6 inch stage, use clean scissors to snip at soil level rather than pulling. This prevents disturbing the roots of your remaining plant. I've found that the strongest seedling often emerges from the center of the hill—this gets the most warmth from the soil mound and sunlight exposure. If all three seedlings look equally strong, leave the one with the thickest stem and most vigorous leaves.
Pollination Watch: The 24-hour window for silks to be pollinated is tighter than most gardeners realize. Start checking for silks in the morning and watch closely—if they're still white and turgid by evening, they haven't been pollinated yet. Planting your 4 rows in a square pattern creates better wind flow between rows, which helps carry pollen more efficiently than straight rows would. This spacing difference can mean the difference between plump ears and barren stalks.
Pro Tips for Corn Seed Spacing
- These simple tricks will help you maximize your corn harvest with minimal effort.
- Visual Planning Pays Off: Before digging, sketch your 4-foot by 4-foot square on paper with the 16 planting points clearly marked.
- Soil Warmth is Non-Negotiable: Corn seeds need soil temperatures above 60°F to germinate properly.
Frequently asked questions
Got questions about optimizing your corn seed spacing? You’re not alone! Here are some of the most common queries farmers and gardeners ask—plus science-backed answers to help you grow like a pro.
What’s the ideal corn seed spacing for maximum yield?
For most corn varieties, plant seeds 12–18 inches apart in rows spaced 24–36 inches apart. Tighter spacing (e.g., 10–12 inches) can boost yields in short-season areas, while wider spacing (up to 40 inches) improves airflow and reduces disease risk in humid climates. Adjust based on your variety’s mature plant width and local growing conditions.
When is the best time to plant corn seeds with proper spacing?
Corn thrives in warm soil—aim to plant when soil temperatures reach 50–60°F (10–15°C) and stay above 60°F (15°C) consistently. In most regions, this means after the last frost (typically late April–early June in the U.S.). For northern climates, use early-maturing varieties to avoid frost damage. Pro tip: Wait until nighttime temps stay above 55°F (13°C) to prevent seed rot.
Can I plant corn seeds too close together? What are the risks?
Yes! Overcrowding leads to stunted growth, poor ear development, and increased disease risk (like fungal infections). Plants compete for sunlight, water, and nutrients, resulting in smaller ears or even no ears at all. If you’ve already planted too close, thin seedlings to the recommended spacing once they’re 3–4 inches tall to give them room to thrive.
What if I don’t have a planter? Are there alternative spacing methods?
No planter? No problem! Use a stick or dowel rod marked with spacing measurements to drop seeds by hand. For small gardens, try hill planting: place 3–4 seeds in a mound every 3 feet, then thin to the strongest plant. Another option: broadcast seeding (scattering seeds evenly), but this works best for cover crops or silage corn—not sweet corn.
My corn plants look uneven—what went wrong with my spacing?
Uneven growth often signals inconsistent spacing, poor soil prep, or uneven watering. Check for:
- Gaps in rows: Skipped seeds or uneven planting depth.
- Clumped plants: Overlapping drill paths or uneven seed distribution.
- Stunted sections: Compacted soil or uneven moisture.
Solution: Re-space seedlings manually if possible, or adjust irrigation to ensure uniform water delivery. For next time, calibrate your planter or use a grid system for hand-planting.
Wrapping up and next steps
Perfecting corn seed spacing is your secret weapon for a bountiful harvest—science shows that precision pays off! 🌽 Whether you’re adjusting rows for soil health, weather, or variety, the right spacing ensures stronger plants, fewer weeds, and higher yields.
Now that you’ve got the how-to, it’s time to roll up your sleeves and put theory into practice.
🚀 Your Next Step: Test & Refine!
Start small—plot a test row with your ideal spacing and compare results. Keep notes on growth, pests, and yield, then tweak as needed. Every farmer knows: the best lessons come from the field! 🌱