Lawn
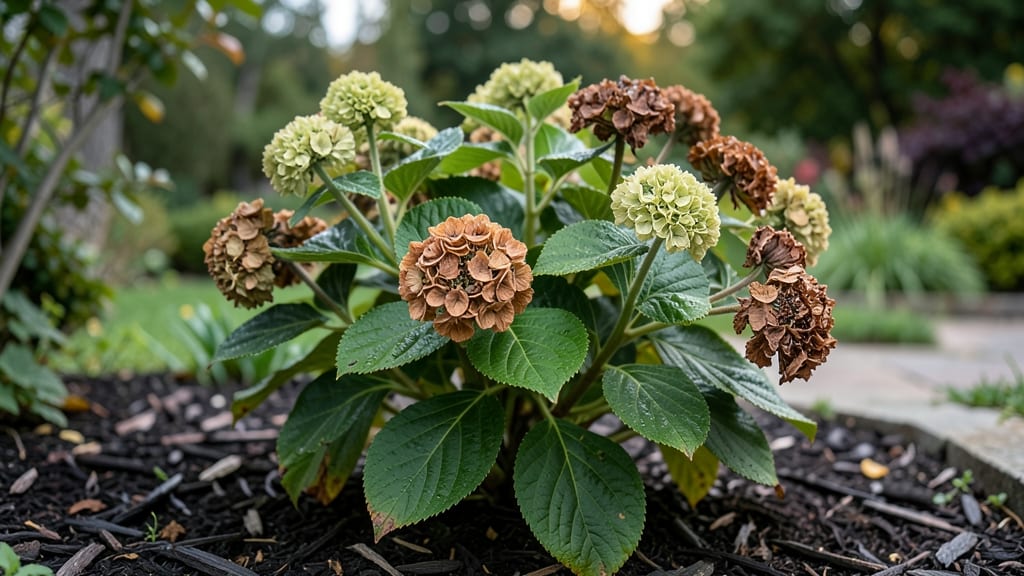
Twisting open hydrangea seed pods reveals tiny treasures that could grow into your next garden showstopper. 🌿 I’ve collected hundreds of these pods over the years, and the ones that open just right hold seeds with the potential to start a new plant—though they won’t always match their parent’s blooms.
The key is timing: wait until the pods turn brown and papery in late summer or early fall, then gently twist them open to find the flat, papery seeds inside.
You’ll need just a few supplies: a sharp pair of scissors, a small container for seeds, and some patience. The seeds are lightweight, so handle them carefully—don’t let them float away!
Once collected, store them in a cool, dry place until spring planting. Germination can be slow, but with the right conditions, you’ll see tiny sprouts within a few weeks.
What you end up with might surprise you—seed-grown hydrangeas often take 2-3 years to bloom, but when they do, they can produce unique colors and forms. The first flush of leaves is delicate and heart-shaped, a sign that your patience is paying off.
These young plants thrive in partial shade, just like their parent shrubs.
If you’re growing hydrangeas from seed, expect a slower process than cuttings or nursery plants. But the reward? A one-of-a-kind shrub that no one else in the neighborhood has. Plus, you’ll save money and gain the satisfaction of nurturing a plant from the very beginning.
📚 In This Guide
- What you need
- Instructions
- Tips and common mistakes
- Wrapping up and next steps
What you need
- ● Mature hydrangea seed pods: Collect fully brown, dry pods (usually late summer to fall). Aim for at least 5–10 pods for a good yield.
- ● Pruning shears or sharp scissors: For cleanly snipping pods from stems. Sterilize with rubbing alcohol to prevent disease spread.
- ● Paper bags or breathable mesh bags: 2–3 medium-sized bags (12x18 inches) to store pods while drying.
- ● Brown paper or newspaper: Line a tray or flat surface for drying pods.
- ● Small paintbrush or cotton swabs: For gently dislodging seeds from pods.
- ● Envelope or seed packet: Acid-free for long-term seed storage (e.g., manila or kraft paper).
- ● Permanent marker: To label seeds with the date and hydrangea variety.
- ● Desiccant packets: Place 1–2 in your seed storage envelope to absorb moisture.
- ● Magnifying glass: For inspecting seed viability (look for plump, intact seeds!).
- ● Seed stratification kit: If cold-moist stratification is needed (some hydrangeas benefit from this).
- ● Digital scale: Weigh seeds to track moisture loss during drying (ideal weight: ~5–10% loss).
- ● Notebook: To log pod collection dates, drying conditions, and germination notes.
How to extract and prepare hydrangea seeds from mature pods
Here's the gentle, foolproof way to open hydrangea seed pods and collect viable seeds without damaging them.
🌿 Step 1: Identify and Harvest Ripe Seed Pods
Wait until hydrangea seed pods turn a deep tan or light brown—this signals they're fully mature and ready for seed collection. I check pods in late fall after the first frost, when they've naturally dried on the plant. Gently twist the pod between your fingers until it releases seeds easily; if it resists, it's not ready yet.
Use clean, sharp pruning shears to snip open any stubborn pods. Place the pods in a paper bag and let them dry indoors for a few days. This extra drying step prevents mold and makes the pods easier to handle. You'll know they're fully dry when they feel light and papery to the touch.
✂️ Step 2: Open the Pods and Collect Seeds
Lay each dried pod on a clean, flat surface like a baking sheet. Use a butter knife or your thumbnail to carefully slice open the pod lengthwise—don't crush it. The seeds inside will look like tiny, flat, papery discs with a single winged edge. I like to work over a piece of white paper so I can easily spot any seeds that might fall.
Gently shake or tap the open pods to release the seeds. Most will drop cleanly, but a few stubborn ones may need a light nudge with the knife. Avoid breathing directly on the seeds or using compressed air, as this can damage their delicate wings. Collect all seeds in a small envelope or paper bag for storage.
💧 Step 3: Stratify Seeds for Better Germination
Hydrangea seeds need a cold period to break dormancy. Place the collected seeds in a sealed plastic bag with a damp paper towel—just enough moisture so the towel feels like a wrung-out sponge. Store the bag in your refrigerator's crisper drawer for 6-8 weeks. Check weekly to ensure the towel stays damp but not soggy.
This cold treatment mimics winter conditions and significantly improves germination rates. After stratification, remove the seeds and let them dry slightly before planting. You'll see the difference in germination speed compared to seeds planted without this step—stratified seeds often sprout within 2-4 weeks of planting.
🌱 Step 4: Plant Stratified Seeds Indoors
Fill small seed-starting pots with moistened seed-starting mix, leaving about 1/4 inch of space at the top. Plant each seed 1/8 inch deep, pressing gently but not firmly. I use a toothpick to make a tiny hole for each seed—this prevents over-deep planting, which can delay germination.
Cover the pots with plastic wrap or a humidity dome to retain moisture and place them in a warm spot (around 65-70°F). Keep the soil consistently moist but never waterlogged. Germination can be slow, so be patient—some seeds may take up to 8 weeks to sprout. Once seedlings emerge, remove the cover and provide bright, indirect light.
☀️ Step 5: Transplant Seedlings Outdoors
Wait until all danger of frost has passed and soil temperatures reach at least 60°F before moving seedlings outdoors. Harden them off by placing them outside in a sheltered spot for 1-2 hours the first day, gradually increasing their time outside over 10-14 days. This slow transition prevents shock and helps seedlings adjust to outdoor conditions.
Choose a planting site with partial shade and well-draining soil. Space seedlings 3-4 feet apart to allow room for growth. Water thoroughly after transplanting and keep the soil evenly moist during the first growing season. You'll see new growth within a few weeks, signaling that your seedlings have successfully established themselves.
Tips & tricks for handling hydrangea seed pods
Working with hydrangea seed pods doesn't have to be tricky—these simple strategies will help you collect viable seeds with ease.
Pod Maturity Check: The color test is your best friend here. Look for pods that have turned deep tan or light brown—this is your signal they're mature. I've found that pods harvested after the first frost release seeds more easily. If a pod resists when you twist it, it's not ready yet. Patience here prevents wasted effort and ensures you're working with seeds that'll germinate properly.
Storage Wisdom: After harvesting, let those pods dry indoors for a few days in a paper bag. This step is crucial because it prevents mold and makes the pods easier to handle. I like to place them on a mesh screen or rack to allow airflow—this helps them dry evenly. Once they feel light and papery, they're ready for the next step. Store them in a cool, dry place until you're ready to open them.
Seed Collection Technique: When opening the pods, lay them on a clean surface and use a butter knife or thumbnail to make a lengthwise cut—never crush them. The seeds inside will look like tiny, flat discs with winged edges. I've learned to work over a piece of white paper to spot any seeds that might fall. For stubborn seeds, a light tap with the knife works wonders without damaging the delicate wings. This careful approach ensures you don't lose any viable seeds during the process.
Stratification Success: The 6-8 week cold treatment is non-negotiable for breaking dormancy. I've found that using a damp paper towel (wrung out like a sponge) creates the perfect moisture level. Place the sealed bag in your refrigerator's crisper drawer and check weekly to ensure the towel stays damp. After this period, let the seeds dry slightly before planting—this step makes all the difference in germination speed, often resulting in sprouts within 2-4 weeks.
Pro Tips for Hydrangea Seed Pods
- Working with hydrangea seed pods doesn't have to be tricky—these simple strategies will help you collect viable seeds with ease.
- Pod Maturity Check: The color test is your best friend here.
- Storage Wisdom: After harvesting, let those pods dry indoors for a few days in a paper bag.
Frequently asked questions
Got questions about hydrangea seed pods? You’re not alone! Here are some of the most common concerns—and their simple solutions—to help you navigate this process like a pro.
When do hydrangea seed pods form, and how long do they take to mature?
Hydrangea seed pods typically appear in late summer or early fall after flowering. They usually take 4–6 weeks to fully mature, turning from green to brown and splitting open when ready. Keep an eye out for dry, papery pods—this is your cue to harvest!
How do I know if a seed pod is ready for seed extraction?
Ready seed pods will be dry, brown, and cracked open on their own. Gently squeeze the pod—if seeds rattle inside or fall out easily, it’s time to collect them. Avoid harvesting green or moist pods, as seeds won’t be viable.
Can I grow hydrangeas from seed pods, or should I buy plants?
While it’s possible to grow hydrangeas from seed pods, it’s a slow process (2–3 years to bloom) and results may vary. For faster, more predictable growth, consider buying nursery-grown plants. Seed-grown hydrangeas are great for experimentation or heirloom varieties!
What should I do if my seed pods are being eaten by pests?
Pests like slugs, snails, or birds may target seed pods. Use organic deterrents like diatomaceous earth, neem oil, or physical barriers (e.g., row covers). Remove damaged pods promptly to prevent further issues and encourage healthy ones to develop.
Do hydrangea seed pods need special storage conditions?
Store harvested seeds in a cool, dry place (like an envelope or paper bag) until planting. They can remain viable for 1–2 years if kept dry. Avoid plastic containers—moisture can cause mold and reduce germination rates.
Wrapping up and next steps
Hydrangea seed pods may seem tricky, but with the right know-how, you can easily release viable seeds and even propagate new plants! 🌱 Whether you’re a seasoned gardener or a curious beginner, this stress-free twist-and-release method opens the door to growing your own hydrangeas—saving money and adding a personal touch to your garden.
Ready to dive in? Start by gathering your pods, following the simple steps, and watch your green thumb grow!
💡 Pro tip: Share your success with fellow plant lovers or experiment with different hydrangea varieties to expand your garden’s beauty!