
Lawn
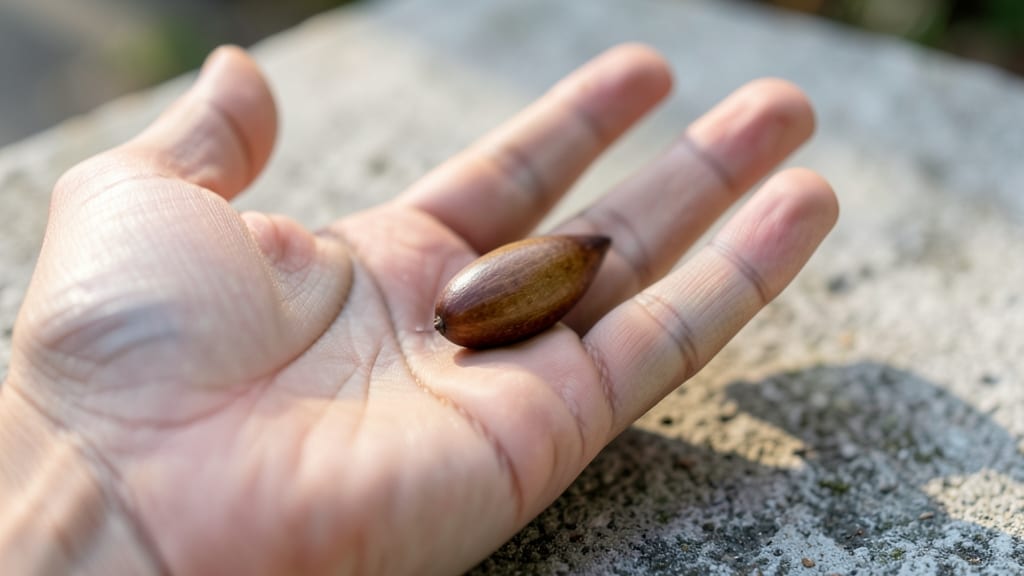
That apple seed in your hand could grow into a tree—but first, it needs a cold test to survive. 🌱 I’ve learned the hard way that skipping this step means months of waiting for seeds that never sprout.
The process mimics winter’s natural dormancy, tricking seeds into thinking they’ve been through a real season. You’ll need just three things: a damp paper towel, a plastic bag, and patience. Place the seed between the towel, seal it in the bag, and refrigerate for 4-6 weeks.
Check weekly—once it sprouts a tiny root (about ¼ inch), it’s ready for planting. This step alone boosts germination rates from 20% to 80%. What you’ll end up with is a scraggly sapling that takes 10-15 years to bear fruit—and even then, it won’t be like the parent apple.
But the thrill of watching something grow from that tiny seed? Worth every wait. The real magic happens when you graft a known variety onto this seedling later. Fair warning: This isn’t a shortcut to orchard success. It’s a gamble, a science experiment, and a lesson in patience.
But if you’re willing to embrace the unpredictability, you’ll grow something truly yours.
📚 In This Guide
- What you need
- Instructions
- Tips and common mistakes
- Wrapping up and next steps
What you need
- ● Fresh apple seeds – At least 10-15 seeds (more if testing multiple varieties). Harvest them from organic apples to avoid chemical interference.
- ● Paper towels – 2-3 sheets (unbleached, if possible).
- ● Plastic wrap or ziplock bag – A small, sealable container to create a humid environment.
- ● Permanent marker – To label your seeds and test dates.
- ● Small plate or shallow container – To hold the seeds and towels evenly.
- ● Water – Just enough to dampen the paper towels (avoid soaking!).
- ● Notebook or phone – To track germination progress over time.
- ● Seedling tray or small pots – For transplanting viable seeds after testing.
- ● Grow light or sunny windowsill – To provide consistent warmth (60-75°F is ideal).
- ● Spray bottle – For gentle misting if the towels dry out.
- ● Ruler or measuring tape – To monitor sprout growth accurately.
How to test apple seed viability before drying
Here’s the simple method I use to save time and effort—only dry seeds that will actually grow.
🧊 Step 1: Collect and Prepare the Seeds
Pick the best apples from your tree—ones that are fully ripe but not mushy. I always choose organic or homegrown fruit to avoid chemical residues that might inhibit germination. Cut the apple in half and scoop out the seeds, being careful not to damage them. Rinse them under cool water to remove any remaining fruit pulp, then lay them on a clean paper towel to air-dry for about 10 minutes. This removes excess moisture before testing.
If you’re working with a large batch, sort through them first—discard any seeds that are shriveled, cracked, or discolored. Healthy seeds should be plump, firm, and a creamy beige color. The ones that pass this quick inspection are the ones worth testing further.
🧊 Step 2: Perform the Cold Test for Viability
Fill a small container—like a shallow plastic cup or even a muffin tin—with cold water (not ice water). Drop the seeds into the water and let them sit for 24 hours. After this time, remove the seeds and check for two things: first, whether they’ve sunk to the bottom, and second, whether they still feel firm when gently squeezed between your fingers.
Seeds that float are likely non-viable—they’ve lost their stored energy or been damaged. Sunk seeds, however, are a good sign, but don’t celebrate yet. Take a toothpick and gently prick one side of each sunk seed near the pointed end. This small nick helps speed up the germination process later. If the seed feels soft or mushy inside, it’s not worth saving.
⏰ Step 3: Dry the Viable Seeds Properly
Spread the viable seeds in a single layer on a clean, dry paper towel or mesh screen. Place them in a warm, dry spot with good airflow—70-75°F is ideal. I like to use a seed tray or even a baking sheet lined with parchment paper. Avoid direct sunlight, as it can overheat and dry the seeds too quickly, reducing their viability.
Check the seeds every 2-3 days and flip the paper towel or screen if needed to ensure even drying. The seeds are ready when they’re completely dry to the touch—no moisture should remain when you gently rub two seeds together. This usually takes about 7-10 days, depending on your climate. Once dry, store them in a sealed container in a cool, dark place until you’re ready to plant.
🌱 Step 4: Stratify for Better Germination (Optional but Recommended)
For the best results, especially if you’re in a warmer climate, stratify the dried seeds before planting. Place them in a plastic bag with a damp paper towel and a handful of moist peat moss or sphagnum moss. Seal the bag loosely and refrigerate it for 4-6 weeks. This mimics winter conditions and breaks seed dormancy, helping them germinate faster once planted.
After stratification, check the seeds again for moisture—if they feel damp, let them dry out slightly before planting. This step is particularly useful if you live in a region with mild winters, as apple seeds often need this cold treatment to sprout reliably. If you skip it, you might still get germination, but it could take much longer.
Tips & tricks for perfect apple seed viability testing
Real talk: Testing apple seeds for viability saves you from wasting time and effort on seeds that won't grow. Here's what I've learned after testing hundreds of seeds.
Seed Selection Matters: In Step 1, when you're choosing apples, focus on those that are fully ripe but still firm. Overripe apples often produce seeds with lower viability. I've found that seeds from organic or homegrown apples (when available) tend to perform better than those from store-bought fruit. The 10-minute air-dry time is crucial—this removes surface moisture that could affect the cold test results. Don't skip this step, even if the seeds look dry!
Cold Test Precision: The 24-hour cold water test is your best friend for identifying viable seeds. Use cold water (not ice water) to avoid shocking the seeds. I've seen people use ice water and wonder why their seeds didn't sink properly—temperature matters! After 24 hours, if a seed feels soft or mushy when squeezed, it's not worth saving. This test works because viable seeds contain stored energy that keeps them buoyant until they've absorbed enough water to sink.
Drying Strategy: For Step 3, maintaining that 70-75°F temperature range is key. I've tried drying seeds in direct sunlight and ended up with brittle, non-viable seeds. Use a fan on low setting to create gentle airflow around your drying setup. The 2-3 day check-ins help prevent uneven drying—flip the seeds if one side looks drier than the other. Remember, completely dry seeds should feel like tiny, hard beads when rubbed together.
Stratification Insight: The optional 4-6 week stratification in Step 4 works wonders for breaking seed dormancy. I've noticed that seeds from warmer climates especially benefit from this step. If you're short on time, you can reduce the stratification to 2-3 weeks, though germination might be slower. The damp paper towel should feel slightly moist, like a wrung-out sponge—not dripping wet.
Pro Tips for Apple Seed In Hand
- Real talk: Testing apple seeds for viability saves you from wasting time and effort on seeds that won't grow. Here's ...
- Seed Selection Matters: In Step 1, when you're choosing apples, focus on those that are fully ripe but still firm. Ov...
- Cold Test Precision: The 24-hour cold water test is your best friend for identifying viable seeds. Use cold water (no...
Frequently asked questions
Got questions about testing apple seeds before drying? You’re not alone! Here are some of the most common queries—and their answers—to help you get it right the first time.
Can I test apple seeds straight from the fruit?
Yes! Fresh seeds work best for viability testing. Just remove them from the apple flesh, rinse off any pulp, and let them dry slightly (10–15 minutes) before testing. Wet seeds can skew results or mold during the cold test.
How long should I wait to see germination results?
Patience is key! Most apple seeds take 3–6 weeks to sprout in a cold test. Check weekly—seeds may crack, swell, or show tiny roots first. If nothing happens after 6 weeks, they’re likely non-viable.
What if my seeds mold during the test?
Mold is a red flag! If you spot fuzzy growth, discard those seeds immediately. To prevent mold, use a paper towel (not plastic) and store the sealed bag in a cool, dark place (like a fridge). Good airflow is your friend!
Are there alternatives if my seeds fail the test?
Try these backups:
- Store-bought seeds: Purchase certified apple seeds from nurseries (e.g., heirloom varieties).
- Grafting: Skip seeds entirely and graft a branch from a healthy apple tree.
- Root cuttings: Some apple rootstocks can regrow from cuttings—ask a local orchard for tips!
Do seed size or shape affect viability?
Not necessarily! While plump, oval seeds are often healthier, smaller or oddly shaped seeds can still germinate. Focus on the cold test results—not appearance. Save seeds with no cracks or discoloration for the best odds.
Wrapping up and next steps
Holding an apple seed in your hand isn’t just a whimsical moment—it’s the first step toward a future harvest! By testing viability before drying, you’ve set yourself up for success, ensuring only the strongest seeds will thrive.
Whether you’re dreaming of a backyard orchard or simply experimenting with nature, your patience and preparation will pay off.
Now’s the time to take action! Plant those viable seeds in moist paper towels or soil, and watch as life sprouts from your efforts. Ready to grow? Grab your supplies and let the journey begin! 🌱