
Lawn
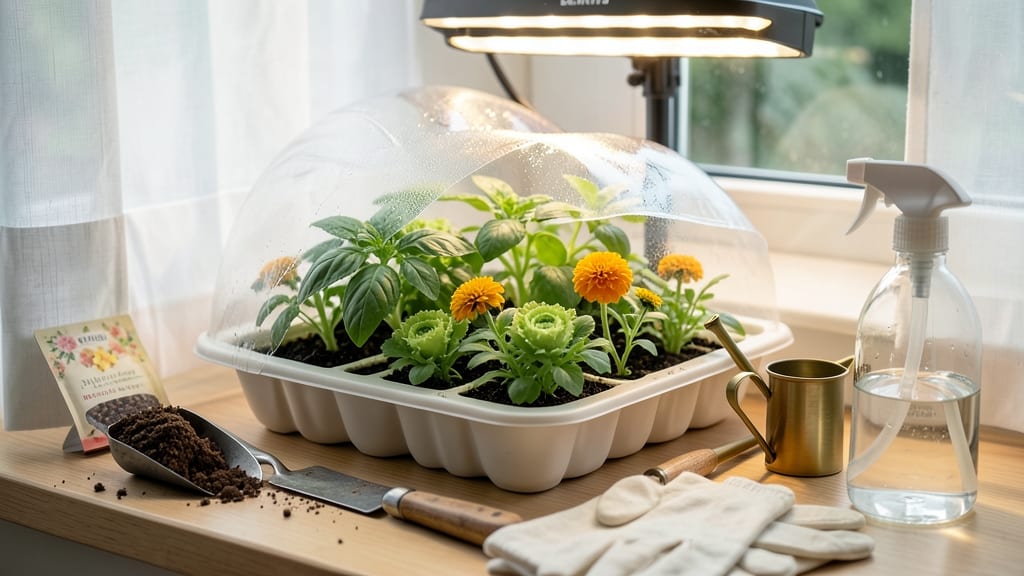
How to use seed starter cuts your wait time for garden-ready plants from months to weeks. 🌱 I’ve watched tiny seeds transform into sturdy seedlings in just 4-6 weeks using this method—perfect for tomatoes, peppers, or delicate flowers that hate cold snaps. The secret lies in mimicking nature’s cozy conditions: warmth, moisture, and just the right amount of light.
You’ll need a starter mix (sterile, seedling-specific blend), seed trays with drainage, and a heat mat or sunny windowsill. No fancy tools required—just a spray bottle for gentle watering and a grow light if your natural light falls short.
My first batch of seedlings grew so fast I nearly forgot to thin them!
By the time you’re ready to transplant, those fragile sprouts will be stocky and ready for life outdoors. The payoff? Earlier harvests, stronger plants, and the satisfaction of watching life begin from a single seed. Even my black thumb can’t mess this up.
Works for any garden—whether you’re growing in a sunroom, basement, or kitchen counter. Let’s get those seeds sprouting!
📚 In This Guide
- What you need
- Instructions
- Tips and common mistakes
- Wrapping up and next steps
What you need
- ● Seed starter trays or pots: 2–4" deep, with drainage holes (6–12 trays/pots, depending on seed quantity). Pro tip: 💡 Opt for biodegradable pots to avoid transplant shock!
- ● Seed starting mix: Lightweight, sterile potting soil (1–2 bags, ~1–2 cubic feet per tray). Avoid garden soil—it’s too dense!
- ● Seeds: High-quality, fresh seeds (check packet for spacing needs). 🌡️ Store seeds in a cool, dry place until use.
- ● Watering can or spray bottle: With a fine mist nozzle for gentle hydration.
- ○ Plastic wrap or humidity dome: To retain moisture (optional but helpful for slow-germinating seeds).
- ● Label markers/popsicle sticks: To track seed varieties (essential for organization!).
- ● Grow lights or sunny windowsill: 12–16 hours of light daily (LED grow lights are ideal).
- ○ Heat mat (optional): For warm-season seeds like peppers or tomatoes (70–85°F range).
- ○ Fertilizer (optional): Water-soluble, diluted to half-strength (use after sprouts emerge).
Step-by-Step instructions for using seed starters
Here's how to jumpstart your growing season with speed and precision—no guesswork involved.
🌱 Step 1: Prepare Your Seed Starter Tray
Fill your seed starter tray with the provided growing medium until it's level with the top edges of each cell. Press down lightly to remove air pockets but don't compact the mix—roots need space to spread. I like to tap the tray gently on the table to settle everything evenly. The medium should feel like a damp sponge, not a soggy mess.
Place the tray on a seedling heat mat if available, as most seeds germinate fastest at 75-85°F. If you don't have a heat mat, position the tray on a warm spot like near your fridge or on top of your water heater (just avoid direct heat sources). This warmth kickstarts germination in 3-7 days instead of the usual 10-14.
💧 Step 2: Plant Seeds at Correct Depths
Check each seed packet for planting depth—most say to plant at twice the seed's diameter. For tiny seeds like lettuce, that's just a light press into the surface. For larger seeds like beans, go ½ inch deep. I use a toothpick to poke a small hole, drop in the seed, then cover with a pinch of medium.
Label each cell immediately with the variety and date—you'll thank yourself later when seedlings pop up and you can't remember which is which. Mist the surface lightly with water until the medium looks evenly damp but not wet. Overwatering now can drown seeds before they sprout.
☀️ Step 3: Provide Optimal Light and Humidity
Cover the tray with a clear plastic dome or plastic wrap to trap humidity and warmth. Seeds need 80-90% humidity to germinate, and the dome creates that perfect environment. Place the tray under grow lights set to 14-16 hours daily—natural light alone won't cut it unless you have a south-facing window with intense sunlight.
Watch for condensation on the dome's underside—that's your sign the humidity is right. Once 50% of seeds have sprouted, remove the dome immediately. Keeping it on too long risks damping-off, a fungal disease that collapses seedlings overnight. You'll see the first true leaves (not the initial seed leaves) appear in 1-2 weeks after sprouting.
🌿 Step 4: Thin and Transplant Seedlings
When seedlings have 2-3 true leaves, thin to the strongest one per cell by snipping the others at soil level with clean scissors. This prevents overcrowding and gives remaining plants room to grow. I like to do this in the morning so any damaged seedlings have time to recover before evening.
After thinning, transplant seedlings to larger pots when they fill their cells. Use the same growing medium and water gently to settle the roots. Harden off seedlings by placing them outside for 1-2 hours daily over 7-10 days before transplanting to the garden. This gradual adjustment prevents shock.
Tips & tricks for perfect seed starter success
Common pitfalls—and how to sidestep every one—when working with seed starters to ensure your seedlings thrive from day one.
Heat and Timing Secret: The 75-85°F temperature range in Step 1 is non-negotiable for fast germination. If your kitchen runs cooler, consider using a small portable heat mat (they're affordable and reusable) rather than relying on your fridge or water heater. I've seen germination times nearly double when seeds sit in cooler conditions—especially true for slower starters like tomatoes or peppers. A simple thermometer placed near your tray confirms you're in the optimal zone.
Seed Depth Technique: For Step 2, remember that "twice the seed's diameter" is a general rule, but larger seeds like beans actually need slightly more coverage—about ½ inch deep—to prevent them from being exposed to light too soon. I've found that using a toothpick to create precise planting holes eliminates guesswork, especially when working with tiny seeds like lettuce where depth matters more than you'd think. Lightly patting the medium around the seed helps maintain consistent moisture without disturbing it.
Humidity and Light Strategy: The 14-16 hours of grow light in Step 3 is critical, but don't overlook the importance of positioning your lights just 2-4 inches above the seedlings. Too high and they'll stretch toward the light; too low and they'll burn. I adjust mine every few days as seedlings grow. Also, watch for condensation on the dome—this is your visual cue that humidity levels are perfect. Once you see 50% germination, remove the dome immediately to prevent damping-off, which can wipe out your seedlings overnight.
Transplanting Timing: When you're ready to transplant in Step 4, focus on the "2-3 true leaves" milestone rather than calendar dates. True leaves look different from the initial seed leaves—they're smaller, more complex in shape, and often a different color. I've learned the hard way that transplanting too early leads to shock, while waiting too long means roots become pot-bound. The gradual 1-2 hour daily hardening process is worth the extra time—it's what transforms delicate seedlings into resilient plants ready for the garden.
Pro Tips for Use Seed Starter
- Common pitfalls—and how to sidestep every one—when working with seed starters to ensure your seedlings thrive from da...
- Heat and Timing Secret: The 75-85°F temperature range in Step 1 is non-negotiable for fast germination. If your kitch...
- Seed Depth Technique: For Step 2, remember that "twice the seed's diameter" is a general rule, but larger seeds like ...
Frequently asked questions
Got questions about seed starters? You’re not alone—germination timing, setup hiccups, and material choices can feel tricky. Here’s a quick guide to the most common concerns, so you can skip the guesswork and get those roots growing fast!
What’s the best time of year to start seeds indoors with a seed starter?
Timing depends on your climate and the plants you’re growing. For most vegetables and flowers, start 6–8 weeks before the last frost date in your area. Check your local frost calendar—cool-season crops (like lettuce) can handle early starts, while warm-season plants (like tomatoes) need to wait until after frost risk passes. Pro tip: Use a seed-starting chart for your zone!
How long does it take for seeds to germinate in a seed starter?
Germination time varies by seed type. Fast growers (like radishes or basil) sprout in 3–7 days, while slower seeds (such as tomatoes or peppers) may take 10–21 days. Keep the starter in a warm, humid spot (70–85°F) and check daily. If nothing sprouts after 3x the seed packet’s estimated time, the seeds may be old or damaged.
Can I reuse a seed starter, or do I need a new one every time?
Yes! Most seed starters (especially plastic or biodegradable ones) can be cleaned and reused for multiple batches. After harvest, scrub with soapy water, rinse well, and let dry in the sun. Avoid metal trays if you’re growing acid-loving plants (like blueberries)—they can alter soil pH over time.
What should I do if my seedlings look leggy or weak?
Leggy seedlings mean they’re stretching for light. Move the starter to a sunnier spot (or under grow lights) and ensure it’s no more than 1–2 inches from the light source. Rotate the tray daily for even growth. If they’re already too tall, bury them deeper in the soil up to their first true leaves—roots will grow along the buried stem!
Are there alternatives to a seed starter if I don’t have one?
Use egg cartons, toilet paper rolls, or even paper cups lined with damp paper towels. For larger batches, try biodegradable pots made from peat or coconut coir. Just ensure whatever you use has drainage holes to prevent rot. Bonus: DIY setups work great for herbs or small veggies!
Wrapping up and next steps
You’ve got everything you need to kickstart your gardening journey with seed starters—faster germination, healthier roots, and a head start on your lawn or garden! 🌱 Whether you’re a beginner or a seasoned green thumb, these tools make growing easier and more efficient.
Now that you’re armed with the how-to, it’s time to get planting!
Ready for the next step? Experiment with different seeds, track your progress, and soon you’ll be enjoying a lush, thriving lawn or garden. Happy growing! 🌿