
Transplanting
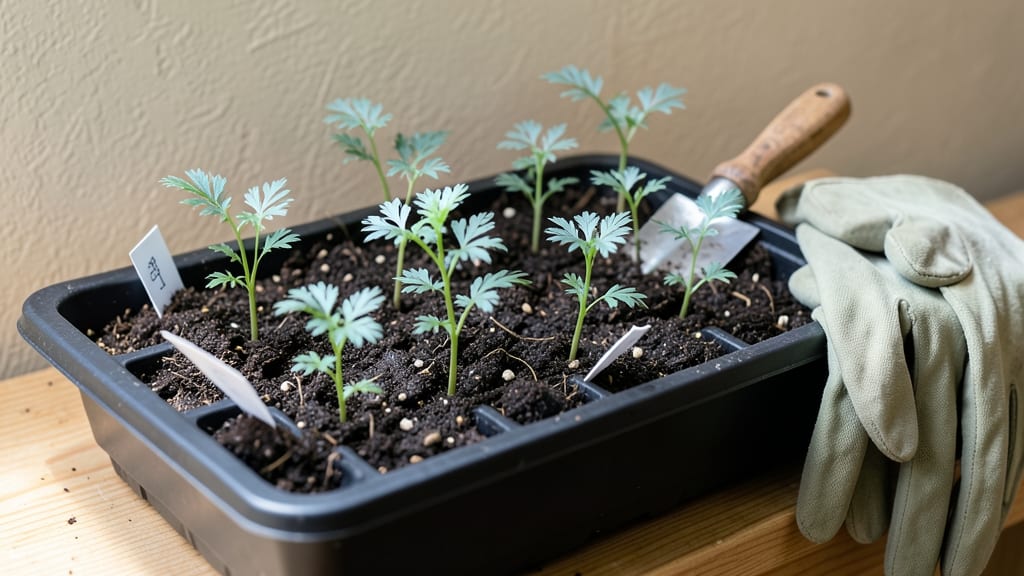
Transplanting breadseed poppy seedlings means fast, airy blooms that outshine store-bought flowers. 🌸 I learned the hard way—my first batch flopped when I rushed them into the ground too soon. The secret lies in patience, soil prep, and knowing exactly when those delicate stems can handle the outdoors.
These poppies thrive in poor soil but demand perfect timing. Start seedlings indoors 6-8 weeks before your last frost, then harden them off over 7-10 days before moving them outside. Overcrowded trays and damp soil trigger damping off, so keep them in bright light and water from below.
The payoff? Bright, papery blooms that dance in the breeze by early summer. Once planted, they’re nearly indestructible—drought-tolerant, pest-resistant, and self-seeding for years. Space them 12-18 inches apart in full sun, and watch them multiply like confetti.
The key is not to fuss over them after transplanting; they reward neglect with effortless beauty. Perfect for cottage gardens, wildflower meadows, or cutting gardens. Here’s how to avoid the rookie mistakes I made—and get poppies that outperform any other annual. Let’s get those seedlings in the ground right!
📚 In This Guide
- What you need
- Instructions
- Tips and common mistakes
- Wrapping up and next steps
What you need
- ● Breadseed poppy seeds: 1–2 packets (about 1,000–2,000 seeds, depending on desired coverage). Choose Papaver somniferum varieties labeled for culinary or ornamental use.
- ● Seedling trays or biodegradable pots: 50–100 cell trays (2–3 inches deep) or 4-inch pots for individual seedlings.
- ● High-quality seed-starting mix: 1–2 bags (sterilized, well-draining blend with perlite or vermiculite). Avoid garden soil—it’s too dense!
- ● Grow lights or sunny windowsill: A full-spectrum LED grow light (12–16 hours/day) or a south-facing window with 6+ hours of sunlight.
- ● Misting bottle or spray nozzle: For gentle watering without disturbing seeds.
- ● Transplanting tools: Small hand trowel, tweezers, or a butter knife for delicate seedling handling.
- ○ Heating mat (optional): Bottom warmth (70–75°F) speeds germination—great for cooler climates! 🌡️
- ● Fertilizer: Water-soluble, low-nitrogen starter fertilizer (5-10-10 ratio) or fish emulsion (diluted to half-strength).
- ● Humidity dome or plastic wrap: Keeps moisture high until seeds sprout (remove once seedlings emerge!).
- ● Hardening-off tray: A shallow container with mesh sides to acclimate seedlings to outdoor conditions.
- ● Garden gloves: Protects hands from prickly poppy stems during transplanting.
- ● Plant labels & marker: Track varieties and transplant dates—breadseed poppies mature quickly!
Step-by-Step guide for transplanting breadseed poppy seedlings
Here's how to move your fast-growing poppy seedlings into the garden without shocking their delicate roots.
🌱 Step 1: Prepare the Garden Bed for Transplanting
Choose a location with full sun exposure—breadseed poppies thrive with at least 6-8 hours of direct sunlight daily. Loosen the soil to a depth of 12 inches using a garden fork or tiller, breaking up any compacted layers. Poppies prefer well-draining soil, so mix in 1-2 inches of compost to improve fertility and structure.
Rake the bed smooth and create shallow holes—just deep enough to accommodate the root balls of your seedlings. Space the holes 12-18 inches apart in rows spaced 18-24 inches apart. This spacing ensures adequate airflow and prevents overcrowding, which can lead to weak stems and fewer blooms. Water the prepared bed thoroughly 24 hours before transplanting to settle the soil.
⏰ Step 2: Acclimate Seedlings Before Transplanting
Start hardening off your seedlings 7-10 days before transplanting by placing them outdoors in a sheltered spot for 1-2 hours the first day. Gradually increase their outdoor time by 1 hour daily, eventually leaving them out overnight. This process helps them adjust to temperature fluctuations and wind exposure without shock.
Watch for signs of stress like wilting or yellowing leaves—these indicate the seedlings are not ready. If you notice these symptoms, return them indoors and extend the hardening-off period by another 2-3 days. Healthy seedlings will appear vibrant and upright, with no signs of wilting even after a full day outside.
🪴 Step 3: Transplant Seedlings Carefully
On the day of transplanting, water the seedlings thoroughly in their current containers to ensure the roots are moist and pliable. Gently remove each seedling from its container, supporting the stem with one hand while loosening the root ball with the other. If the roots are tightly bound, use your fingers to tease them apart lightly—this encourages outward root growth.
Place each seedling into its prepared hole, ensuring the top of the root ball sits just below the soil surface. Fill the hole with soil, pressing gently but firmly to eliminate air pockets. Avoid compacting the soil too tightly, as this can restrict root growth. Water each newly transplanted seedling deeply to help settle the soil and reduce transplant shock.
☀️ Step 4: Provide Post-Transplant Care
After transplanting, keep the soil consistently moist but not soggy for the first 2 weeks. Water deeply every 2-3 days if rainfall is insufficient, focusing on the base of the plants to encourage strong root development. Avoid wetting the foliage, as this can promote fungal diseases in the damp garden environment.
Apply a 1-inch layer of mulch around each plant, keeping it 2 inches away from the stem to prevent rot. This mulch layer helps retain soil moisture, regulate temperature, and suppress weeds. Once the seedlings have established and begun active growth, reduce watering to once weekly, allowing the top inch of soil to dry out between waterings.
✂️ Step 5: Monitor and Support Growth
As your breadseed poppy seedlings grow, they may develop tall, slender stems that require support. Install small stakes or cages near each plant when the stems reach 6-8 inches tall to prevent them from toppling over. Gently tie the stems to the supports using soft plant ties or strips of fabric to avoid damaging the delicate stems.
Watch for signs of pests like aphids or spider mites, which can weaken the plants. If you notice any infestations, treat the plants with a mild solution of neem oil or insecticidal soap, following the product instructions carefully. With proper care, your breadseed poppies will quickly establish and produce vibrant blooms, providing a stunning display of color and texture in your garden.
Tips & tricks for perfect breadseed poppy transplanting
Avoid these common pitfalls—and ensure your fast-growing poppies thrive from the moment they hit the garden.
Soil Prep Secret: The 12-inch soil loosening in Step 1 isn't just about breaking up compaction—it's about creating a root-friendly environment. Poppies have delicate taproots that need easy access to nutrients. If your soil feels dense after loosening, mix in an extra half-inch of compost. This gives those roots room to spread without resistance, which is especially important for the first critical 2 weeks after transplanting. Think of it as giving your poppies a soft landing pad.
Hardening Off Hack: I learned this the hard way after losing seedlings to shock—don't rush the 7-10 day hardening process. Start with just 1-2 hours on the first day, even if your seedlings look tough. The key is gradual exposure to wind and temperature fluctuations. Place them in a spot where they'll get morning sun but afternoon shade for the first few days. This mimics natural conditions and prevents the sudden stress that causes wilting. Trust me, those extra few days now save you from replanting later.
Root Ball Rescue: When loosening those root balls in Step 3, focus on gently separating them rather than pulling. If you find roots that are tightly circling (a common issue with container-grown seedlings), use your fingers to make small cuts along the root ball's edge. This encourages outward growth instead of the roots continuing to circle in the soil. It's like giving your poppy's roots permission to explore their new home rather than staying trapped in their old growth pattern.
Watering Wisdom: The 24-hour pre-watering in Step 1 is non-negotiable—it settles the soil and creates ideal conditions. But here's what nobody tells you: after transplanting, water deeply but avoid creating puddles. Poppies hate soggy roots. Use a watering can with a gentle spray nozzle to deliver moisture directly to the soil surface, then let it soak in. This prevents fungal issues while keeping those roots happy. Think of it as giving your poppies a refreshing drink rather than a swampy bath.
Pro Tips for Breadseed Poppy Seedlings
- Avoid these common pitfalls—and ensure your fast-growing poppies thrive from the moment they hit the garden.
- Soil Prep Secret: The 12-inch soil loosening in Step 1 isn't just about breaking up compaction—it's about creating a ...
- Hardening Off Hack: I learned this the hard way after losing seedlings to shock—don't rush the 7-10 day hardening pro...
Frequently asked questions
Got questions about growing breadseed poppy seedlings? You’re not alone! Here are some of the most common queries—and their answers—to help you nurture thriving plants from seed to bloom.
When is the best time to transplant breadseed poppy seedlings outdoors?
Transplant your seedlings after the last frost when soil temps reach at least 50°F (10°C). These tender sprouts hate cold, so wait until nighttime temps stay above 45°F (7°C). Harden them off for 5–7 days first by placing them outdoors in shade for gradually longer periods.
How long does it take for breadseed poppy seedlings to mature?
From seed to mature plant with blooms, expect 60–90 days in ideal conditions. Seedlings emerge in 7–14 days, and flowers typically appear 8–12 weeks after germination. Fast-growing but short-lived, they’ll reward you with vibrant blooms in just a few months!
Can I grow breadseed poppies from store-bought poppy seeds?
Nope! Store-bought poppy seeds (like those in bagels) are opium poppies and won’t germinate. For breadseed poppies, source seeds from reputable nurseries or seed banks. Look for varieties like Papaver somniferum (breadseed type)—they’re legal and perfect for culinary or ornamental use.
What should I do if my seedlings look leggy or weak?
Leggy seedlings mean they’re stretching for light. Move them to a sunnier spot (they need 6+ hours of sunlight daily) and avoid overcrowding. If they’re already transplanted, thin them to 12–18 inches apart and add a light layer of compost to boost nutrients.
How do I protect breadseed poppy seedlings from pests?
Poppies are generally pest-resistant, but aphids or slugs might target young plants. Spray aphids with soapy water or introduce ladybugs. For slugs, set up beer traps or use copper barriers. Avoid chemical pesticides—they can harm beneficial insects!
Wrapping up and next steps
Growing breadseed poppy seedlings is a rewarding journey—these hardy, fast-growing plants bring vibrant blooms and even edible seeds to your garden!
With the right timing, soil prep, and gentle care, you’ll soon enjoy their cheerful faces and potential harvest. Now’s your chance to take action: mark your calendar for those early spring transplant dates and get ready to nurture these beauties into thriving plants. Happy gardening! 🌱✨