
Lawn
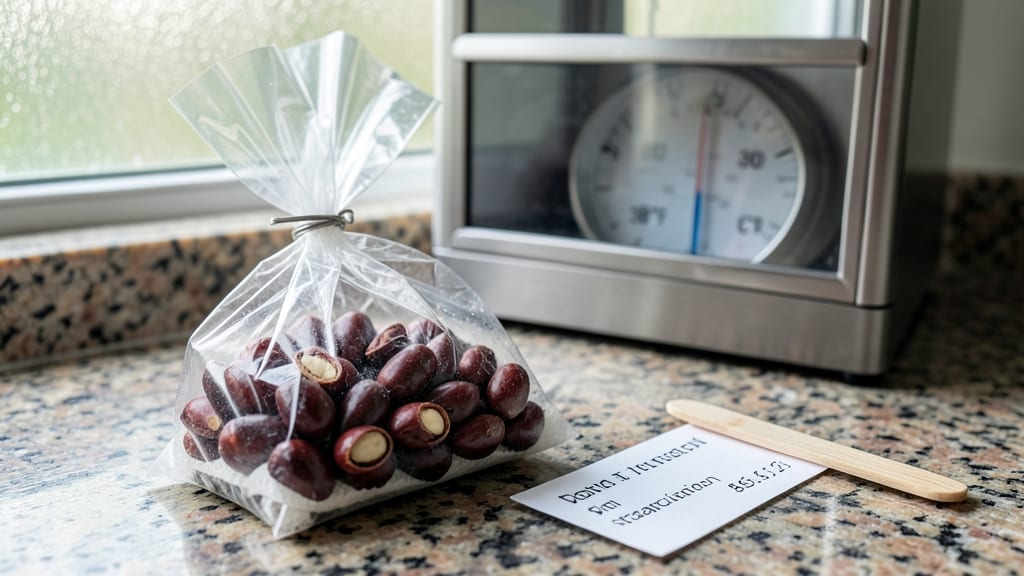
Cherry seed stratification in cold, moist conditions breaks their stubborn dormancy—turning what would be a 50%+ failure rate into reliable germination next spring. 🌱 I’ve struggled with cherry seeds before, watching them rot or refuse to sprout despite perfect growing conditions. The trick? Mimicking nature’s winter chill cycle in your own fridge or cold frame. Most gardeners overlook this step, but cherry seeds need 90-120 days of cold, moist treatment to soften their hard coats. You’ll need a simple setup: damp paper towels, a sealed container, and patience. Skip this, and you’re betting on luck—do it right, and you’ll see those first pale green shoots in 4-8 weeks after planting. What you’ll end up with are sturdy seedlings ready for transplanting, not the weak, leggy failures from direct sowing. The payoff? A tree that grows true to its parent’s fruit quality—something you can’t guarantee with store-bought seedlings. Works for sweet, sour, and wild cherries alike. Here’s how to do it without the guesswork.
📚 In This Guide
- What you need
- Instructions
- Tips and common mistakes
- Wrapping up and next steps
What you need
- ● Fresh cherry seeds: Collect 20-50 clean, plump seeds from ripe, organic cherries (avoid store-bought—pesticides can inhibit germination!).
- ● Stratification medium: Option 1: Moistened peat moss (1 part peat to 1 part water by volume).
- ● Option 2: Vermiculite or perlite (sterilized, 100% moisture retention when dampened).
- ● Option 3: Coconut coir (sustainable, holds moisture well).
- ● Containers: Small, breathable pots (3-4 inches deep) or a ziplock bag (for wet stratification). Use 2-3 containers to distribute seeds evenly.
- ● Plastic wrap or lid: To seal containers and maintain humidity.
- ● Refrigerator: A standard fridge (34–40°F / 1–4°C) with a crisper drawer (ideal for cold stratification).
- ● Spray bottle: For gently misting the medium (avoids over-saturation).
- ● Label & marker: To track seed varieties and stratification dates.
- ● Fine-mesh sieve: Helps separate seeds from pulp if needed.
- ○ Thermometer/hygrometer: To monitor fridge temps (optional but pro tip for precision!).
- ● Gloves: Protects hands from potential skin irritation (some cherry pits contain trace cyanogenic compounds—not harmful in small amounts).
How to stratify cherry seeds for successful spring germination
This cold-moist process mimics nature's timing—here's how to break dormancy and ensure strong, healthy seedlings.
🌱 Step 1: Extract and Prepare the Seeds
Start by removing seeds from ripe cherries—select only deep red, plump fruit that's fully ripe but not mushy. Slice open the cherry and gently pry out the single large seed inside. Rinse seeds thoroughly under cool water to remove any remaining fruit pulp, which can ferment and rot them during stratification.
Pat seeds dry with a paper towel and let them air dry for 24 hours in a single layer on a mesh screen or paper towel. This prevents mold growth during the cold period. I always label my seeds with the variety and date—cherry seeds can take 3-6 months to germinate, and tracking helps avoid confusion.
💧 Step 2: Apply the Moist Stratification Medium
Fill a sealed plastic bag or airtight container with dampened peat moss or vermiculite—the medium should feel like a wrung-out sponge, not dripping. Place seeds 1 inch apart in the moist medium, spacing them evenly to prevent crowding. The goal is to keep seeds hydrated without waterlogging them.
Seal the container tightly and store it in a refrigerator set to 35-40°F. This temperature range mimics winter's natural cold period, breaking seed dormancy. Check seeds monthly—if the medium dries out, lightly mist it with water and reseal. Over time, you'll notice the seed coats soften slightly, signaling dormancy is breaking.
⏰ Step 3: Monitor and Test for Germination Readiness
After 3-4 months of cold stratification, remove the seeds and test for germination readiness. Place a few seeds between damp paper towels in a sealed plastic bag and return them to the refrigerator for 24 hours. Then, move the bag to room temperature (65-75°F) and watch for signs of life.
Successful stratification will show as a tiny white root emerging within 7-14 days. If no roots appear, return the seeds to cold stratification for another 2-4 weeks before retesting. This step ensures seeds are fully prepared for planting—skipping it often results in weak, slow germination or no sprouts at all.
☀️ Step 4: Plant Stratified Seeds in Warmth
Once seeds show root growth, plant them ½ inch deep in a well-draining seed-starting mix at 70°F. Use small pots or a seed tray with a humidity dome to retain moisture. Keep the soil consistently moist but never soggy—cherry seedlings are delicate and prone to damping-off if overwatered.
Place the tray under grow lights for 14-16 hours daily to prevent leggy growth. Within 2-4 weeks, you'll see the first true leaves emerge—this is your signal that germination is progressing well. Thin seedlings to 1 plant per pot once they reach 2 inches tall, using sharp scissors to avoid disturbing roots.
Tips & tricks for perfect cherry seed stratification
Here's what nobody tells you about getting every seed to sprout—these little details make all the difference.
Seed Selection Matters: In Step 1, when choosing cherries, look beyond just color—press gently on the fruit. Ripe cherries should yield slightly under pressure, but not be mushy. The seed's viability is directly tied to the fruit's ripeness, so skip any that feel mealy or shriveled. I've found sour cherries often produce more reliable seeds than sweet varieties, though both can work with proper stratification.
Temperature Control: The 35-40°F range in Step 2 is critical, but not all refrigerators are created equal. If your fridge runs cooler, consider placing the container on a shelf near the back where temperatures are most stable. A simple fridge thermometer (placed near your seeds) reveals if your unit actually hits the target—some can vary by 10°F or more! For extra insurance, I've used a small cooler with ice packs in my garage during winter months when outdoor temps naturally hover around 35°F.
Germination Test Hack: When testing seeds after 3-4 months in Step 3, I've found placing the damp paper towel setup on a clear glass plate makes root emergence visible from all angles. This visual confirmation prevents guesswork about whether stratification succeeded. The 24-hour cold shock before moving to room temperature is often the missing piece—it mimics nature's final winter chill before spring warmth triggers growth.
Planting Depth Precision: The ½-inch planting depth in Step 4 might seem shallow, but cherry seeds need this exact exposure to light for proper germination. Use a ruler to verify depth—any deeper and they may rot; any shallower and they'll dry out. I mark my seed trays with depth indicators using a permanent marker to avoid inconsistencies.
Pro Tips for Cherry Seed Stratification
- Here's what nobody tells you about getting every seed to sprout—these little details make all the difference.
- Seed Selection Matters: In Step 1, when choosing cherries, look beyond just color—press gently on the fruit. Ripe che...
- Temperature Control: The 35-40°F range in Step 2 is critical, but not all refrigerators are created equal. If your fr...
Frequently asked questions
Got questions about cherry seed stratification? You’re not alone—this process can feel tricky at first! Below are answers to the most common queries, from timing to troubleshooting, so you can tackle it with confidence.
How long does cherry seed stratification take?
Cherry seeds typically need 60–90 days of cold, moist stratification to break dormancy. Sweet cherries (like Prunus avium) often require the full 90 days, while tart cherries (like Prunus cerasus) may germinate faster—sometimes in as little as 45 days. Patience is key!
Can I stratify cherry seeds in the fridge instead of outdoors?
Use a plastic bag with damp paper towels or a sealed container with moistened peat moss. Store seeds in the fridge (34–40°F) for the required duration. Just check them monthly for mold—discard any slimy or foul-smelling seeds.
What if my seeds don’t germinate after stratification?
Try these fixes:
- Soak seeds in warm water for 24 hours before replanting.
- Ensure your growing medium is well-draining (sandy soil or a 50/50 mix of perlite/potting soil).
- Move pots to a warm, sunny spot (70–75°F) after stratification.
Do I need to stratify all cherry seeds, or just certain types?
Most stone fruit seeds (cherries, plums, peaches) benefit from stratification, but some heirloom or hybrid varieties may have reduced dormancy. When in doubt, stratify—it won’t hurt, and it boosts germination rates. Skip stratification only if seeds sprout within weeks of planting!
When should I start the stratification process?
For fall planting, begin stratification in late summer (August–September) so seeds are ready by winter. For spring planting, start in January–February and move pots outdoors in early spring. Timing depends on your climate—aim for 6–8 weeks before your last frost date.
Wrapping up and next steps
Mastering cherry seed stratification is your ticket to a thriving garden next spring! 🌱 By mimicking nature’s cold-moist cycle, you’ll break dormancy and boost germination rates—no more waiting in vain for those tiny seeds to sprout.
Whether you’re a novice or a seasoned gardener, this method is your secret weapon for reliable, early growth.
Ready to plant the seeds of success? Grab your seeds, gather your supplies, and dive in—your future cherry trees (or lawn companions) are waiting! Start small, experiment, and watch your patience pay off with lush, healthy starts. Happy gardening! 🌿