
Lawn
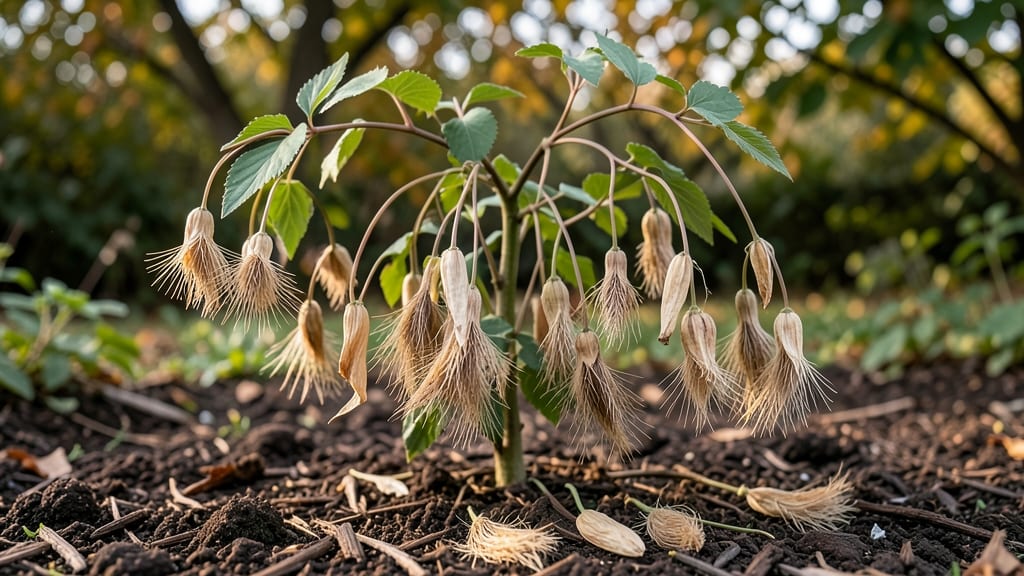
Clematis seed heads are nature’s way of keeping your plant productive—and they’re easier to handle than you think. ✨ I’ve turned my late-season clematis into a year-round seed-saving machine by mastering the "zero-twist" harvesting method, which preserves viability without the struggle of stubborn stems.
The secret? Wait until the seed pods turn brown and papery—usually late summer to early fall—then snip the entire seed head cleanly with pruners. No twisting, no tugging, just a clean cut that leaves the stem intact for birds or compost.
Store the heads in a paper bag until they fully dry, then shake out the seeds for next year’s garden.
You’ll end up with plump, viable seeds ready for spring planting, plus a garden that stays tidy without sacrificing wildlife value. The process takes less than 10 minutes per plant and transforms what would be debris into a free resource.
Works for all clematis varieties, from climbing giants to compact shrubs. Here’s how to do it without losing seeds—or your patience.
📚 In This Guide
- What you need
- Instructions
- Tips and common mistakes
- Wrapping up and next steps
What you need
- ● Mature clematis seed heads – Collect from healthy, non-hybrid plants (e.g., Clematis montana, Clematis viticella, or Clematis armandii). Aim for 5–10 seed heads per batch for best results.
- ● Sharp pruning shears or scissors – For clean cuts (sterilize with rubbing alcohol to prevent disease).
- ● Paper bags or breathable mesh bags – 2–3 medium-sized bags (labeled with the clematis variety and date). Avoid plastic to prevent mold.
- ● Drying tray or wire rack – Elevate seed heads to dry evenly (a 12" x 18" rack works for 10–15 heads).
- ○ Desiccant packets (optional but helpful) – Place 1–2 packets in drying bags to absorb excess moisture.
- ● Small paintbrush or soft-bristle brush – For gently separating seeds from chaff.
- ● Fine-mesh sieve or sifter – A #100 mesh sieve (0.149mm openings) works well for sifting clean seeds.
- ● Labeling supplies – Acid-free tags, permanent markers, and a pencil for noting varieties.
- ● Air-tight seed envelopes or glass jars – 3–5 oz capacity per variety; store in a cool, dark place (50–60°F).
- ● Hand lens or magnifying glass – Helps inspect seed viability (look for plump, intact seeds).
- ● Patience – Seed heads need 4–6 weeks to fully dry indoors.
- ● Dry, well-ventilated space – Avoid humidity (aim for 40–50% humidity).
- ● Knowledge of clematis varieties – Some hybrids (e.g., Clematis ‘Jackmanii’) may not produce true-to-type seeds.
Step-by-Step guide to harvesting and saving clematis seed heads
Here's how to collect and store clematis seed heads the easy way—no fuss, just reliable seeds for next year.
🌿 Step 1: Identify and Select Mature Seed Heads
Look for seed heads that have turned brown and papery—this means they're fully mature and ready for harvesting. I avoid green or partially open heads; they won’t store well. The best time to collect is on a dry, sunny morning when moisture levels are low, which helps prevent mold later.
Gently twist the seed head from the stem—it should release easily without tearing. If it resists, the seed head isn’t fully ripe yet. Place the collected heads in a brown paper bag (not plastic) to allow airflow and prevent dampness. This keeps them fresh until you process them.
🪴 Step 2: Dry and Separate the Seeds
Spread the seed heads in a single layer on a clean, dry surface like a windowsill or table. Keep them out of direct sunlight—indirect light is best to avoid overheating. Over 7-10 days, the seed heads will dry completely, turning crisp and brittle. You’ll know they’re ready when the fluffy seed tufts (the feathery bits) detach easily with a light touch.
Once dry, place the seed heads in a large bowl and gently rub them between your hands or a fine mesh screen. The seeds will fall out while the chaff and empty husks stay behind. Sift the mixture to remove any remaining debris—clean seeds store better and germinate faster. A small kitchen strainer works perfectly for this.
⏰ Step 3: Store Seeds for Long-Term Viability
Transfer the clean seeds into a small envelope or airtight container labeled with the clematis variety and the harvest date. Store them in a cool, dry place—a refrigerator’s crisper drawer works well, or a sealed jar in a pantry. Clematis seeds stay viable for 1-2 years when stored properly, so this method ensures you’ll have fresh stock whenever you’re ready to plant.
I like to add a tiny packet of silica gel (the kind that comes with electronics) to the container to absorb any lingering moisture. This extra step prevents mold and keeps seeds crisp for longer. Check the seeds every few months—if they feel damp or smell musty, transfer them to a fresh container immediately.
🌱 Step 4: Prepare Seeds for Planting Next Season
When you’re ready to sow, soak the seeds in lukewarm water for 12-24 hours to soften the outer coating. This step mimics natural weathering and speeds up germination. After soaking, plant them in moist seed-starting mix at a depth of ¼ inch, covering lightly with additional mix. Keep the soil consistently moist but not soggy—clematis seeds need steady moisture to sprout.
Place the pots in a warm, bright spot (around 65-75°F) and cover them loosely with plastic wrap to retain humidity. Germination can take 3-6 weeks, so patience is key. Once the first true leaves appear, remove the plastic and provide bright, indirect light until the seedlings are strong enough to transplant outdoors in spring.
Tips & tricks for perfect clematis seed head harvesting
Here's what nobody tells you about getting the most from your clematis seed collection—these tricks make all the difference.
Timing Secret: Harvest on a dry morning after dew has evaporated but before the sun gets too intense. The 7-10 day drying period in Step 2 works best when starting with completely dry seed heads—this prevents any lingering moisture that could lead to mold during storage. I've learned this the hard way after watching batches develop fuzzy growth!
Storage Wisdom: The cool, dry place mentioned in Step 3 doesn't have to be a refrigerator—your basement or a sealed pantry works just as well. What matters most is maintaining consistent temperature and humidity. I keep a small jar of seeds in my basement where temps stay around 60°F, and they've remained viable for nearly two years. The silica gel packet is optional but worth it for peace of mind.
Germination Hack: For the 12-24 hour soaking in Step 4, use filtered water if your tap water has high chlorine content. Chlorine can inhibit germination, and this extra step ensures better sprouting rates. I like to add a drop of mild dish soap to the soaking water—it helps break surface tension and encourages even hydration of the seeds.
Visual Cue: When checking for mature seed heads in Step 1, look for a slight papery texture that feels almost like tissue paper. If you press gently and it crumbles easily between your fingers, that's your signal it's ready. Green or leathery heads need more time—don't rush this step, as immature seeds won't store properly.
Pro Tips for Clematis Seed Heads
- Here's what nobody tells you about getting the most from your clematis seed collection—these tricks make all the diff...
- Timing Secret: Harvest on a dry morning after dew has evaporated but before the sun gets too intense. The 7-10 day dr...
- Storage Wisdom: The cool, dry place mentioned in Step 3 doesn't have to be a refrigerator—your basement or a sealed p...
Frequently asked questions
Got questions about harvesting and saving clematis seed heads? You’re not alone! Here are some of the most common queries—plus quick, practical answers to keep your gardening game strong.
When is the best time to harvest clematis seed heads?
Harvest seed heads when they’re fully mature but before they split open and scatter seeds naturally. This usually happens in late summer to early fall (August–October), depending on your climate. Look for dry, papery seed pods—gently twist them off the vine to avoid damaging the plant.
How long can I store harvested clematis seeds?
Store seeds in a cool, dry place (like a sealed envelope or jar) for up to 6 months for best viability. For longer storage, refrigerate them in a sealed container with a desiccant (like silica gel) to prevent moisture buildup. Test germination rates annually if saving for multiple years.
Can I use clematis seed heads for anything other than propagation?
Beyond seeds, dried seed heads add textural charm to winter bouquets or dried floral arrangements. Their unique shapes contrast beautifully with evergreens or grasses. Just let them dry completely on the vine or indoors before arranging.
Why aren’t my clematis seeds germinating?
Clematis seeds often need a cold stratification period (4–6 weeks in the fridge) to break dormancy. If stored seeds fail to sprout, check for moisture (too damp = mold), temperature (too warm = rot), or age (older seeds germinate poorly). Try soaking seeds in water for 24 hours before planting.
Do I need to clean the seeds before storing them?
Not necessarily! Remove large debris (like stems or chaff) but leave the fluffy seed tufts intact—they help with natural dispersal. If storing long-term, lightly brush off excess dust with a soft brush. Over-cleaning can damage the delicate seed coats.
Wrapping up and next steps
Clematis seed heads aren’t just charming garden remnants—they’re a goldmine for year-round propagation! With the right zero-twist harvesting technique, you can preserve viability, boost your garden’s diversity, and even share seeds with fellow green thumbs.
Whether you’re a seasoned gardener or just starting, these methods make it effortless to nurture new clematis plants from last season’s seeds.
Ready to level up your garden game? Start by experimenting with a few seed heads this fall—try drying, storing, or even sowing them—and watch your garden transform next spring! 🌱✨