
Size
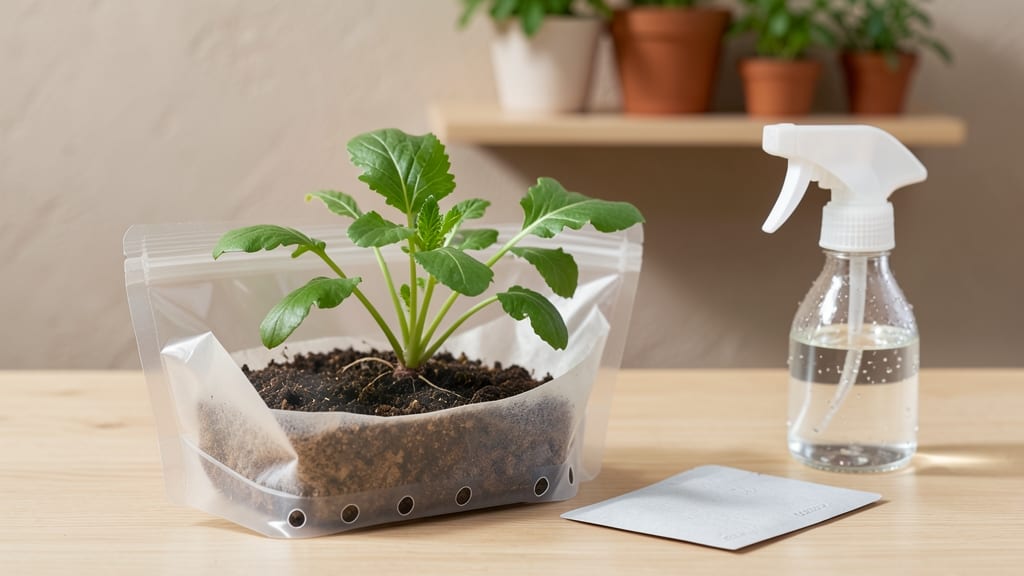
Growing seeds in a bag is the gardener's secret weapon for tiny spaces and zero waste. 🌱 I used to think sprouting required fancy trays and constant attention—until I discovered this bag method that turns a simple plastic bag into a self-contained growing system.
No mess, no fuss, and you can grow herbs or microgreens right on your kitchen counter. The beauty of this method is its simplicity: just a few supplies, minimal prep, and you're growing fresh greens in days.
You'll need a sturdy plastic bag, some soil or just water for sprouts, and your chosen seeds. The process keeps everything contained, so no spills or cleanup—just watch your plants grow right through the bag's mesh.
By the end of a week, you'll have vibrant microgreens ready to harvest or transplant. The bag method is perfect for herbs like basil, cilantro, or even sunflower sprouts—all while using less space than traditional pots.
It's also a great way to teach kids about gardening without the usual dirt and mess. Works for both beginners and experienced gardeners, whether you're growing for snacks, salads, or just the joy of watching something grow. Let's get those seeds sprouting!
📚 In This Guide
- What you need
- Instructions
- Tips and common mistakes
- Wrapping up and next steps
What you need
- ● 1 reusable sprouting bag (or a clean, breathable cloth bag with a drawstring—10x12 inches works well). Look for organic cotton or hemp bags labeled for sprouting.
- ● 1–2 tablespoons of seeds (choose your favorite: alfalfa, broccoli, radish, sunflower, or lentils). Organic, non-GMO seeds are ideal!
- ● Filtered or distilled water (about 1 cup per day for rinsing). Avoid tap water with chlorine if possible.
- ● 1 colander or strainer (for rinsing seeds if not using a bag with a built-in strainer). A fine-mesh strainer works best.
- ● A small spray bottle (for gentle watering if seeds are sensitive).
- ● A seed germination guide (to check ideal sprouting times for your seed type).
- ● A notebook (to track sprouting progress and experiment with different seeds!).
- ○ Vitamin C powder or tablets (optional, for preserving sprouts longer by preventing mold).
- ● A clean workspace (a kitchen counter or sink works great).
- ● 10–15 minutes daily for rinsing and draining (seriously, that’s it!).
- ● Patience! Sprouts are worth the wait—some take 3–7 days to harvest.
Step-by-Step instructions for growing seeds in a bag
This zero-waste method turns a simple bag into a self-watering sprouting station—no soil, no mess, just fresh greens.
🌱 Step 1: Choose and Prepare Your Seeds and Bag
Pick a small, organic seed packet—alfalfa, broccoli, or radish seeds work best for beginners. I like to use a quart-sized resealable plastic bag with a zipper, but paper lunch bags work too. Rinse the seeds in a bowl of cool water for 3-5 minutes to remove any debris, then drain.
Place the damp seeds into the bag, adding about 2 tablespoons for a quart-sized bag. Seal the bag, then give it a gentle shake to distribute the seeds evenly. This ensures they’ll have space to spread out and sprout without crowding. Here’s the thing—don’t skip the rinsing. It prevents mold and gives your seeds a clean start.
💧 Step 2: Store and Rinse Daily for 3-5 Days
Hang the sealed bag in a cool, dark spot—like a cupboard or pantry—where the temperature stays between 60-70°F. You’ll see tiny sprouts appear in just 24-48 hours. Every 12-24 hours, unzip the bag, drain the water, then give it a quick shake to aerate the seeds. Rinse them again under cool running water for 1-2 minutes.
Watch for the first signs of growth—tiny white roots will appear first, followed by delicate green sprouts. If you notice any slimy residue or foul smell, rinse more thoroughly and drain well. This keeps your sprouts fresh and prevents bacteria from taking over. Real talk: the first few rinses might feel tedious, but it’s worth it for crisp, clean sprouts.
☀️ Step 3: Move to Light and Continue Rinsing
Once your sprouts reach about 1-2 inches tall—usually on day 3-5—it’s time to move them to indirect sunlight. I place mine near a bright window but not in direct sun, which can scorch the delicate leaves. Keep rinsing daily, but reduce the water time to 30-60 seconds to avoid over-saturating the sprouts.
You’ll see a noticeable change as the sprouts turn a vibrant green and develop longer stems. This is your signal that they’re ready for a final rinse and a quick spin in a salad spinner or clean towel to remove excess moisture. Don’t overwater now—just enough to keep them damp, not soggy. Overcrowding or excess moisture is how mold creeps in.
✂️ Step 4: Harvest and Store for Freshness
Harvest your sprouts when they reach your preferred length—usually 2-3 inches for most varieties. Use clean scissors to snip the stems just above the roots, then give them one last rinse. I like to store them in a sealed container lined with a paper towel to absorb any remaining moisture. Keep them in the fridge for up to 5-7 days.
Here’s where it gets fun—you can replant the roots! Rinse the roots again, place them back in the bag, and repeat the process for a second harvest. Just be sure to rinse them more frequently to prevent mold. You’ll love how this method turns a simple bag into a mini garden that keeps giving. Plus, no cleanup—just toss the bag when you’re done!
Tips & tricks for perfect zero-waste sprouting
Here's what nobody tells you about growing sprouts—these little tricks make all the difference between slimy messes and crisp, vibrant greens.
Seed Selection Matters: Not all seeds sprout equally in this method. Alfalfa and radish seeds are your safest bets for beginners—they germinate quickly and handle moisture well. Broccoli sprouts take a little longer to show results but pack serious flavor. Avoid tiny seeds like clover; they're better suited for traditional sprouting trays where you can control spacing better.
Temperature Control: That 60-70°F range in Step 2 is non-negotiable for consistent germination. If your kitchen runs cooler, place the bag near a sunny window during the day or use a small heating pad set to low under the bag at night. Too cold and your seeds will take forever to sprout; too hot and they'll overheat. I learned this the hard way after watching my sprouts turn mushy in a warm kitchen corner.
Rinsing Technique: The 1-2 minute rinse in Step 2 isn't just about water—it's about aeration. After draining, give the bag a good shake to break up any clumps and expose all seeds to air. This prevents mold from forming in hidden pockets. For the final rinse in Step 3, I use a fine-mesh strainer under the tap to control the water pressure—too much force can damage delicate sprouts.
Light Transition Tip: When moving to light in Step 3, don't rush it! Let your sprouts acclimate gradually by placing them near a window for just 1-2 hours on the first day, then increasing exposure. Sudden bright light can shock young sprouts, causing them to turn yellow or grow leggy. The goal is vibrant green, not sunburned stems.
Pro Tips for Grow A Seed In A Bag
- Here's what nobody tells you about growing sprouts—these little tricks make all the difference between slimy messes a...
- Seed Selection Matters: Not all seeds sprout equally in this method. Alfalfa and radish seeds are your safest bets fo...
- Temperature Control: That 60-70°F range in Step 2 is non-negotiable for consistent germination. If your kitchen runs ...
Frequently asked questions
Got questions about growing seeds in a bag? You’re not alone! Here are some of the most common concerns—and their easy solutions—to help you sprout like a pro.
How long does it take for seeds to sprout in a bag?
Most seeds (like alfalfa, lentils, or radishes) sprout in 3–7 days when kept in a warm, dark place. Smaller seeds (e.g., clover or broccoli) may sprout faster (2–4 days), while larger seeds (like sunflower) can take up to 10–14 days. Check daily for tiny sprouts!
Do I need to rinse the seeds every day?
Yes! Rinse your seeds 1–2 times daily with cool water to keep them moist and oxygenated. After sprouting, rinse 2–3 times daily until you harvest. Use a fine-mesh strainer or colander to avoid losing seeds. Pro tip: Drain well to prevent mold!
What if my seeds smell bad or get moldy?
Bad smells or fuzzy mold mean your seeds are too wet or stagnant. Immediately rinse thoroughly, drain well, and store in a dry, breathable bag (like a mesh produce bag). If mold appears, discard the batch—it’s not safe to eat. Prevent it: Use organic seeds and avoid overcrowding.
Can I use any seeds in a sprouting bag?
Not all seeds work for sprouting! Stick to edible, non-toxic seeds like alfalfa, radish, broccoli, lentils, or mung beans. Avoid: Potatoes, tomatoes, or raw beans (they contain toxins). Check labels for "sproutable" seeds, or research online before starting.
What do I do with the bag after sprouting?
Reuse your sprouting bag 3–5 times by washing it with hot, soapy water and letting it dry completely. For extra hygiene, sanitize with a vinegar-water solution (1:1 ratio). Once it’s worn out, compost it—no waste!
Wrapping up and next steps
Growing a seed in a bag is more than just a clever hack—it’s a simple, sustainable way to bring fresh sprouts to your table with minimal effort and zero waste.
Whether you’re a busy parent, a zero-waste enthusiast, or just curious about easy gardening, this method proves that small steps lead to big changes. 🌱
Now that you’re ready to sprout, why not take it further? Try growing a variety of seeds—from crunchy radishes to protein-packed lentils—and experiment with flavors in your favorite dishes. Your future self (and the planet) will thank you! 💚