
Lawn
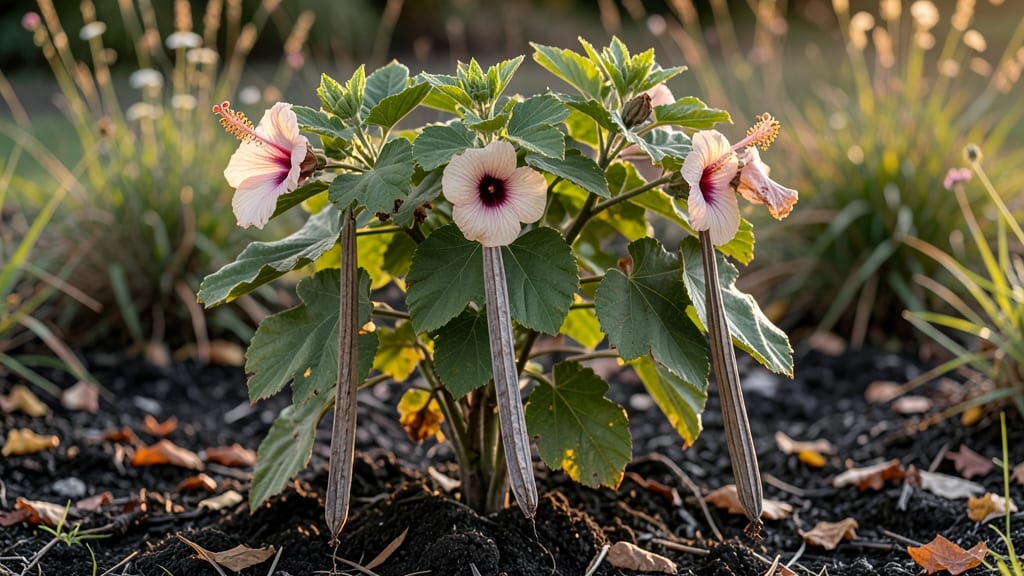
Harvesting hardy hibiscus seed pods without the frustrating twist-and-pull struggle is the secret to propagating these showstopper plants. 🌿 I’ve wrestled with those stubborn pods for years—until I discovered the simple technique that lets you collect seeds with minimal fuss and maximum success.
The key is patience and timing: wait until the pods turn from green to a dry, papery brown before harvesting. Once they’re ready, a gentle twist usually releases the seeds, but if they resist, a small knife or scissors works better than brute force.
Store the seeds in a cool, dry place for up to a year, and you’ll have a ready supply for next season’s garden. What you’ll end up with is a tray of plump, dark seeds that germinate reliably when given warmth and consistent moisture.
The first true leaves appear in just 10-14 days, and with proper care, you’ll have sturdy seedlings ready for transplanting by spring. This method works for both Hibiscus moscheutos (swamp hibiscus) and Hibiscus syriacus (rose of Sharon), making it perfect for gardeners in zones 5-9.
No more struggling with stubborn pods—just stress-free propagation!
📚 In This Guide
- What you need
- Instructions
- Tips and common mistakes
- Wrapping up and next steps
What you need
- ● Gloves (heavy-duty gardening gloves) – 1 pair (to protect hands from prickly pods and thorns).
- ● Pruning shears or sharp scissors – 1 pair (clean, sterilized blades for precise cuts).
- ● Large paper bags or breathable mesh bags – 2-3 bags (for collecting pods without crushing them).
- ● Newspaper or cardboard – 1-2 sheets (to lay pods out for drying).
- ● Small paintbrush or soft cloth – 1 (for gently removing seeds from dried pods).
- ● Labeling tags or markers – 1 pack (to track seed varieties if saving for planting).
- ○ Spray bottle with water – 1 (optional, for dampening pods if they’re stubbornly dry).
- ● Seed-saving envelopes – For storing seeds long-term in a cool, dry place.
- ● Fine-mesh sieve – To separate seeds from chaff efficiently.
- ● Disinfectant spray – To clean tools between uses and prevent mold.
- ● Magnifying glass – For inspecting seeds for viability before planting.
Step-by-step guide to harvesting hardy hibiscus seed pods
Here's how to collect seeds without the stubborn twist-and-pull frustration.
🌿 Step 1: Identify Mature Seed Pods
Look for pods that have turned a dry, papery brown instead of the plant's usual green. They should feel slightly papery to the touch and may even start cracking open on their own. I check mine in late fall when temperatures dip below 60°F—this signals the plant's natural drying cycle has begun.
Gently squeeze a ripe pod between your fingers. If it crumbles easily, it's ready for harvesting. Avoid pods that are still green or firm—they won't contain viable seeds. I find the best time to harvest is on a dry morning after dew has evaporated, as moisture makes pods stickier and harder to handle.
✂️ Step 2: Harvest Without Damaging the Plant
Use clean, sharp scissors or pruning shears to snip the pods cleanly from the stem. Cut about ½ inch below the pod to avoid leaving stubs that could attract pests. I always sterilize my tools with rubbing alcohol first—this prevents spreading any fungal spores that might be hiding on the plant.
Place harvested pods in a paper bag (not plastic) to allow airflow while they finish drying. If you're working with multiple pods, I recommend harvesting in batches of 4-5 pods at a time to avoid overcrowding. Never pull pods by hand—they twist stubbornly and often tear, leaving the plant vulnerable to disease.
🪴 Step 3: Dry and Prepare for Seed Extraction
Spread the pods out on a clean, dry surface in a single layer. I use a wire mesh screen or an old window screen to allow air circulation from all sides. Place them in a warm, dry spot with indirect light—direct sun can cause them to crack too quickly and scatter seeds prematurely.
Check pods daily for 7-10 days until they're completely dry and brittle. You'll know they're ready when they shatter easily with just a light tap. Store them in a sealed envelope or small paper bag in a cool, dark place until you're ready to extract the seeds.
💧 Step 4: Extract and Store Seeds
Once fully dry, place a single pod on a clean cutting board and gently crush it with your fingers or the flat side of a spoon. The seeds will pop out easily if the pods were properly dried. I use a small sieve to catch any tiny seeds that might scatter during extraction.
Remove any chaff or debris by winnowing—simply pour the seeds onto a piece of white paper and gently blow away the lighter debris. Store clean seeds in a labeled envelope or small glass jar in a cool, dry place. Hardy hibiscus seeds remain viable for 2-3 years if stored properly, so don't rush to plant them all at once.
🌱 Step 5: Plant or Store for Future Use
If you're ready to plant immediately, sow seeds ¼ inch deep in well-draining soil. Keep the soil consistently moist but not soggy until germination, which typically occurs in 14-21 days at 70-75°F. I always plant mine in small pots first—this gives seedlings room to grow before transplanting outdoors in spring.
For seeds you're saving, label each envelope with the variety and harvest date. Hardy hibiscus seeds are surprisingly resilient, but they do best when planted fresh. If you're not ready to grow them right away, store them in the refrigerator to extend their viability even further.
Tips & tricks for perfect hardy hibiscus seed pod harvesting
These little tricks will turn your seed collection from frustrating to foolproof.
Harvest Timing Secret: The 60°F temperature threshold is your golden window—this is when the pods' natural drying cycle kicks into high gear. I've found that harvesting on crisp mornings after frost (when temps hover around 50-55°F) gives me the driest pods, which means easier handling and less mess during extraction. Just avoid harvesting after rain—moisture makes the pods stickier and more prone to tearing when you try to cut them.
Tool Technique: Sterilizing your scissors with rubbing alcohol isn't just about cleanliness—it's about plant health. I keep a small bottle of 70% isopropyl alcohol right by my pruning shears. The alcohol kills any potential fungal spores that might be lurking on the plant, which could otherwise infect your hibiscus. Pro tip: Wipe the blades with a paper towel after each cut to remove any plant sap that could dull your tools over time.
Drying Strategy: That 7-10 day drying period is non-negotiable for seed viability, but you can speed up the process slightly by placing your drying setup near a gentle heat source—like a sunny windowsill during the day (but out of direct sun) or near a space heater at night. Just don't rush it! Over-drying can make the seeds too brittle, while under-drying leaves them prone to mold. I tap my pods daily with a pencil—they're ready when they shatter completely at the first tap.
Storage Wisdom: For long-term seed storage, I've had the best luck using small glass jars with tight-sealing lids. The glass doesn't absorb moisture like paper can, and the dark color helps block light that can degrade seed quality. Label each jar with both the variety and harvest date—this is especially important if you're saving multiple hibiscus varieties. I store mine in the refrigerator's crisper drawer where the temperature stays consistently cool (around 35-40°F), which helps preserve viability for that full 2-3 year window.
Pro Tips for Hardy Hibiscus Seed Pods
- These little tricks will turn your seed collection from frustrating to foolproof.
- Harvest Timing Secret: The 60°F temperature threshold is your golden window—this is when the pods' natural drying cyc...
- Tool Technique: Sterilizing your scissors with rubbing alcohol isn't just about cleanliness—it's about plant health. ...
Frequently asked questions
Got questions about harvesting hardy hibiscus seed pods?
You’re not alone! Here are answers to the most common queries to help you navigate the process like a pro.
When is the best time to harvest hardy hibiscus seed pods?
Harvest seed pods when they turn brown and dry but before they split open naturally. This usually happens in late fall or early winter, depending on your climate. Check pods weekly—they’re ready when they’re crispy to the touch but still intact. Pro tip: Morning harvests prevent humidity from causing premature splitting!
How do I remove seed pods without damaging the plant?
Use sharp pruners or clean scissors to snip pods at the base, leaving a small stem. Avoid tugging, which can uproot the plant or leave wounds. For stubborn pods, gently twist while pulling downward. Safety tip: Wear gloves—some varieties have prickly pods!
Can I save seed pods from store-bought hibiscus flowers?
Unfortunately, no. Store-bought hibiscus flowers are often hybridized and sterile, meaning they won’t produce viable seeds. For seed pods, you’ll need to grow hibiscus from open-pollinated varieties or save seeds from your own plants. Bonus: Try ‘Dwarf Red’ or ‘Luna Red’ for reliable seed production!
How should I store harvested seed pods for planting?
Let pods dry completely (1–2 weeks in a cool, dry place), then remove seeds by crushing the pods gently. Store seeds in a paper envelope or breathable container in a dark, cool spot. They’ll stay viable for 1–2 years. Tip: Label seeds with the harvest date to track freshness!
What do I do if my seed pods rot or mold before drying?
High humidity or wet conditions can cause rot. If this happens, discard affected pods immediately. To prevent it, harvest on dry days and avoid overhead watering. For future crops, choose disease-resistant varieties or grow hibiscus in well-draining soil. Quick fix: Use a fan in a warm, dry room to speed up drying!
Wrapping up and next steps
Harvesting hardy hibiscus seed pods doesn’t have to be a tangled mess—with the right tools and techniques, you can collect seeds effortlessly while keeping your plants thriving! 🌱 Whether you’re saving seeds for next season or simply admiring their unique beauty, these stress-free methods ensure success.
Now that you’re armed with knowledge, why not share your newfound skills with fellow gardeners or experiment with growing your own hibiscus from seed? Happy harvesting! 🌸