
Lawn
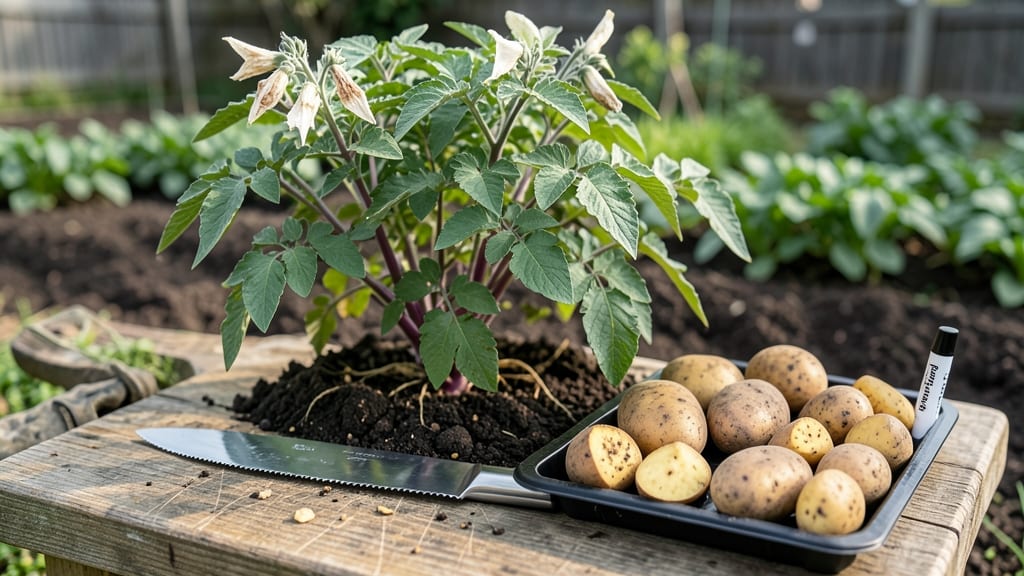
Cutting seed potatoes the right way turns a single tuber into a bumper crop—perfect slices mean faster sprouting and stronger plants. 🌱 I’ve sliced hundreds of potatoes over the years, and the difference between a healthy start and a failed patch comes down to sharp cuts, proper healing, and timing.
Skip the guesswork with these foolproof steps that’ll have your potatoes ready for planting in just 2 weeks.
You’ll need a clean knife, seed potatoes (certified disease-free), a well-ventilated workspace, and a few hours of patience. The goal is to create 1.5- to 2-inch slices with at least two "eyes" (sprouts) per piece—this ensures each cut will grow into a vigorous plant.
Organic growers should use sterilized tools to avoid introducing pathogens, while conventional gardeners can focus on sharpness and speed to minimize stress on the potato.
After slicing, let the cuts heal for 24-48 hours in a cool, dark place—this prevents rot and encourages strong root growth. You’ll see the edges dry slightly and the sprouts thicken, signaling they’re ready to plant.
By the time you’re ready to set them in the soil, your cut potatoes will be tougher and more resilient than store-bought seedlings, giving you a head start on the season.
This method works for both early and late varieties, though timing matters: cut seed potatoes for spring planting in early spring, while those for fall harvest can be prepped a few weeks before the last frost.
Whether you’re growing in rows, containers, or raised beds, these slices will give you the confidence to plant more densely without overcrowding—just space them 10-12 inches apart for optimal growth.
📚 In This Guide
- What you need
- Instructions
- Tips and common mistakes
- Wrapping up and next steps
What you need
- ● Seed potatoes: Certified disease-free, organic or non-organic (5–10 lbs, depending on planting scale). Choose varieties like Yukon Gold, Red Pontiac, or Fingerlings for best results.
- ● Sharp knife or potato cutter: A clean, sterilized knife (or a dedicated potato cutter) to make precise cuts. Avoid dull blades—they crush tubers!
- ● Cutting surface: A clean wooden board, plastic tray, or newspaper (to prevent contamination and easy cleanup).
- ○ Disinfectant (optional but recommended): Rubbing alcohol (70% isopropyl) or a 10% bleach solution to sterilize tools and surfaces.
- ● Paper towels or paper bags: For drying cut pieces before sprouting (absorbs excess moisture and prevents rot).
- ● Pencil or marker: To label varieties if using multiple types (saves confusion later!).
- ● Hydrogen peroxide (3%) or cinnamon: Sprinkle on cuts to prevent bacterial/fungal growth while sprouting.
- ● Seed potato tray or egg cartons: For organized sprouting (keeps pieces separate and easy to monitor).
- ● Garden twine or labels: To mark trays or bags with potato types and cutting dates.
- ● Gloves: Protects hands from potato starch (can irritate skin) and keeps cuts clean.
Step-by-step instructions for cutting seed potatoes
Here's how I prepare seed potatoes for maximum sprouting—no guesswork, just reliable results.
🪴 Step 1: Select and Prepare Healthy Seed Potatoes
Choose firm, disease-free potatoes with at least 1-2 inch diameter and visible eyes (sprouts). Avoid soft, green, or shriveled tubers—these won’t sprout well. Wash the potatoes gently to remove dirt, then let them dry completely on a clean towel. This prevents rot when you cut them later.
I like to work in a well-lit area with clean hands and a sharp knife—this ensures precision and reduces stress on the potato. If you’re short on time, you can skip the drying step, but the potatoes will be slightly wetter to handle. The goal is to minimize damage to the flesh while exposing the eyes.
✂️ Step 2: Cut Potatoes into Perfect Slices
Use a sterilized knife (wipe with rubbing alcohol) to cut each potato into pieces with 2-3 healthy eyes per slice. Each piece should be roughly 1.5-2 ounces—about the size of a golf ball. The key is to make clean cuts without crushing the eyes, as damaged sprouts won’t grow.
Here’s the thing—I avoid cutting too close to the eyes. Leave at least ½ inch of potato around each sprout to give the new plant enough energy to establish roots. If a slice has only one eye, pair it with another slice to balance the cuttings. This ensures every piece has the potential to grow.
💧 Step 3: Let Cuts Heal Before Planting
Place the cut potatoes in a cool, dark, and well-ventilated spot for 24-48 hours. This allows the cut surfaces to form a protective callus, which prevents rot when planted. Think of it like scabbing over a scrape—it’s nature’s way of protecting the wound.
I store mine on a wire rack or paper towels to avoid moisture buildup. If you’re in a humid climate, reduce healing time to 24 hours to prevent premature sprouting or mold. The callused slices will look slightly dry and firm to the touch—this is your signal they’re ready for planting.
☀️ Step 4: Plant Callused Slices for Sprouting
After healing, plant the slices with the eyes facing upward in a tray or directly in soil, 2 inches deep. Space them 3-4 inches apart to allow room for root development. Use a light, well-draining mix to encourage strong root growth.
Keep the soil consistently moist but not soggy—you’ll know it’s right when the surface feels damp but not waterlogged. Place the tray in a bright, indirect light spot (like a sunny windowsill) and wait for 2-4 weeks for sprouts to emerge. Avoid direct sunlight at this stage—it can scorch the tender shoots.
⏰ Step 5: Monitor and Prepare for Transplanting
Once sprouts reach 2-3 inches tall with visible roots, they’re ready to harden off. Gradually expose them to outdoor conditions over 7-10 days by moving them to a sheltered spot for increasing lengths of time. This toughens the young plants for the garden.
Here’s where it gets fun—watch the roots and stems thicken as they prepare for transplanting. You’ll know they’re ready when the foliage looks vibrant and the roots fill the container. Plant them outdoors after the last frost, spacing 12-15 inches apart in rows. The callused slices you prepped will now reward you with robust, disease-resistant plants.
Tips & tricks for perfect seed potato preparation
These little details make all the difference between healthy sprouts and wasted effort—trust me, I've learned this the hard way after ruining three batches of seed potatoes.
Knife Selection: A sharp, sterilized knife is non-negotiable. I use a chef's knife or a potato cutter specifically designed for this task—it gives you cleaner cuts and reduces the risk of crushing those precious eyes. For larger batches, a dedicated potato cutter with a guard can help maintain consistent ½-inch spacing around each sprout. The cleaner the cut, the better the healing process will be.
Sprout Health Check: Before cutting, examine each potato carefully. Look for eyes that are plump and white—not shriveled or blackened. If you find any with dark or sunken eyes, discard those potatoes entirely. Healthy sprouts will have a slight greenish tint around the base, indicating they're ready to grow. This step alone can save you from weak, underperforming plants later.
Healing Environment: The 24-48 hour healing period is where many people cut corners, but don't skip it! I've found that placing the cut potatoes on a clean, unglazed ceramic tile (which naturally wicks away moisture) works better than paper towels in humid conditions. The goal is to create that protective callus layer—if your kitchen is particularly damp, reduce to 24 hours maximum to prevent premature sprouting. You'll know it's ready when the cut surfaces feel slightly dry and firm to the touch.
Storage Wisdom: If you need to store your cut potatoes before planting, wrap them individually in damp paper towels and place them in a sealed plastic bag in the refrigerator. This mimics the cool, moist conditions they'd experience in a seed tray. They'll keep for up to 5 days this way, but plant them as soon as possible for best results. The key is maintaining that balance between moisture and airflow—too much moisture causes rot, too little prevents proper callusing.
Pro Tips for Cut Seed Potatoes
- These little details make all the difference between healthy sprouts and wasted effort—trust me, I've learned this th...
- Knife Selection: A sharp, sterilized knife is non-negotiable. I use a chef's knife or a potato cutter specifically de...
- Sprout Health Check: Before cutting, examine each potato carefully. Look for eyes that are plump and white—not shrive...
Frequently asked questions
Got questions about cutting seed potatoes? You’re not alone! Here are answers to the most common queries to help you grow strong, healthy plants with ease.
Can I cut seed potatoes too early before planting?
Nope! Wait until 1-2 weeks before planting to cut your seed potatoes. If you slice them too soon, the cut surfaces may dry out or rot before sprouting. Store them in a cool, dark place with the cut side up until planting day.
How long do cut seed potatoes need to heal before planting?
Let the cut edges callus over for 1-3 days before planting. This toughens the skin, reducing rot risk. Place them in a dry, shady spot—like a paper bag or cardboard box—until you see a slight scab form.
What’s the best way to store cut seed potatoes before planting?
Store them in a cool (40–50°F), dark, and humid environment (like a basement or garage). Use a paper bag or a container with a damp towel to keep moisture balanced. Avoid plastic bags—they trap too much humidity and cause rot.
My cut potatoes are turning mushy—what went wrong?
Mushy cuts usually mean too much moisture or bacteria. Check for these culprits:
- Storing in a damp or warm spot
- Using a dull knife (tears tissue, inviting rot)
- Cutting diseased or soft potatoes
Can I use store-bought potatoes as seed potatoes?
Technically yes, but certified seed potatoes are better. Store-bought spuds may carry diseases or be treated with sprouting inhibitors. If you use them, choose organic, unsprouted potatoes and inspect for pests before cutting.
Wrapping up and next steps
Cutting seed potatoes is a simple yet powerful way to boost your garden’s yield—just follow the right steps! With the right tools, timing, and technique, you’ll be well on your way to healthy sprouts and a thriving harvest. 🌱
Now that you’re armed with knowledge, grab those spuds and get started! Pro tip: Keep a garden journal to track your progress and refine your method each season. Happy gardening!