
Propagation
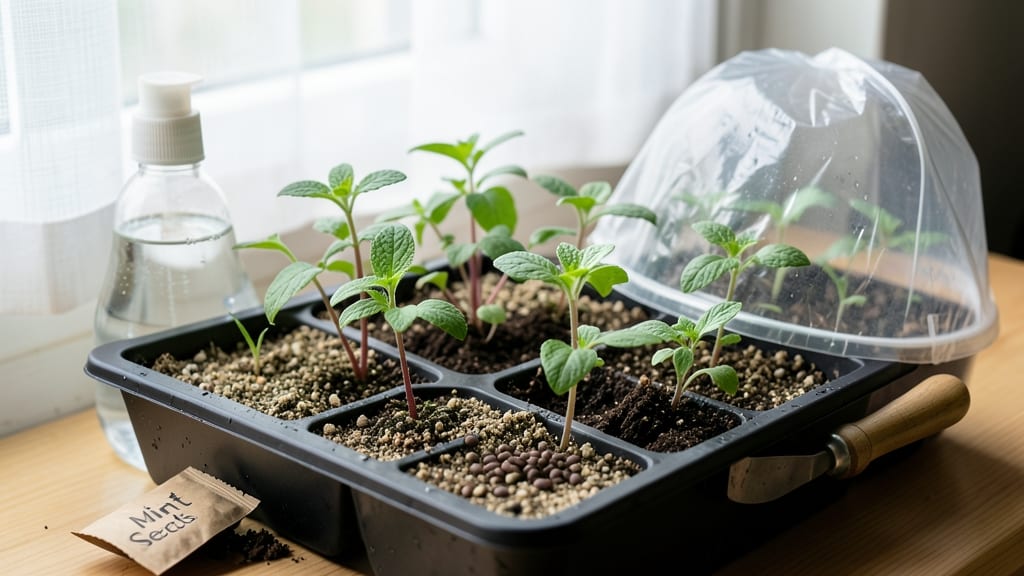
Mint seed germination feels like waiting for a stubborn friend to show up—until you use the cold-moist trick. 🌱 That simple tweak cuts waiting time from weeks to just 7-10 days, turning tiny seeds into vibrant green sprouts that fill your garden with that familiar fresh scent. The secret? A damp paper towel tucked into a sealed bag and chilled for 24-48 hours before planting. Most people skip this step and end up staring at empty soil for months. I’ve tried both methods—trust me, the cold prep makes all the difference, especially in cooler climates where mint seeds naturally hesitate to wake up. Once sprouted, those first leaves appear fast—within 2 weeks—and you’ll have a lush mint plant ready for transplanting. The key is patience with the initial cold soak; it mimics winter’s natural dormancy break, tricking seeds into thinking spring has arrived. Works for peppermint, spearmint, or any variety, and the same trick speeds up other slow starters like basil. Here’s exactly how to do it without the guesswork—no more empty seed trays!
📚 In This Guide
- What you need
- Instructions
- Tips and common mistakes
- Wrapping up and next steps
What you need
- ● Fresh mint seeds – High-quality, organic seeds (1–2 tsp for a small batch, or 1 tbsp for larger yields). Look for varieties like peppermint or spearmint.
- ● Germination paper or damp paper towels – 2–3 sheets (or a roll of seed-starting paper). Avoid regular printer paper—it’s too thick!
- ● Plastic bag or airtight container – A ziplock bag (quart-sized) or a small Tupperware with a lid to create humidity.
- ● Spray bottle with water – A fine-mist sprayer ensures even moisture without drowning the seeds.
- ○ Small tray or plate – To hold the seeds while they germinate (optional but helpful).
- ● Refrigerator – Required for the cold-moist trick! A standard fridge (35–40°F) works perfectly.
- ○ Growing medium – Potting soil or coco coir (for transplanting after germination). Optional: Add a handful of perlite for drainage.
- ● Seedling pots or trays – Small biodegradable pots (2–3 inches) or a seedling tray with cells.
- ● Grow lights or sunny windowsill – Mint loves light! A 12–16 hour light cycle speeds up growth.
- ● Plant labels & marker – To track varieties and germination dates (because mint can get wild!).
- ○ Fungicide (optional) – A mild solution like hydrogen peroxide (3%) to prevent mold if humidity gets too high.
How to germinate mint seeds using the cold-moist method
This trick cuts germination time in half by mimicking mint's natural cold-wet soil conditions.
🌱 Step 1: Prepare the Seeds for Cold Stratification
Fill a small container with damp paper towels—they should feel like a wrung-out sponge, not dripping. Lay the mint seeds about 1 inch apart on the towels, then fold them to cover the seeds completely. Place the wrapped seeds in a sealed plastic bag with a tiny hole for airflow.
Here's the thing—mint seeds need this cold treatment to break dormancy. Refrigerate the bag for 7-10 days at 34-40°F. Check daily: if the towels dry out, mist them lightly with water. You'll see nothing happening yet, but this cold-moist phase is what triggers germination.
💧 Step 2: Transition to Warm Germination Conditions
After the cold treatment, remove the seeds from the fridge and place them in a shallow tray lined with fresh, damp paper towels. Keep the towels consistently moist—you want them damp enough that water beads form when you press gently, but not soaking wet. Cover the tray loosely with plastic wrap to maintain humidity.
Move the tray to a warm spot, ideally 70-75°F. A seedling heat mat works wonders here, but even a sunny windowsill above your fridge will do. Within 5-14 days, you'll notice tiny sprouts pushing through the towels. That's your signal the cold-moist trick worked!
☀️ Step 3: Prepare Soil and Transplant Seedlings
While waiting for sprouts, fill small pots with well-draining potting mix—mint hates soggy roots. Make holes ¼ inch deep for each seedling using a pencil or toothpick. When the sprouts reach about ½ inch tall, gently lift them from the paper towels with a toothpick and place one in each hole.
Press the soil lightly around the seedlings to secure them, then water gently from the bottom of the pot. The soil should be moist but not waterlogged. Place the pots in bright, indirect light for the first week—direct sun can scorch these tender new plants. You'll see true leaves (not the initial seed leaves) appear within 2-3 weeks.
🌿 Step 4: Maintain Ideal Growing Conditions
Once seedlings have 3-4 true leaves, they're ready for slightly more light. Gradually introduce them to 4-6 hours of morning sun daily, then increase to full sun over 7-10 days. Mint thrives in 60-80°F temperatures, so if your space runs cooler, use a grow light to supplement.
Water when the top inch of soil feels dry, but don't let the soil dry out completely—mint prefers consistent moisture. You'll know you're doing it right when the plants grow vigorously and develop that classic minty aroma. Real talk: mint spreads easily, so keep it contained unless you're planning a dedicated mint garden!
Tips & tricks for perfect mint seed germination
Here's what nobody tells you about getting mint seeds to sprout reliably.
Cold Stratification Precision: The 7-10 days in the fridge at 34-40°F is non-negotiable for mint seeds. I learned this the hard way after trying to rush the process—seeds need this cold shock to break their natural dormancy. Place the sealed bag on the middle shelf of your fridge where temps stay most consistent. If your fridge runs warmer, extend the cold treatment by 2-3 days. The tiny hole in the bag is crucial too—it prevents mold while allowing just enough airflow.
Moisture Management Secret: Those damp paper towels should feel like a wrung-out sponge, not a dripping washcloth. Too much moisture causes mold, too little prevents germination. I use a spray bottle to mist the towels every other day during cold stratification, keeping them consistently damp but never soggy. After moving to warm conditions, I find a clear plastic container with a lid works perfectly—it traps humidity while letting me see the seeds without opening the lid constantly.
Light Transition Strategy: Mint seedlings are ultra-sensitive to direct sun. Start them in bright indirect light for that first week after transplanting, then gradually introduce morning sun over 7-10 days. I use a sheer curtain to diffuse sunlight if my windowsill gets too intense. The goal is to harden them off slowly—think of it like sun protection for your tiny plants. You'll know you're doing it right when they develop that classic minty aroma before you even see the leaves fully mature.
Equipment Upgrade: While you can use regular paper towels, I've found that using a seedling heat mat ($15 on Amazon) makes all the difference during the warm germination phase. It keeps the tray consistently at 70-75°F without needing to monitor constantly. For the cold stratification, I repurpose a small plastic takeout container with a tiny hole punched in the lid—it's free and works perfectly. These small upgrades cut down on daily maintenance while improving success rates dramatically.
Pro Tips for Mint Seed Germination
- Here's what nobody tells you about getting mint seeds to sprout reliably.
- Cold Stratification Precision: The 7-10 days in the fridge at 34-40°F is non-negotiable for mint seeds. I learned thi...
- Moisture Management Secret: Those damp paper towels should feel like a wrung-out sponge, not a dripping washcloth. To...
Frequently asked questions
Got questions about mint seed germination?
You’re not alone! Here are some of the most common queries—and their answers—to help you grow mint from seed like a pro.
How long does it take for mint seeds to germinate?
With the cold-moist stratification trick, mint seeds typically sprout in 2–4 weeks. If you’re impatient, check moisture levels—seeds need consistent dampness (not soggy!) to break dormancy. Patience pays off, though: some stubborn seeds may take up to 6 weeks.
Can I germinate mint seeds without stratification?
Yes, but success rates drop significantly. Mint seeds have a hard seed coat, so stratification mimics natural winter conditions to soften it. Without it, germination may take 6–8 weeks or fail entirely. For best results, stick with the cold-moist method or use a sandpaper trick to scratch the seed coat lightly.
Why aren’t my mint seeds sprouting?
Troubleshooting time! Check these common culprits:
- Temperature: Too warm (above 75°F) halts germination. Keep seeds at 60–70°F.
- Moisture: Dry seeds = no sprouts. Use a spray bottle to keep soil evenly damp (not waterlogged).
- Light: Seeds germinate in darkness. Wait until sprouts appear (1–2 inches tall) before exposing to light.
- Seed viability: Old seeds (over 1 year) may fail. Test a few in warm water—if they sink, they’re likely still good.
When is the best time to plant mint seeds outdoors?
Timing matters! For direct outdoor sowing, plant seeds 4–6 weeks before your last frost date (spring) or 8–10 weeks before the first frost (fall). Mint thrives in USDA Zones 3–11, but young plants need protection from harsh cold. Start indoors 6–8 weeks early if your climate is unpredictable.
Should I use store-bought mint plants instead of seeds?
It depends on your goals! Pros of seeds: Wider variety, organic options, and fun experimentation. Pros of cuttings: Faster growth (roots in 2–3 weeks) and identical plants to the parent. For beginners, cuttings are easier, but seeds let you grow heirloom or rare varieties like chocolate mint or pineapple mint.
Wrapping up and next steps
Mastering mint seed germination with the cold-moist trick is all about patience, preparation, and a little science! Whether you’re a seasoned gardener or just starting, these steps will help you grow vibrant mint plants with confidence. 🌱
Now that you know the secrets, it’s time to roll up your sleeves and plant those seeds. Keep track of your progress, adjust conditions as needed, and soon you’ll be harvesting fresh mint for teas, cocktails, or culinary creations. Happy growing!
💡 Next Steps:
- Start with a small batch to refine your technique.
- Experiment with different mint varieties for variety.
- Share your success (or lessons learned) with fellow gardeners!