
Lawn
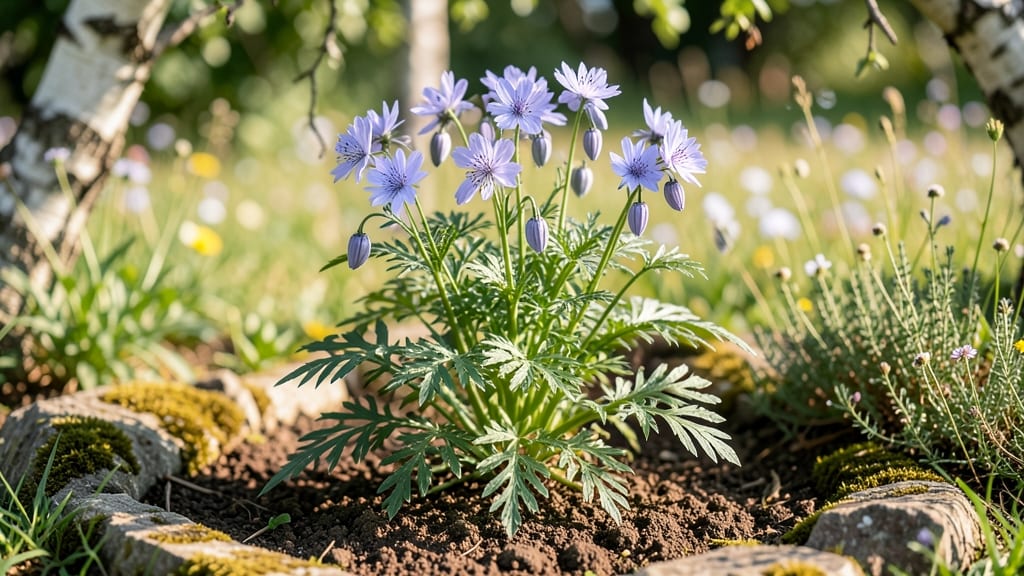
Harvesting nigella seed pods without twisting them preserves viability and saves you from brittle, crumbling messes. 🌿 The secret lies in timing—wait until the pods turn golden-brown and begin splitting naturally, then gently coax the seeds free with a soft tap.
I learned this the hard way after struggling with dried, shattered pods that scattered seeds everywhere.
Nigella thrives in well-drained soil with full sun and minimal fuss—think of it as the low-maintenance annual that rewards patience. Plant seeds directly in spring after the last frost, and within 8-10 weeks, you’ll have striking blue flowers that transform into those iconic lace-like seed pods.
The key is consistency: water lightly to keep soil moist but never soggy.
What you’ll end up with is a trove of seeds for next year’s garden, plus ornamental pods that add texture to dried arrangements. The seeds themselves are edible—earthy and slightly peppery—and perfect for sprinkling over salads or baking.
Imagine the satisfaction of harvesting your own seeds while creating beauty in the garden.
This method works equally well for gardeners with small windowsills or expansive borders. Whether you’re saving seeds for future plantings or crafting winter wreaths, nigella seed pods deliver both function and form. Let’s make the most of their unique charm.
📚 In This Guide
- What you need
- Instructions
- Tips and common mistakes
- Wrapping up and next steps
What you need
- ● Mature nigella seed pods: 10–20 pods (fully brown, dry, and ready to split open naturally).
- ● Clean, dry paper towels: 2–3 sheets (for drying and handling seeds).
- ● Small bowl or tray: 1 (for collecting seeds).
- ○ Fine-mesh sieve or strainer: 1 (optional but helpful for separating seeds from chaff).
- ● Paper bags or airtight containers: 1–2 (for seed storage).
- ● Pruning shears or scissors: 1 pair (for harvesting pods from stems).
- ● Labeling tags or markers: 1–2 (to mark seed containers with the harvest date).
- ● Glove: 1 pair (to protect hands from prickly stems).
- ● Magnifying glass: 1 (for inspecting seed viability up close).
- ● Food dehydrator or oven: 1 (if pods need extra drying time—set to low heat, 90–110°F).
- ● Humidity monitor: 1 (to ensure seeds are stored in <50% humidity).
- ● Seed packet or envelope: 1 (for long-term storage, if preferred over containers).
How to harvest nigella seed pods without damaging viability
Here's the gentle method I use to collect seeds from love-in-a-mist plants—no twisting, no stress, just perfect pods every time.
🌿 Step 1: Identify and Select Mature Pods
Wait until the seed pods turn from green to deep brown—that's when they're fully mature. You'll see them standing upright among the delicate foliage, their papery texture contrasting with the soft stems. Gently shake each pod over a clean sheet of paper or into a paper bag; if seeds rattle inside, they're ready.
Don't harvest pods that still have green sections—they won't store well. I find the best time is late afternoon when the pods are slightly dry from the sun but still flexible. This method preserves seed viability for up to 2 years when stored properly.
🪴 Step 2: Collect Seeds Without Opening Pods
Place the mature pods on a flat surface and use a clean, dry paintbrush to gently stroke the sides. The pods will naturally split open, releasing seeds in a fine dust. This zero-twist method prevents the pods from shattering and losing seeds everywhere.
Work in a well-ventilated area to avoid inhaling the fine seed dust. I like to do this outside on a breezy day—any seeds that drift away will still find their way to the soil. Collect the seeds in a small bowl or directly into your storage container.
✂️ Step 3: Clean and Store Seeds Properly
Spread the collected seeds on a clean paper towel and let them dry for 24 hours in a dry, shaded spot. This ensures any remaining moisture evaporates before storage. Once completely dry, transfer them to a glass jar with an airtight lid or a sealed paper envelope.
Label your container with the variety and harvest date—nigella seeds lose viability faster than many other seeds. Store in a cool, dark place like a pantry or seed drawer. Check for moisture annually; if you see condensation, transfer to a fresh container immediately.
🌱 Step 4: Test Seed Viability Before Planting
Before sowing next spring, test a few seeds by placing them between damp paper towels in a sealed plastic bag. Keep them in a warm spot (70-75°F) and check daily. If 50% or more sprout within 7-10 days, your seeds are viable and ready for planting.
This simple test saves you from sowing hundreds of seeds only to find they won't germinate. I always test a small batch before committing to a full planting—it's a habit that's paid off every season. If germination is poor, try storing seeds in the fridge for 2 weeks before testing again.
⏰ Step 5: Plan for Next Year's Planting
Nigella self-sows beautifully, but if you want to control placement, sow seeds ¼ inch deep in well-draining soil after your last frost date. They thrive in full sun and tolerate poor soil, making them perfect for cottage gardens or wildflower meadows.
Here's the thing—nigella flowers are stunning, but their real magic is in the seeds. The delicate blue petals attract pollinators, while the seeds remain viable for years. I always plant extra to share with friends or scatter in unexpected spots—like a secret garden surprise.
Tips & tricks for perfect nigella seed harvesting
These subtle refinements will help you maximize seed yield and viability while making the process even smoother.
Timing is Everything: The late afternoon timing in Step 1 is crucial—pods need that afternoon sun to dry slightly while remaining flexible. If you harvest earlier in the day, pods may still contain too much morning dew, which can promote mold during storage. I've learned this the hard way after storing damp pods that developed fuzzy growth within days.
Brush Technique Refinement: When using the paintbrush in Step 2, apply gentle pressure along the pod's natural seams—never press directly on the center where the seeds cluster. I use a soft watercolor brush because its bristles are flexible enough to coax the pods open without causing micro-tears that scatter seeds. This precision is what separates a good harvest from a perfect one.
Storage Environment: While a cool, dark pantry works well, I've found that a small refrigerator drawer (around 50°F) extends viability beyond the 2-year mark for some varieties. The key is maintaining consistent low humidity—if you notice condensation on your glass jar, transfer seeds to a fresh container immediately. This simple check prevents the most common storage failure among seed savers.
Pro Tips for Nigella Seed Pod
- These subtle refinements will help you maximize seed yield and viability while making the process even smoother.
- Timing is Everything: The late afternoon timing in Step 1 is crucial—pods need that afternoon sun to dry slightly whi...
- Brush Technique Refinement: When using the paintbrush in Step 2, apply gentle pressure along the pod's natural seams—...
Frequently asked questions
Got questions about harvesting nigella seed pods? You’re not alone! Here are some of the most common queries—plus quick, practical answers to help you master the process like a pro.
What’s the best time to harvest nigella seed pods?
Harvest nigella seed pods when they’re fully brown and dry but before they split open. This usually happens 8–12 weeks after flowering, depending on your climate. If pods crack prematurely, seeds may scatter—so keep an eye out!
How do I know if the seeds inside are still viable?
Viable nigella seeds should be plump, dark, and firm. If they’re shriveled, hollow, or crumbly, they’ve lost potency. For extra peace of mind, plant a few seeds—if they germinate within 2–3 weeks, your harvest is good to go!
Can I use nigella seed pods if they’ve already split open?
Yes! If pods have split, collect the seeds immediately and dry them on a tray for 1–2 weeks in a cool, dark place. Store them in an airtight container to prevent moisture loss. Just avoid using pods with moldy or weevil-damaged seeds—they’ll ruin your harvest.
What if my nigella plants aren’t producing pods?
Check these fixes:
- Deadhead spent flowers to encourage new blooms.
- Ensure plants get 6+ hours of sunlight daily.
- Water deeply but infrequently—overwatering causes rot.
- Use well-draining soil to prevent fungal issues.
Are there alternatives to nigella seed pods for culinary use?
If you can’t grow nigella, try these flavorful substitutes:
- Poppy seeds (mild, nutty—great for baking).
- Sesame seeds (toasty crunch, ideal for savory dishes).
- Fenugreek seeds (earthy, used in Indian/Middle Eastern cuisine).
- Black cumin (Nigella sativa seeds)—the same as nigella but sold pre-harvested!
Wrapping up and next steps
Harvesting nigella seed pods with the zero-twist method ensures you’ll collect the most viable, high-quality seeds for your garden—without the fuss! 🌱 Whether you’re growing them for culinary, medicinal, or ornamental purposes, mastering this technique saves time and boosts your yield.
Now that you’re equipped with the know-how, why not plant a few pods this season and enjoy the rewards of your own homegrown nigella?
Ready to take it further? Experiment with different drying methods or share your harvest with fellow gardeners—your green thumb will shine! 🌿