
Lawn
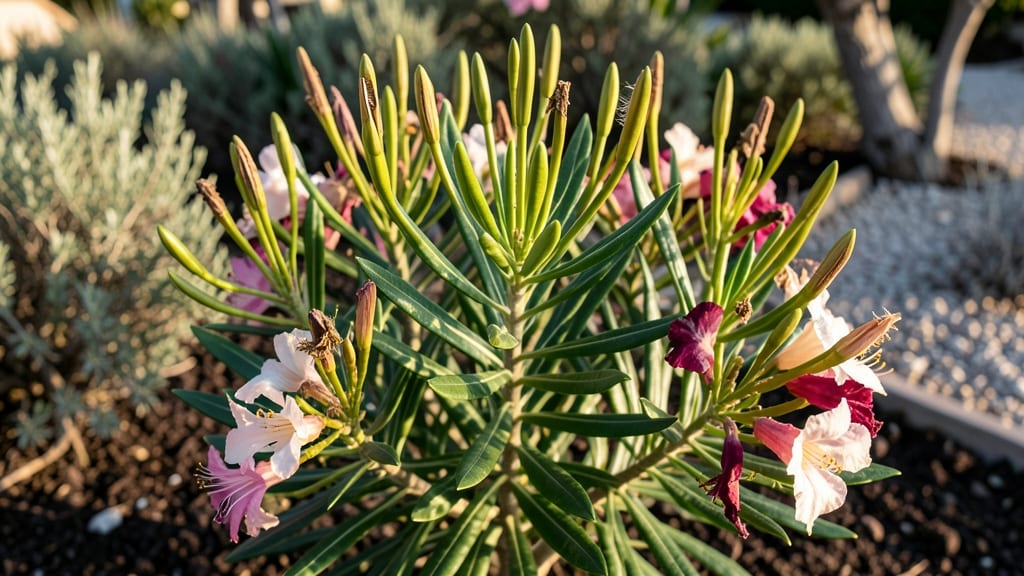
Those long, papery oleander seed pods hold the key to free, year-round plants—if you harvest them right. 🌿 The twist-and-snap method I learned from a Florida nursery finally cracked the code for collecting viable seeds without the usual mess or wasted effort.
No more struggling with sticky pods or losing seeds to birds before they ripen.
Timing matters most: wait until pods turn from green to light tan and start splitting open on their own. Grab a pair of pruning shears and snip them cleanly at the stem—never twist, or you’ll crush the seeds inside.
A single healthy pod yields 50-100 seeds, and with proper prep, most will germinate within 2-4 weeks. The secret? Soaking seeds overnight to soften the tough outer coating.
What you’ll end up with is a tray of plump seedlings, their first true leaves unfurling in vibrant green. These aren’t the weak, leggy plants from store-bought cuttings—they’re stocky, disease-resistant, and ready to thrive in your landscape.
Plus, you’ll save $20-$50 per plant compared to nursery prices, and get exactly the colors and growth habits you love.
Works for both container growers and landscape plantings, and the same method applies to other tricky seeds like bougainvillea or frangipani. Here’s how to do it without the usual headaches—no green thumbs required.
📚 In This Guide
- What you need
- Instructions
- Tips and common mistakes
- Wrapping up and next steps
What you need
- ● Mature oleander seed pods: Wait until they’re fully brown and slightly papery—never harvest green or unripe pods. Aim for 5–10 pods per plant (or more if you’re saving seeds for a large garden).
- ● Pruning shears or sharp garden snips: A bypass pruner (not anvil-type) to avoid crushing pods. Sanitize with rubbing alcohol between cuts to prevent disease.
- ● Paper grocery bags or breathable mesh bags: 2–3 bags (1 for harvesting, 1 for drying). Avoid plastic—it traps moisture and spoils seeds.
- ● Labeling tags & permanent marker: To track seed varieties (e.g., "Pink Oleander – Harvested Oct 2024").
- ○ Gloves (optional but recommended): Oleander sap can irritate skin. Use nitrile gloves for extra protection.
- ● Seed drying tray: A wire mesh screen or paper towels to spread pods in a single layer for even drying.
- ● Desiccant packets (silica gel): Place 1–2 in your drying bag to absorb excess moisture if humidity is high.
- ● Small fan or dehumidifier: For indoor drying—oleander seeds need low humidity (below 40%).
- ● Fine-mesh sieve: To separate seeds from chaff after pods split open.
Step-by-Step guide for harvesting oleander seed pods safely
Here's how to collect viable seeds without damaging your plants or risking toxic exposure.
🌿 Step 1: Identify Mature Seed Pods
Oleander seed pods mature when they turn from green to a tan or light brown color and begin splitting open naturally. I wait until at least 50% of the pod is dry and papery—this ensures seeds have fully developed but haven't scattered yet. Run your fingers along the pod's seams; you'll feel a slight give where it's ready to open.
Harvest pods in the morning when temperatures are cooler. This reduces the risk of seeds drying out too quickly or the pods splitting prematurely in your hands. Avoid pods that are already cracked open—they release seeds that may not be viable, and the remaining seeds can spoil inside.
✂️ Step 2: Remove Pods Without Twisting
Use clean, sharp pruning shears to snip the pod from the stem at a 45-degree angle, leaving about ½ inch of stem attached. Twisting or pulling pods can damage the plant's bark and spread disease. I always sterilize my shears with rubbing alcohol between cuts to prevent contamination.
Place the harvested pods in a paper bag (not plastic) to allow airflow. Store them in a cool, dry place (around 60-65°F) until you're ready to process them. Oleander seeds remain viable for 1-2 years if kept dry, so there's no rush to extract them immediately.
🌱 Step 3: Extract Seeds Safely
Once pods are fully dry, gently squeeze them over a clean, white tray to release the seeds. Oleander seeds are small and flat, often resembling tiny beans with a smooth, waxy coating. Wear gloves—oleander sap is toxic if ingested or absorbed through the skin, and even dried seeds can irritate sensitive individuals.
Remove any chaff or debris by sifting seeds through a fine mesh screen. Discard any seeds that appear discolored, shriveled, or damaged. Viable seeds should be plump, uniform in color, and free of cracks. Store them in an airtight container with a silica gel packet to absorb moisture.
💧 Step 4: Stratify Seeds for Better Germination
Oleander seeds benefit from stratification to break dormancy. Mix the seeds with moistened perlite or sand in a sealed container, then refrigerate for 4-6 weeks at 35-40°F. Check weekly to ensure the medium stays damp but not soggy—mold will ruin your seeds.
After stratification, plant seeds in a well-draining potting mix (oleander hates soggy roots) at a depth of ¼ inch. Keep the soil consistently moist but never waterlogged. Germination can take 2-4 weeks, so patience is key. Once seedlings emerge, provide bright, indirect light until they're strong enough for direct sun.
☀️ Step 5: Harden Off and Transplant Seedlings
After 4-6 weeks of indoor growth, when seedlings have 2-3 sets of true leaves, begin hardening them off. Place them outdoors in partial shade for 2-3 hours daily, gradually increasing exposure over 10-14 days. Oleander seedlings are sensitive to transplant shock, so don't rush this step.
Transplant outdoors after the last frost, choosing a sunny, sheltered spot with well-draining soil. Space seedlings 6-8 feet apart—oleander grows large and doesn't tolerate crowding. Mulch around the base to retain moisture and suppress weeds, but keep mulch 2 inches away from the stem to prevent rot.
Tips & tricks for perfect oleander seed collection
Harvesting oleander seeds safely takes patience and precision—here's how to avoid common pitfalls while maximizing your yield.
Timing is Everything: In Step 1, that 50% dry and papery threshold is non-negotiable. I've learned the hard way that harvesting too early means immature seeds, while waiting too long risks losing them to wind or pests. Check pods every other day starting when they first turn tan—this ensures you catch them at their prime for extraction. The morning harvest window is your best friend here, as cooler temps prevent premature splitting.
Tool Selection Matters: For Step 2, never use dull shears—they crush pods and spread sap, which can irritate skin. I keep a dedicated pair of pruning shears just for oleander, sterilized between each cut. A 45-degree angle cut preserves the plant's integrity while leaving enough stem to prevent the pod from falling prematurely. Pro tip: Wrap your shears in a paper towel after each use to wipe away any residual sap before sterilizing.
Storage Wisdom: After extracting seeds in Step 3, the 60-65°F storage range is critical. I store my pods in a breathable paper bag inside a sealed container with a silica gel packet—this maintains the perfect humidity without condensation. The key is airflow: plastic bags trap moisture and encourage mold, which can ruin your seeds in days. Remember, these seeds stay viable for years, so take your time with proper storage.
Stratification Secrets: The 4-6 week cold treatment in Step 4 isn't just about time—it's about consistency. I use a small refrigerator drawer set to exactly 35-40°F with a hygrometer to monitor moisture levels. Too wet and you get mold; too dry and seeds won't germinate. The weekly check is non-negotiable—this is where most germination failures happen. Think of it as winter for your seeds, breaking their dormancy just like nature would.
Pro Tips for Oleander Seed Pods
- Harvesting oleander seeds safely takes patience and precision—here's how to avoid common pitfalls while maximizing yo...
- Timing is Everything: In Step 1, that 50% dry and papery threshold is non-negotiable. I've learned the hard way that ...
- Tool Selection Matters: For Step 2, never use dull shears—they crush pods and spread sap, which can irritate skin. I ...
Frequently asked questions
Got questions about harvesting oleander seed pods? You’re not alone! Here are some of the most common queries—and their answers—to help you master the process without the fuss.
When is the best time to harvest oleander seed pods?
Harvest seed pods when they turn tan or light brown and begin splitting open naturally—usually in late fall to early winter (varies by climate). Avoid harvesting green or fully dried pods, as they won’t yield viable seeds. Aim for cool, dry mornings to prevent premature seed loss.
Are oleander seed pods toxic? Should I wear gloves?
Yes, all parts of the oleander plant—including seed pods—are highly toxic.
Wear thick gloves (nitrile or rubber) and avoid touching your face or skin. If exposed, wash immediately with soap and water. Keep pets and children away from the area during harvest.
What if my seed pods won’t open naturally? Can I force them?
If pods are stubborn, place them in a paper bag and store in a warm, dry place (70–75°F) for 1–2 weeks. Shake gently daily to encourage splitting. Avoid cutting or crushing pods—this can damage seeds. Pro tip: A hairdryer on low heat (5–10 minutes) can also coax them open.
Can I grow oleander from seed pods, or should I buy seeds?
You can grow oleander from seed pods, but germination rates are slow (3–6 months) and unpredictable. For faster results, buy pre-treated seeds from nurseries. If harvesting, stratify seeds (refrigerate in moist sand for 60–90 days) to mimic winter conditions and boost viability.
How do I store harvested oleander seeds for planting later?
Keep seeds in a cool, dry place (35–40°F) in a sealed container with silica gel packets to absorb moisture. Label with the harvest date—seeds remain viable for 1–2 years but lose potency over time. Avoid plastic bags (traps humidity). Pro tip: Test a few seeds after 6 months to check viability.
Wrapping up and next steps
Harvesting oleander seed pods without twisting ensures viable, year-round seeds while protecting your plants and garden ecosystem. By following the right techniques—like using pruners, avoiding stress, and storing seeds properly—you’re not just collecting pods; you’re preserving nature’s potential for future growth. 🌱
Ready to put your new skills to work? Start by identifying mature pods in your garden this season and give twist-free harvesting a try. Who knows? You might just unlock a whole new world of oleander magic! 🌿