
Lawn
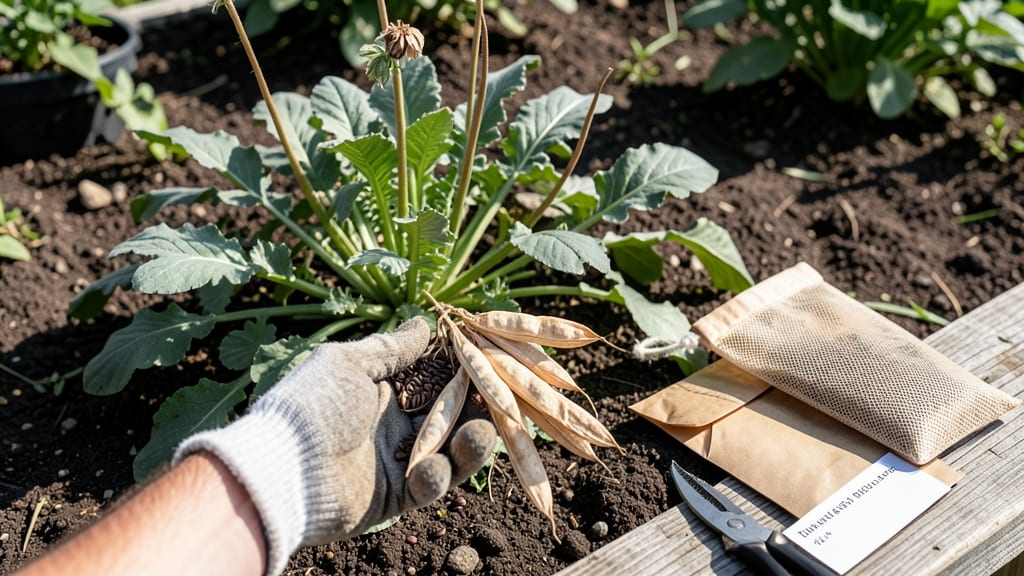
Saving radish seeds transforms scraps into next year's zero-waste harvest—here's how to do it right. 🌱 The key is letting plants bolt naturally, then harvesting pods before they crack open. Most gardeners toss these "spent" radishes, but those dried pods hold seeds that outperform store-bought varieties.
You'll need just three things: mature radish plants that bolted, a paper bag for drying, and a cool dark spot. The process takes about 2 weeks from harvest to storage, and you'll end up with seeds that stay viable for 3-4 years if stored properly.
Unlike many vegetables, radishes don't hybridize easily, so saved seeds often grow true.
What you'll get is a stash of seeds adapted to your climate and soil—no more struggling with store-bought varieties that bolt too early or split. The first batch you save will taste like coming home: familiar, predictable, and packed with that signature peppery crunch your garden perfected.
This method works for any radish variety, from quick-maturing cherry types to classic French breakfast radishes. Just be patient—the best seeds come from plants that bolt naturally under your local conditions, not forced early harvests. Ready to turn scraps into next season's foundation?
📚 In This Guide
- What you need
- Instructions
- Tips and common mistakes
- Wrapping up and next steps
What you need
- ● Mature radish plants: Choose open-pollinated varieties (e.g., 'Cherry Belle,' 'French Breakfast'). Avoid hybrids like 'Saxa' or 'Rainbow.'
- ● Harvest 20–30 plants for reliable seed production (more = better genetic diversity!).
- ● Pruning shears or sharp scissors: For cleanly snipping seed pods.
- ● Paper bags (brown lunch bags): 10–15 bags (1 pod per bag to prevent cross-contamination).
- ● Drying rack or mesh screen: Elevate pods for airflow (a wooden frame with chicken wire works!).
- ● Fine-mesh strainer or sieve: For separating seeds from chaff.
- ● Paper towels or newspaper: To line drying trays or absorb moisture.
- ● Small envelopes or seed packets: 20–30 envelopes (label with variety + date!).
- ● Permanent marker or labels: For marking pods/envelopes.
- ● Dehumidifier or fan: Speed up drying in humid climates.
- ● Desiccant packs: Place in seed envelopes to absorb moisture.
- ● Seed catalog or notebook: Track varieties, germination rates, and notes.
- ● Glass jars with tight lids: For long-term seed storage (add silica gel for extra dryness).
- ● Hand lens (magnifying glass): Inspect seeds for pests/damage.
Step-by-Step guide to saving radish seeds at home
Here's how I turn garden waste into next year's crop—no special tools, just patience and a few key tricks.
🌱 Step 1: Select and Grow Disease-Free Radishes
Choose bold, vibrant radishes with no signs of rot, powdery mildew, or insect damage—these traits carry to seeds. I plant French breakfast or daikon varieties because their large seed pods yield more seeds. Let them mature beyond their usual harvest time, watching for the tops to yellow and dry naturally.
Overwatering now causes the pods to split before seeds ripen. Instead, water deeply every 3-4 days until the soil feels dry 1 inch below the surface. You'll know they're ready when the foliage turns crispy brown and the pods rattle when shaken—like a dried pea pod.
☀️ Step 2: Harvest and Dry the Seed Pods
Snip the entire plant at the base with clean scissors and lay it upside-down in a well-ventilated, shady spot for 3-5 days. This prevents mold from forming on the pods. I use a drying rack or even a wire mesh screen over a table—just avoid direct sun, which can scorch the pods prematurely.
When the pods turn papery brown and open slightly, they're ready. If birds start pecking at them, your pods aren't dry enough—return them to the drying area for another day. Once fully dry, gently crush the pods in your palm to release the seeds.
⏰ Step 3: Clean and Store the Seeds
Spread the seeds on a clean white towel and fan them with a paper towel to remove chaff. I use a small fan on low for 10 minutes—this removes lightweight debris while leaving the plump, dark brown seeds intact. Discard any seeds that feel light or shriveled to the touch.
Store the cleaned seeds in a paper envelope (not plastic—it traps moisture) labeled with the variety and harvest date. Keep them in a cool, dark place like a seed drawer or even the fridge. Properly stored, radish seeds stay viable for 3-4 years, though I've had great luck with 1-year-old seeds for fresh, vigorous starts.
🌿 Step 4: Test Seed Viability Before Planting
Before spring planting, test a handful of seeds by soaking them overnight in lukewarm water. Healthy seeds will plump up and sink, while old or dead seeds stay floating and shriveled. Plant only the sunk seeds in moist potting mix, pressing them ¼ inch deep—never deeper, or they won't germinate.
Place the pot in a warm spot (70-75°F) and cover it with plastic wrap to retain humidity. Check daily for sprouts—radish seeds germinate in 3-7 days. If none appear after a week, your seeds may have lost viability, and it's time to replant with fresh ones.
Tips & tricks for perfect radish seed preservation
These simple yet game-changing techniques will ensure your radish seeds stay viable and ready for next season's garden.
Selection Matters: In Step 1, when choosing radishes, look for those with firm, plump pods that haven't split open. The pods should feel slightly crisp to the touch—this indicates they'll produce the most seeds. I've found that French breakfast radishes consistently yield the highest seed count because their larger pods contain more seeds. If you notice any pods starting to crack prematurely, harvest those plants immediately to prevent seed loss.
Drying Strategy: The 3-5 day drying period in Step 2 is crucial—don't rush it! I've learned the hard way that cutting this short leads to moldy seeds. Place your drying plants in an area with gentle airflow (like a screened porch) rather than a completely enclosed space. This prevents moisture buildup while still protecting from direct sunlight. If you're short on time, you can speed up drying by using a dehydrator on low heat for 2-3 hours, but monitor closely to avoid overheating.
Storage Wisdom: When storing your seeds in Step 3, I recommend adding a small silica gel packet to the envelope to absorb any residual moisture. These packets are available at craft stores or online and help extend seed viability beyond the standard 3-4 years. Label your envelopes with both the variety name and harvest date—this prevents confusion when you're ready to plant next season. I've had excellent results with seeds stored this way for up to 5 years!
Viability Test: The overnight soaking test in Step 4 is your quality control measure. For even more accuracy, I suggest testing 10 seeds rather than just a handful. Count how many sink—if fewer than 80% sink, your seeds may have lost viability. This test also works well for other small seeds like lettuce or carrots if you're expanding your seed-saving practice. The 70-75°F warm spot can be as simple as placing your pot on top of your fridge or near a sunny window during the day.
Pro Tips for Radish Seed Saving
- These simple yet game-changing techniques will ensure your radish seeds stay viable and ready for next season's garden.
- Selection Matters: In Step 1, when choosing radishes, look for those with firm, plump pods that haven't split open. T...
- Drying Strategy: The 3-5 day drying period in Step 2 is crucial—don't rush it! I've learned the hard way that cutting...
Frequently asked questions
Got questions about saving radish seeds? You’re not alone! Here are some of the most common queries—plus straightforward answers to help you master this zero-waste skill.
How do I know when my radishes are ready for seed saving?
Harvest radishes for seed when they’ve bolted (sent up flower stalks) and the seed pods turn from green to dry and papery. Wait until pods pop open naturally or turn brown—this usually happens 6–8 weeks after flowering. Pro tip: Pick seeds on a dry day to avoid mold!
Can I save seeds from store-bought radishes?
Unfortunately, no! Store-bought radishes are often hybrid varieties (F1 hybrids), meaning their seeds won’t grow true to type. For reliable seed saving, grow open-pollinated or heirloom radish varieties from seed. Check seed packets for the "OP" or "Heirloom" label.
What’s the best way to store saved radish seeds?
Clean and dry seeds thoroughly (3–5 days in a warm, dark place), then store them in a paper envelope or airtight container with a silica gel packet. Keep seeds in a cool, dry spot (ideal: 35–40°F). Label with the variety and date—radish seeds stay viable for 2–3 years!
Will cross-pollination ruin my seed-saving efforts?
Radishes are self-pollinating, so cross-pollination is rare. However, if growing multiple varieties nearby, isolate them by at least 50 feet to prevent accidental mixing. For extra safety, hand-pollinate flowers with a brush if you’re saving rare or prized seeds.
Can I save seeds from radishes grown in cold climates?
Yes! Radishes thrive in cool weather, but seed production slows in extreme cold. Extend the season with row covers or grow them in containers you can move indoors. If frost threatens, harvest seeds before pods freeze—viability drops if seeds are exposed to moisture or freezing temps.
Wrapping up and next steps
Saving radish seeds is a rewarding way to reduce waste, save money, and grow your favorite varieties year after year! With just a few simple steps—like selecting healthy plants, allowing them to bolt, and properly drying the seeds—you’ll have a sustainable supply for future gardens. 🌱
Now that you’re ready to start, why not plant a few radishes this season and practice your new seed-saving skills? Share your harvest with friends or experiment with heirloom varieties—your zero-waste journey is just beginning!