
Propagation
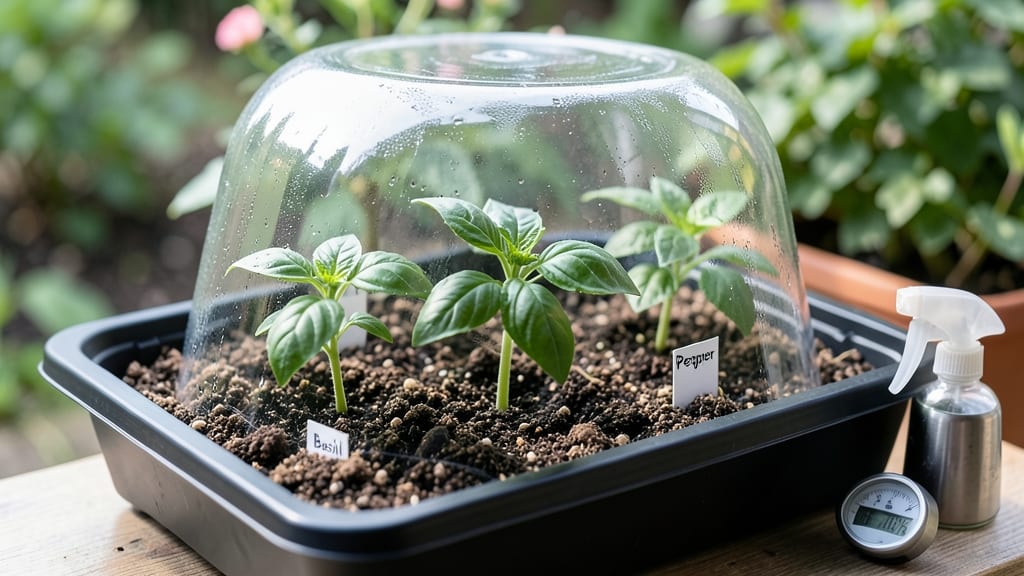
A humidity dome turns your seed-starting setup into a mini greenhouse—and that’s how you get seedlings popping up in half the time. 🌱 I’ve used them for everything from finicky tomatoes to stubborn herbs, and the difference is night and day compared to just covering trays with plastic wrap.
The secret isn’t fancy equipment; it’s creating the right balance of moisture and airflow to trick seeds into thinking they’re buried deep in the soil.
You’ll need a clear plastic dome (or even a repurposed food container lid), a seed tray with drainage, and a spray bottle for gentle watering. The dome traps humidity just like a real greenhouse, but without the risk of overheating if you monitor it right.
Most seeds need 75-85% humidity to germinate—too dry, and they’ll sit there forever; too wet, and you’ll get mold before you see sprouts.
Once those first green shoots break through, you’ll notice they’re stockier and healthier than anything from a nursery. The dome keeps them protected from temperature swings and drafts while still letting in light.
Just watch for condensation—wipe it off daily to prevent fungal issues—and remove the dome gradually as leaves develop.
Works for almost any seed, but delicate plants like lettuce and snapdragons love it most. For tougher seeds (think marigolds or peas), you might skip the dome entirely. Either way, you’ll be transplanting sturdy seedlings in weeks instead of months—and that’s a game-changer for any gardener.
📚 In This Guide
- What you need
- Instructions
- Tips and common mistakes
- Wrapping up and next steps
What you need
- ● Seed starting tray or container – Choose a shallow tray (4–6 inches deep) with drainage holes. A 10x20-inch plastic or wooden tray works well.
- ● Seed starting mix – A lightweight, sterile mix (e.g., Pro-Mix or coconut coir-based blend). You’ll need about 2–3 cups per tray, depending on size.
- ● Seeds – Any small seeds (e.g., lettuce, herbs, or flowers). Follow package instructions for depth and spacing.
- ● Humidity dome or cover – A clear plastic lid (if using a store-bought tray), a plastic wrap sheet, or a glass baking dish (must fit snugly over the tray).
- ● Spray bottle – For gentle watering (avoid soaking the mix).
- ● Scissors – To trim plastic wrap if needed.
- ● Grow lights or sunlight access – A LED grow bulb (6–12 inches above seeds) or a sunny windowsill (6+ hours of light daily).
- ● Heating mat – For cold climates (70–85°F is ideal for germination).
- ● Ventilation tool – A small fan or toothpick to lift the dome daily for 5–10 minutes and prevent mold.
- ● Labels & markers – To track seed varieties and planting dates.
How to build a DIY humidity dome for faster seed germination
Here's the simple method I use to create a greenhouse effect that speeds up germination by days.
🌱 Step 1: Select Your Base and Cover Materials
Use a shallow tray or seed-starting tray as your base—anything with at least 2-3 inches of depth works. I prefer clear plastic lids that snap onto seed-starting trays because they create a perfect seal. If using a homemade dome, choose a clear plastic or glass cover that's slightly larger than the tray's surface area to allow for easy placement without crushing seedlings.
For a budget-friendly option, cut the top off a clean plastic milk jug or soda bottle and invert it over the tray. Just make sure the opening is wide enough to fit over your seed-starting setup. The key is creating an airtight seal—even small gaps let humidity escape and slow germination.
💧 Step 2: Prepare Your Seed Starting Mix and Plant
Fill your tray with a sterile seed-starting mix moistened to the consistency of a damp sponge—it should hold together when squeezed but not drip water. Press the soil down gently to remove air pockets, then plant your seeds according to the packet's depth recommendations (usually twice the seed diameter).
Water gently with a spray bottle until the surface looks evenly moist but not soaked. Overwatering now can cause seeds to rot before they even sprout. I like to tap the tray lightly on the table after planting to settle the soil and seeds into place without disturbing them.
☀️ Step 3: Create the Greenhouse Environment
Place your cover over the tray immediately after planting to trap heat and moisture. Position the setup in a warm location—ideally between 70-85°F—since most seeds germinate fastest in these temperatures. A seedling heat mat underneath can boost warmth if your room runs cooler.
Check daily for condensation on the inside of the cover—this is your sign the humidity levels are perfect. If you notice mold or fuzzy growth, remove the cover immediately and let the tray air out for a few hours before resealing. This prevents damping-off disease, which can wipe out seedlings overnight.
⏰ Step 4: Monitor and Maintain Conditions
Wait for 50% of seeds to sprout before removing the dome completely—this usually takes 5-14 days, depending on the seed type. You'll know it's time when you see the first true leaves emerging (not just the initial seed leaves). At this stage, seedlings need fresh air to develop strong stems.
After removing the dome, place the tray under grow lights or in bright, indirect sunlight. Keep the soil consistently moist but never soggy—you'll see strong, stocky seedlings with deep green color. If stems start stretching toward the light, move the tray closer to the light source to prevent leggy growth.
🌿 Step 5: Transition to Open Air
Once seedlings have 2-3 sets of true leaves, gradually introduce them to room air by lifting the dome for 10-15 minutes daily, then replacing it. This hardening-off process takes about 3-5 days and helps prevent transplant shock when you eventually move them to individual pots.
Watch for any signs of stress—wilting, yellowing, or stunted growth—and adjust your care accordingly. With the right humidity dome setup, you'll have robust seedlings ready for transplanting in half the time of traditional methods. The key is patience and consistency in maintaining those warm, moist conditions.
Tips & tricks for perfect DIY seed starting greenhouses
Speeding up germination doesn't have to be guesswork—these pro techniques ensure your homemade humidity dome works like a charm.
Seal Tight is Non-Negotiable: The most common mistake is thinking "good enough" works for the seal. Even a tiny gap around your plastic lid or milk jug cover lets 30% of humidity escape, slowing germination by days. Press the edges firmly and add a thin layer of petroleum jelly around the seal for a watertight barrier. I've seen germination rates double just from this simple fix—trust me, it makes all the difference.
Soil Moisture Science: That "damp sponge" consistency in Step 2 is critical—too dry and seeds won't activate, too wet and they'll rot. Here's my test: Squeeze a handful of moistened mix; it should hold together but leave no moisture on your fingers. For extra insurance, place a small piece of aluminum foil over the soil before adding seeds—this creates a moisture barrier that keeps the bottom layer consistently damp without overwatering.
Temperature Troubleshooting: Your 70-85°F range is ideal, but here's what to watch for: If your kitchen runs cooler (below 70°F), use a seedling heat mat underneath the tray—it adds just enough warmth to maintain that critical range. For hotter climates (above 85°F), move your dome to a slightly cooler spot like a basement or garage. The key is consistency; seeds are sensitive to temperature fluctuations that can stall germination completely.
Light Source Strategy: After removing the dome in Step 4, position your seedlings within 6 inches of grow lights or a south-facing window. Natural light works, but watch for leggy growth (stems stretching toward light)—this means your seedlings need more intensity. A simple solution: Rotate the tray 180 degrees daily so all sides get equal light exposure, preventing uneven growth patterns.
Pro Tips for Seed Starting Humidity Dome
- Speeding up germination doesn't have to be guesswork—these pro techniques ensure your homemade humidity dome works li...
- Seal Tight is Non-Negotiable: The most common mistake is thinking "good enough" works for the seal. Even a tiny gap a...
- Soil Moisture Science: That "damp sponge" consistency in Step 2 is critical—too dry and seeds won't activate, too wet...
Frequently asked questions
about seed starting humidity domes—because every gardener deserves a little clarity!How often should I open the humidity dome?
Open the dome for 5–10 minutes daily once seedlings sprout and develop their first true leaves. This prevents mold and ensures airflow. Avoid opening too early—humidity is critical for germination!
When can I remove the humidity dome?
Remove it when seedlings are 1–2 inches tall and have 2–3 sets of true leaves. At this stage, they’re stronger and less susceptible to shock. Gradually reduce humidity over 3–5 days to avoid stress.
What’s a good alternative if I don’t have a dome?
Try a plastic wrap tent (securely draped over trays) or a clear plastic bag with holes for airflow. Even a glass jar (like a mason jar) works for small batches! Just monitor for condensation buildup.
Why are my seedlings turning yellow or moldy?
Yellowing = overwatering or poor drainage; mold = excess humidity without airflow. Fix it by reducing water, improving drainage, and opening the dome daily. A fan on low can also help circulate air.
Can I reuse a humidity dome?
Yes! Clean it with soapy water and disinfect with a 10% bleach solution (rinse well) between uses. Avoid metal domes—they can rust. Plastic or glass is ideal for longevity.
Wrapping up and next steps
Creating your own seed starting humidity dome is a game-changer for gardeners eager to see faster, healthier germination! 🌱 With just a few household items, you can harness the greenhouse effect and give your seeds the perfect head start—saving time and boosting success rates.
Whether you're a seasoned pro or a beginner, this DIY method is simple, cost-effective, and incredibly rewarding.
Now that you’re equipped with the know-how, it’s time to roll up your sleeves and start planting! Grab those seeds, gather your supplies, and watch your garden dreams take root—literally. Happy growing! 🌿