
Lawn
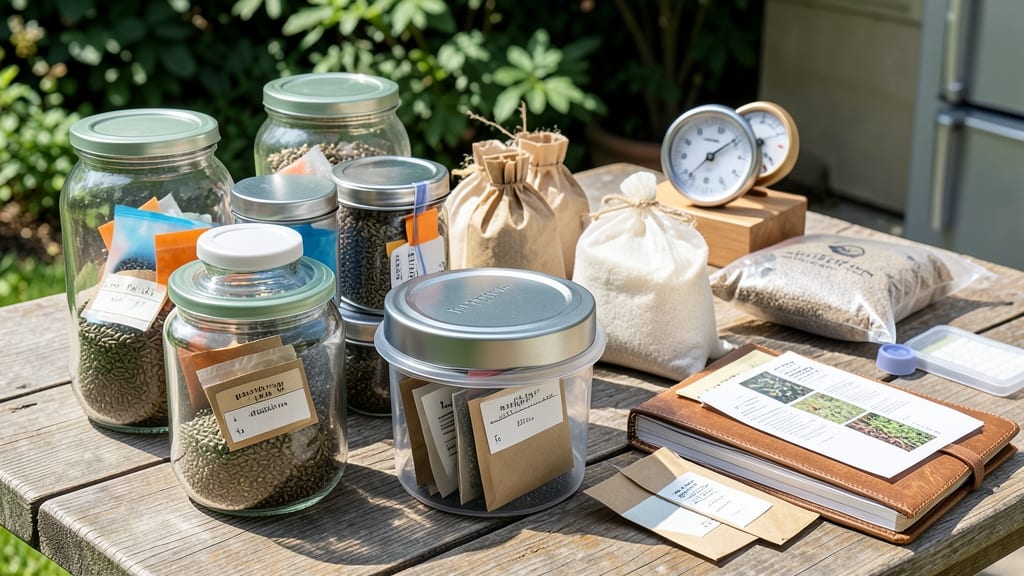
The right seed storage conditions—cool, dry, and dark—mean the difference between next year's thriving garden and a sad packet of dead starts. ✨ The proper environment keeps seeds viable for years, but I've learned the hard way that even small mistakes can ruin months of work. My first batch of heirloom tomatoes lost viability after just two years because I stored them in the garage where humidity crept in. You only need a few simple supplies: airtight containers (mason jars or mylar bags work best), silica gel packets for moisture control, and a permanent marker for labeling. The key is maintaining 35-40°F temperatures and 5-10% humidity—closer to a root cellar than a kitchen pantry. Even a minor temperature swing can trigger germination too early, leaving you with shriveled seeds instead of planting material. Done right, you'll preserve seeds for 5-10 years (some last decades!), saving money and ensuring access to rare varieties. The first time I pulled out a 10-year-old packet of beans that still sprouted, I knew I'd cracked the code. Just avoid common pitfalls like plastic bags (they trap moisture) or storing near onions or potatoes (they release ethylene gas). Seasonal timing matters too—store seeds immediately after harvest or purchase, and never refrigerate them before they're fully dry. For gardeners who want to future-proof their harvests, this system is the ultimate insurance policy against store-bought limitations.
📚 In This Guide
- What you need
- Instructions
- Tips and common mistakes
- Wrapping up and next steps
What you need
- ● Air-Tight Containers: 5–10 containers (e.g., Mylar bags, glass jars, or food-grade plastic bins with tight seals). Opt for 1-gallon or smaller sizes for precision.
- ● Desiccant Packets: 2–5 silica gel or clay-based packets per container (check for humidity indicators if possible).
- ● Humidity Monitor: 1 digital hygrometer (0–90% RH range) to track conditions.
- ● Temperature-Controlled Space: A cool, dark area (e.g., fridge, basement, or seed vault) with stable temps between 32–41°F (0–5°C).
- ● Seed Storage Labels: Waterproof tags + permanent marker to label seed type, date, and variety.
- ○ Vacuum Sealer (Optional but Helpful): For extra airtight sealing of delicate seeds.
- ● Seed Envelopes: Paper or mylar for small batches (e.g., heirloom varieties).
- ● Aluminum Foil: For wrapping seeds before container storage (adds an extra moisture barrier).
- ● Portable Seed Vault: A thermos-style container for on-the-go storage.
- ● Backup Power: A small fridge or thermoelectric cooler for power outages.
How to store seeds for maximum longevity
Perfect seed storage isn't rocket science—just smart science. Here's how to keep your seeds viable for years.
🪴 Step 1: Dry Seeds Thoroughly Before Storage
Freshly harvested seeds must dry completely before storage—moisture is the enemy of long-term viability. Spread seeds in a single layer on a paper towel or mesh screen in a warm, dry place with good airflow. I like to use a seed tray under a gentle fan for 24-48 hours until they feel crisp and brittle to the touch.
Test dryness by gently squeezing a handful—if they crumble easily, they're ready. If they still feel damp, extend drying time by another 12-24 hours. Never use heat sources like ovens or hair dryers; you want to dry seeds slowly to preserve their internal moisture balance.
💧 Step 2: Choose the Right Storage Containers
Air-tight, moisture-proof containers are non-negotiable. I prefer glass jars with rubber seals or Mylar bags with oxygen absorbers because they block both light and humidity. Label each container with the seed variety, harvest date, and germination rate (if known) using a permanent marker—ink fades over time.
Avoid plastic containers with snap lids; they often develop tiny cracks that let moisture seep in. For bulk storage, repurpose vacuum-sealed bags designed for food storage. Just be sure to remove all air before sealing—even a little oxygen accelerates seed aging.
☀️ Step 3: Maintain Ideal Temperature and Humidity
The sweet spot for seed longevity is 32-41°F with 5-15% relative humidity. A standard refrigerator's vegetable crisper drawer hits this perfectly, but avoid the freezer—temperature fluctuations during thawing damage seed membranes. For long-term storage beyond 5 years, consider a seed vault or dedicated cool, dark pantry.
If you don't have a cool space, a dehumidifier near your storage area helps maintain low humidity. Place a silica gel packet inside each container as an extra precaution—these absorb stray moisture and last for years. Check humidity levels occasionally with a hygrometer to ensure they stay below 15%.
⏰ Step 4: Test Germination Periodically
Every 1-2 years, test a small sample of seeds to check viability. Moisten a paper towel, place 5-10 seeds between two, fold it, and store in a sealed plastic bag. Keep in a warm (70-75°F) location and check daily for sprouts. If 50% or fewer germinate, replace those seeds—viability drops sharply after 5-10 years, depending on the species.
I like to test seeds right before planting season so I know which varieties to order fresh. Keep a simple log of germination rates—this helps track which seeds age fastest. For example, onion seeds lose viability in 2 years, while bean seeds often stay good for 5+ years. Adjust your storage rotation based on these patterns.
✂️ Step 5: Rotate and Replace Old Seeds
Even under perfect conditions, seeds degrade over time. Prioritize using older seeds first—this is called FIFO (First-In, First-Out). When you open a new packet, place it behind older ones so you don't accidentally store them longer than necessary. For heirloom varieties, consider short-term storage (1-2 years) to preserve genetic integrity.
If you're storing seeds for emergency use (like heirloom or rare varieties), divide them into two containers and store in different locations. A power outage or flood could ruin one batch—having a backup ensures you never lose a variety entirely. Just be sure both locations meet the 32-41°F temperature requirement.
Tips & tricks for perfect seed preservation
Mastering seed storage means paying attention to details that make all the difference between seeds that last for years and those that lose viability in months.
Drying Precision: In Step 1, when drying seeds for the 24-48 hours recommended, I've found that using a mesh screen with slightly larger holes than the seeds themselves creates even better airflow without risking loss. Place the tray in a spot where airflow circulates naturally—like near an open window with a fan blowing across it. This gentle airflow prevents condensation buildup, which can happen if you use enclosed spaces like paper bags during drying.
Container Selection: For Step 2, while glass jars and Mylar bags are excellent, I've had great success with vacuum-sealed mylar bags for bulk storage. The key is removing all air before sealing—use a vacuum sealer or manually squeeze out air while twisting the bag closed. This creates an oxygen-free environment that slows seed aging dramatically. For small seed quantities, I use glass apothecary jars with silicone seals because they're reusable and easy to label.
Temperature Stability: The 32-41°F range mentioned in Step 3 is critical, but consistency matters more than hitting the exact midpoint. I monitor my seed storage area with a digital thermometer placed inside a sealed container with seeds. Temperature fluctuations of just 5°F can accelerate aging, so avoid storing near appliances that cycle on/off. For those without dedicated cool spaces, a root cellar or basement corner often provides the most stable conditions.
Germination Testing: When testing viability in Step 4, I've discovered that using two layers of paper towels instead of one creates a more consistent moisture environment. Keep the towels damp but not soaking—excess water can cause mold. For seeds that typically require light to germinate (like lettuce), place the folded towel in a clear plastic bag with the seeds facing upward. This mimics natural light conditions while maintaining humidity.
Pro Tips for Seed Storage Conditions
- Mastering seed storage means paying attention to details that make all the difference between seeds that last for yea...
- Drying Precision: In Step 1, when drying seeds for the 24-48 hours recommended, I've found that using a mesh screen w...
- Container Selection: For Step 2, while glass jars and Mylar bags are excellent, I've had great success with vacuum-se...
Frequently asked questions
Got questions about keeping your seeds fresh and ready for planting? Here are some of the most common concerns—plus straightforward answers to help you store seeds like a pro!
What’s the ideal humidity level for storing seeds long-term?
Seeds thrive in 30-40% humidity to prevent mold or drying out. Use silica gel packs or a dehumidifier in your storage container. Avoid damp basements or humid climates—moisture is the #1 enemy of seed viability!
Can I store seeds in the freezer for extra longevity?
Yes! Freezing seeds (0°F or below) can extend viability for decades if sealed airtight in moisture-proof bags. Just thaw them overnight before planting. Great for heirloom or rare seeds you want to save forever!
How do I know if my stored seeds are still good?
Test germination by planting a few seeds in damp paper towels. If 50%+ sprout within 7-14 days, the rest are likely viable. Discard old seeds (especially if they smell musty or look shriveled). When in doubt, replant!
Is a regular kitchen cabinet safe for seed storage?
Not ideal—kitchens often have fluctuating temps (50-80°F) and humidity. Opt for a cool, dark pantry (50-60°F) or a sealed container with a hygrometer instead. Consistency is key!
What’s the best container for long-term seed storage?
Use airtight, moisture-proof containers like:
- Mylar bags with oxygen absorbers
- Glass jars with tight lids
- Vacuum-sealed bags
Wrapping up and next steps
Perfect seed storage isn’t just about luck—it’s a science! By mastering humidity and temperature control, you can preserve your seeds for years, ensuring a thriving lawn or garden whenever you’re ready.
Whether you’re a seasoned gardener or just starting out, these conditions are your secret weapon for long-term success.
Now that you’re armed with the blueprint, take action! Start by auditing your storage setup—adjust humidity levels, fine-tune temperatures, and monitor your seeds regularly. Every small step keeps your seeds healthy and ready to grow. Happy storing, and may your seeds always sprout with vigor! 🌱✨