
Lawn
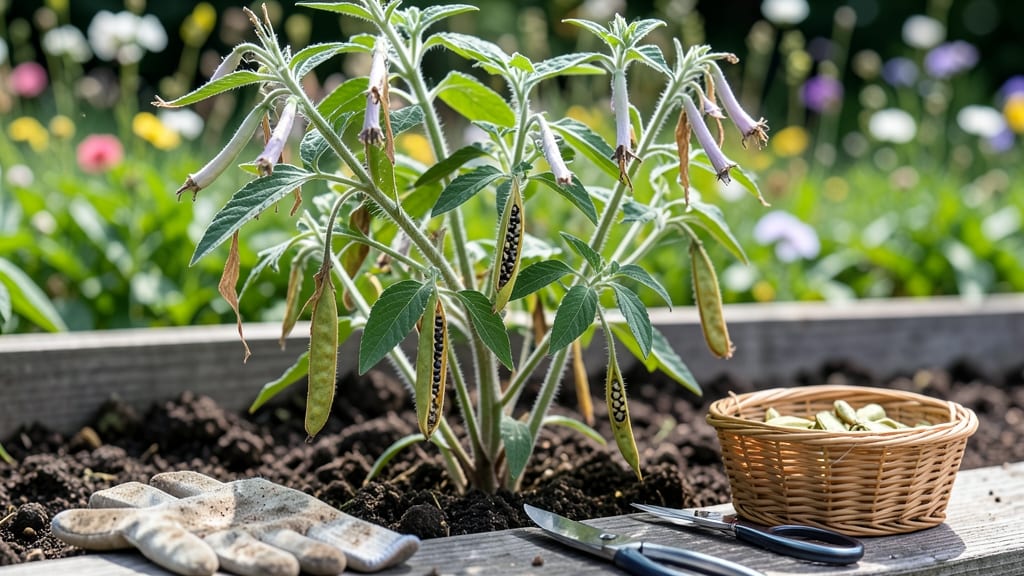
Growing sesame seed pods isn’t as tricky as it seems—just 60 days of patience and the right conditions turns those delicate plants into a goldmine of tiny, flavorful seeds. 🌱 I learned the hard way that sesame thrives on heat and neglect (yes, really), but once you get the rhythm right, the harvest feels like uncovering buried treasure.
The key is mimicking its native tropical climate, even in cooler zones, and letting the plants do most of the work.
You’ll need well-draining soil, full sun, and a warm start—either direct-sow after last frost or begin indoors 8-10 weeks early. Sesame hates soggy roots, so we’re talking 1 inch of water per week, maybe less if your summers are scorching.
The plants grow fast, shooting up to 3-4 feet tall, and their feathery leaves make them look almost too fragile to produce anything useful. But don’t be fooled—they’re tougher than they look, especially when it comes to drought.
By late summer, you’ll spot those signature papery seed pods forming along the stems, each one packed with tiny black or white seeds. The magic happens when you time the harvest just right—pods turn yellowish-brown and split open naturally.
That’s when you’ll want to collect them before birds or wind scatter the bounty. One plant yields about 1/4 cup of seeds, but with proper spacing and care, you can scale that up quickly.
Here’s the secret most guides skip: sesame plants self-thin—they’ll naturally space themselves out as they grow, so no need to fuss with overcrowding. The biggest mistake? Overwatering or fertilizing too much. These plants prefer lean soil, and too much nitrogen will give you lush foliage but fewer pods.
Let’s get those seeds in the ground and watch them transform your garden into a tiny sesame factory.
📚 In This Guide
- What you need
- Instructions
- Tips and common mistakes
- Wrapping up and next steps
What you need
- ● Sesame seeds: 1–2 packets of organic, non-GMO sesame seeds (check for Sesamum indicum variety for best results).
- ● Well-draining soil: A mix of potting soil and perlite (ratio: 70% soil, 30% perlite) or garden soil with compost (amend with 1 cup of compost per 5 gallons of soil).
- ● Containers or garden bed: For containers: 5–7 inch deep pots (1–2 per seedling) with drainage holes.
- ● For in-ground: A sunny spot with at least 6–8 hours of direct sunlight daily and loose, well-aerated soil.
- ● Watering can or hose: With a gentle spray nozzle for even moisture.
- ● Fertilizer: Balanced organic fertilizer (e.g., 10-10-10) or compost tea (apply every 4–6 weeks).
- ● Plant markers: Small sticks or labels to track seedling progress.
- ● Grow lights (for indoor setups or early seedlings).
- ● Mulch (straw or shredded leaves to retain moisture).
- ● Support stakes (if growing tall varieties, though sesame is typically self-supporting).
- ● Pruning shears (for trimming leggy growth if needed).
Step-by-Step instructions for growing sesame seed pods
Let's make growing sesame plants simple—no wrestling with stubborn pods later.
🌱 Step 1: Start Seeds Indoors 8-10 Weeks Before Last Frost
Sesame thrives in warmth, so begin indoors with 65-75°F soil temperatures. Fill small pots with light, well-draining potting mix and plant seeds ¼ inch deep. Keep the soil consistently moist but never soggy—sesame seeds rot easily if overwatered. Place pots in a sunny window or under grow lights for 12-14 hours daily.
Germination takes 7-14 days, so be patient. Once seedlings show 2 true leaves, thin to the strongest sprout per pot. This prevents overcrowding, which weakens plants and reduces pod production. I always label my seedlings—sesame leaves look similar to other greens until flowering begins.
☀️ Step 2: Harden Off and Transplant After Warmth Arrives
Two weeks before your last frost, move seedlings outside for 2-3 hours daily, gradually increasing time. Sesame plants need full sun (6+ hours daily) and warm soil to thrive. Wait until nighttime temperatures stay above 55°F—cold snaps stunt growth.
Transplant seedlings 12 inches apart in rows 18 inches apart when all danger of frost has passed. Sesame roots aren’t deep, so work gently to avoid disturbing them. After transplanting, water deeply at the base—avoid wetting leaves to prevent fungal diseases.
💧 Step 3: Maintain Consistent Moisture and Fertility
Sesame plants prefer moderate moisture—water when the top 1 inch of soil feels dry. Overwatering causes pods to split prematurely, while drought stress reduces yield. I use drip irrigation to keep leaves dry and roots evenly moist. Fertilize lightly with a balanced 10-10-10 formula at planting and again when flowers appear.
Watch for yellowing lower leaves—this signals overwatering or nutrient deficiency. Sesame plants are sensitive to excess nitrogen, which promotes leafy growth at the expense of pods. If this happens, reduce watering and avoid heavy fertilizers.
✂️ Step 4: Harvest Pods Before They Split Open
The key to stress-free harvesting is timing. Pods mature 90-120 days after planting, turning from green to light brown. Harvest when 50% of pods are dry but still closed—waiting too long means seeds scatter everywhere. Cut entire stems with a sharp knife, then hang them upside down in a dry, well-ventilated area for 1-2 weeks to fully dry.
Once pods are completely dry, gently rub them between your hands to release seeds. Store seeds in an airtight container in a cool, dark place. If you miss the window and pods split open, collect seeds immediately—they’ll still be viable for planting.
🪴 Step 5: Prevent Common Pitfalls for Smooth Growth
Sesame plants struggle with powdery mildew in humid climates. Space plants properly and avoid overhead watering to prevent outbreaks. If you see white powder on leaves, spray with a neem oil solution (1 tsp per quart of water) every 5-7 days until it clears.
Here’s the thing—sesame plants hate being moved after transplanting. Once in the ground, keep them undisturbed. If you notice plants leaning toward the sun, rotate the entire pot or container a quarter turn weekly to encourage even growth.
Tips & tricks for growing sesame seed pods
Here's what nobody tells you about growing sesame plants without the headache of tangled pods.
Soil Temperature Secret: The 65-75°F soil temperature range in Step 1 is non-negotiable for germination. I've seen seeds fail to sprout when soil was cooler than 60°F. Use a seedling heat mat if your home stays chilly—it's worth the investment for reliable germination.
Thinning Technique: When thinning to the strongest sprout in Step 1, don't just pull—use clean scissors to snip at soil level. This prevents disturbing the remaining seedling's roots. I also recommend marking your pots with the planting date to track germination progress.
Harden Off Gradually: The 2-3 hours daily outdoor exposure in Step 2 should increase by 1 hour every 2 days. Sudden full-sun exposure can shock delicate seedlings. Watch for leaves curling—this is your cue to slow down the hardening process.
Harvest Timing: The 90-120 day window for harvesting is flexible but critical. I check pods every 3-4 days during this period—when 50% are dry but still closed, that's your perfect moment. Waiting just 2 extra days can mean losing half your crop to scattered seeds.
Pro Tips for Sesame Seed Pod
- Here's what nobody tells you about growing sesame plants without the headache of tangled pods.
- Soil Temperature Secret: The 65-75°F soil temperature range in Step 1 is non-negotiable for germination. I've seen se...
- Thinning Technique: When thinning to the strongest sprout in Step 1, don't just pull—use clean scissors to snip at so...
Frequently asked questions
Got questions about growing and harvesting sesame seed pods? You’re not alone! Here are some of the most common queries—and their straightforward answers—to help you avoid frustration and grow like a pro.
Can I grow sesame seed pods in containers, or do they need a garden bed?
Yes! Sesame plants thrive in containers as long as the pot is at least 12 inches deep and has good drainage. Use well-draining soil and place them in a sunny spot (6+ hours of sunlight daily). Just ensure the container is wide enough to support the plant’s upright growth—sesame pods can reach 3–4 feet tall!
How long does it take for sesame seed pods to mature after planting?
Sesame seed pods typically mature in 70–90 days from planting, depending on the variety and climate. Keep an eye out for yellowing leaves and brown, dry pods—these are your cues! Harvest too early, and the seeds won’t be fully developed. Pro tip: Check pods daily in the last 2 weeks for the perfect timing.
What should I do if my sesame pods split open before I can harvest them?
Don’t worry—this is normal! If pods split prematurely, harvest them immediately and dry the seeds indoors (spread them on a tray in a warm, dry place for 1–2 weeks). If the seeds are still inside, they’re salvageable. To prevent splitting, water consistently but avoid overwatering once flowering begins.
Are there any common pests or diseases that attack sesame seed pods?
Sesame plants are relatively pest-resistant, but keep an eye out for aphids, whiteflies, and spider mites. Treat infestations early with neem oil or insecticidal soap. Fungal diseases like powdery mildew can occur in humid conditions—ensure good airflow and avoid wetting leaves when watering. Pro tip: Space plants 12–18 inches apart to reduce humidity-related issues.
Can I save sesame seeds from my harvest for next year’s planting?
Once fully dried, store seeds in a cool, dark, airtight container for up to 2 years. For best results, test a few seeds for viability before planting. Sesame seeds are non-GMO and easy to save, making them a budget-friendly option for future crops.
Wrapping up and next steps
Growing sesame seed pods at home is a rewarding journey that combines patience, care, and a touch of creativity—especially when you skip the twisting struggles! 🌱 From selecting the right soil to harvesting those prized pods, every step brings you closer to a bountiful yield.
Whether you're a seasoned gardener or a curious beginner, this guide has given you the tools to succeed.
Now that you’re armed with knowledge, why not take the next step? Start small with a few plants, experiment with varieties, or even share your newfound expertise with fellow green thumbs. Your garden—and your pantry—will thank you! 🌟