
Lawn
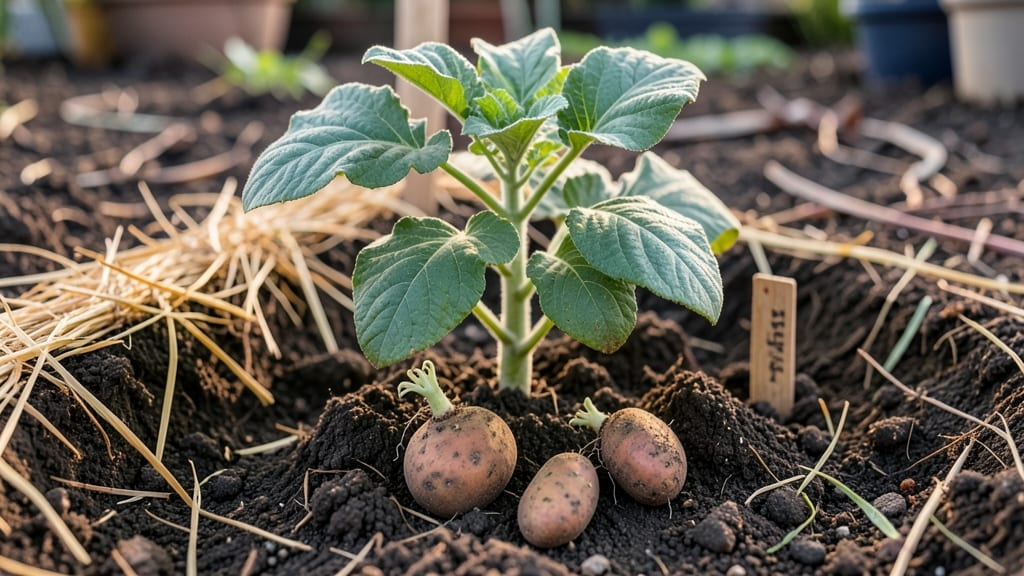
Your sprouted seed potatoes are about to become the easiest, fastest harvest of your gardening year. 🌱 I’ve grown hundreds of pounds from these little nubs—no fancy equipment, just sunlight, patience, and a few simple steps that turn a $3 bag of potatoes into a 100-pound garden goldmine by summer.
The secret starts with chitting—letting those sprouts grow 1-2 inches before planting—which cuts germination time in half. You’ll skip the “waiting for green” phase and get straight to tubers forming underground.
Even my black thumb can’t mess this up once you know the 3 key rules: proper cutting, soil warmth, and consistent moisture.
By week 6, you’ll be harvesting baby potatoes you can eat right away, and by month 3, you’ll have full-sized spuds that outperform store-bought plants. The best part? Every slice of potato you save for seeds next year gets stronger—more disease-resistant, faster-growing, and packed with flavor.
Whether you’re working with a raised bed, in-ground plot, or even large containers, this method adapts. Let’s get those sprouts in the ground—and your harvest on track for a zero-fail season.
📚 In This Guide
- What you need
- Instructions
- Tips and common mistakes
- Wrapping up and next steps
What you need
- ● Seed potatoes: 5–10 lbs (2.3–4.5 kg) of certified organic or disease-free sprouted seed potatoes (look for "seed" labels, not table potatoes). Pro tip: Choose varieties like Yukon Gold, Red Pontiac, or Kennebec for reliability!
- ● Growing containers: 5–10 gallon grow bags (with drainage holes) OR
- ● A wooden crate, fabric pot, or large plastic bin (12" deep minimum).
- ● Potting mix: 10–15 lbs (4.5–6.8 kg) of lightweight, well-draining mix (e.g., 60% peat moss, 30% perlite, 10% compost). Skip garden soil—it compacts and suffocates roots!
- ● Drainage: 2–3 inches (5–7.5 cm) of gravel, pebbles, or broken pottery for container bottoms.
- ● Watering can or hose: With a gentle spray nozzle to avoid displacing soil.
- ○ Fertilizer (optional but helpful): Balanced 10-10-10 fertilizer (1 tbsp per 5 lbs of mix) OR
- ● Slow-release potato-specific granules (follow package rates).
- ● Location: A sunny spot (6+ hours of direct sunlight daily). Partial shade works in hot climates.
- ● Temperature: Ideal 50–70°F (10–21°C). Avoid frost (85°F/29°C).
- ● Humidity: Moderate (40–60% is perfect). Use a humidifier or tray of water in dry climates.
- ● Plant labels (to track varieties).
- ● Garden twine or stakes (for tall varieties like fingerlings).
- ● Potato clipper or knife (for harvesting).
- ● Grow lights (if starting indoors before last frost).
Step-by-step instructions for growing sprouted seed potatoes
Here’s my tested method for turning those little eyes into sturdy, disease-free plants—no guesswork, just results.
🌱 Step 1: Prep Your Sprouted Potatoes for Planting
Start with certified disease-free seed potatoes that already have 1-inch sprouts (the "eyes"). Cut larger potatoes into chunks, ensuring each piece has at least one sprout and 2-3 eyes. Let the cut pieces dry for 24 hours—this prevents rot when you plant. I use a clean knife and wipe it with rubbing alcohol between cuts to avoid spreading bacteria.
Here’s the thing—don’t plant whole potatoes if they’re bigger than a golf ball. Smaller pieces grow faster and produce more uniform plants. If you’re growing 4 plants, you’ll need about 4-6 ounces of seed potatoes total. Save the dried pieces in a cool, dark place until planting day.
☀️ Step 2: Choose the Right Spot and Soil
Potatoes thrive in full sun (6+ hours daily) and loose, well-draining soil. If your garden soil is heavy clay, mix in 2 inches of compost per planting hole to improve drainage. I dig holes 4 inches deep and 12 inches apart—this gives roots room to spread without crowding.
Work the soil until it’s crumbly but not powdery. You’ll know it’s right when a handful forms a loose ball that falls apart when squeezed. Avoid fresh manure—it burns tender potato roots. If your soil feels compacted, add a shovelful of sand or perlite to each hole to break it up.
💧 Step 3: Plant and Water for Strong Starts
Place each potato piece sprout-side up in the hole, covering it with 2 inches of soil. Water gently until the soil feels damp but not soggy. You’ll see the sprouts poke through in 7-10 days—that’s your signal to add another 2 inches of soil around the stem. Repeat this hill-building every 2 weeks until the plant reaches 18 inches tall. This encourages more tubers to form underground.
Don’t skip the hilling! I’ve seen beginners skip this step, and their potatoes stay small and green (from light exposure). Hilling also protects tubers from sunlight, which turns them bitter. Water 1 inch per week, keeping the soil evenly moist but never waterlogged. Mulch with straw or grass clippings to retain moisture and suppress weeds.
✂️ Step 4: Monitor for Pests and Blight
Potatoes are prone to late blight, a fungal disease that looks like greasy brown spots on leaves. At the first sign, remove affected foliage immediately and spray with a copper fungicide. I check plants weekly starting in mid-season—early detection is key. Also watch for colorado potato beetles; handpick adults and larvae before they skeletonize leaves.
If your plants flower, don’t deadhead—the blossoms signal tuber formation. Instead, focus on keeping the soil moist and adding 1 inch of compost around the base every 4 weeks. You’ll know harvest time is near when the flowers fade and the top leaves yellow. Wait 2 more weeks before digging to let skins toughen.
⏰ Step 5: Harvest and Cure for Storage
Use a fork or shovel to gently loosen soil around the plant, then lift the entire clump. Brush off excess dirt and let potatoes air-dry in a dark, shaded spot for 24 hours. This prevents rot during storage. I avoid washing them unless they’re covered in mud—moisture invites disease.
For short-term storage (up to 2 weeks), keep potatoes in a cool (50-55°F), humid place like a basement. For long-term storage (up to 6 months), cure them at 60°F and 85% humidity for 2 weeks—this thickens skins and sweetens flavor. Store in burlap sacks or cardboard boxes, never plastic bags, which trap moisture and cause rot.
Tips & tricks for perfect sprouted seed potato growth
Here's what nobody tells you about transforming those little sprouts into a thriving potato harvest.
Cutting and Curing: The 24-hour drying time for cut seed potatoes is non-negotiable. I've seen beginners skip this step and end up with rotting pieces in the ground. Use a fan to speed up drying in humid climates—just 2 hours of airflow can cut that wait time significantly. For extra protection, sprinkle a tiny bit of cinnamon on the cut surfaces before planting; it acts as a natural antifungal.
Soil Preparation Insight: The "crumbly but not powdery" soil test is your secret weapon. If your soil feels like sand, add 1 part compost to 2 parts soil. For clay-heavy soil, mix in equal parts sand and perlite to break up compaction. I test soil moisture by squeezing a handful—it should hold together but crumble easily. Too much water? Add more perlite or coarse sand.
Hilling Technique: Those 2-week intervals for hilling are crucial for tuber development. I mark my calendar with reminders because it's easy to forget. Use loose soil or straw for hilling—it allows roots to penetrate while protecting tubers from light. Watch for the plant reaching 18 inches tall; that's your cue to stop hilling and focus on pest control instead.
Pest Prevention: The weekly blight check is your best defense against late blight. I keep a small spray bottle of diluted copper fungicide (1 tablespoon per quart of water) handy for quick treatments. For Colorado potato beetles, I've found that a daily 10-minute inspection at dawn catches larvae before they become a problem. The key is consistency—don't wait until you see damage to act.
Pro Tips for Sprouted Seed Potatoes
- Here's what nobody tells you about transforming those little sprouts into a thriving potato harvest.
- Cutting and Curing: The 24-hour drying time for cut seed potatoes is non-negotiable. I've seen beginners skip this st...
- Soil Preparation Insight: The "crumbly but not powdery" soil test is your secret weapon. If your soil feels like sand...
Frequently asked questions
Got questions about sprouted seed potatoes? You’re not alone!
Here are answers to the most common concerns—so you can grow confidently and avoid common pitfalls.
Can I still use sprouted potatoes if the sprouts are long or green?
Yes, but trim them first! Long sprouts (over 1 inch) can be cut off and saved for growing. If the potato is green (a sign of solanine), avoid eating it—this toxin appears when exposed to light. For sprouting, just remove the green parts before planting.
How long do sprouted seed potatoes take to grow into plants?
Sprouts appear in 2–4 weeks after planting, depending on temperature (ideal: 50–60°F). Full plants with leaves and roots emerge in 4–6 weeks. If sprouts stop growing, check for rot or dry soil—adjust watering and light exposure!
Are sprouted potatoes safe to eat if I didn’t intend to grow them?
Sprouted potatoes are edible—just remove the sprouts (they’re bitter) and cook them like normal. The potato itself is fine, but avoid green or shriveled spots. Store them in a cool, dark place (like a pantry) to slow sprouting.
What if my sprouted potatoes rot before planting?
Rot happens from too much moisture or old potatoes. Fix it by:
- Choosing firm, disease-free potatoes (no soft spots!).
- Storing them in a paper bag (not plastic) with airflow.
- Planting within 2–3 weeks of sprouting for best results.
Can I use store-bought potatoes as seed potatoes?
Yes, but organic or untreated potatoes work best. Avoid new potatoes (too small) or those treated with sprout inhibitors (check labels). For guaranteed success, buy certified seed potatoes from nurseries—they’re bred for growing, not eating!
Wrapping up and next steps
Growing sprouted seed potatoes is a rewarding journey that yields delicious, homegrown harvests with minimal effort! By following these simple steps—choosing healthy tubers, pre-sprouting, and nurturing them in the right conditions—you’ll enjoy zero-fail results in just six weeks.
Whether you’re a seasoned gardener or a curious beginner, this method proves that growing potatoes is easy, fun, and incredibly satisfying.
Ready to dig in? Start your sprouts today and watch your garden transform into a thriving potato patch! Share your progress with fellow gardeners or experiment with different varieties next season—happy growing! 🌱✨