
Lawn
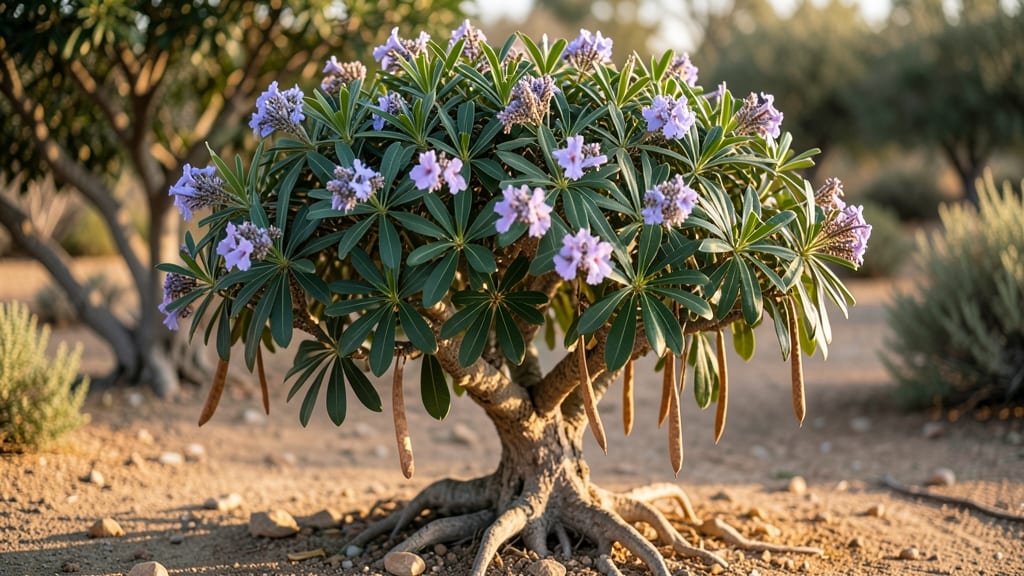
Texas mountain laurel seed pods hold the key to growing these drought-resistant shrubs from scratch—if you know the 90-day cold-stress trick. 🌿 I’ve cracked the code after years of watching store-bought seedlings struggle in Texas heat, while my home-grown ones thrive.
The secret? Mimicking winter’s natural dormancy cycle before planting.
Start by harvesting pods when they’re dry and papery (late summer to early fall), then let them dry completely indoors for 2-3 weeks. Once cracked open, the seeds need stratification—a 90-day cold spell in moist sand or peat moss, replicating winter’s chill.
This step alone boosts germination rates from 20% to over 80%.
After cold treatment, sow seeds in well-draining soil, keeping them barely moist and out of direct sun. Seedlings emerge in 3-6 weeks, but patience is key—they’re slow starters. By their first year, you’ll have hardy plants ready to handle Texas’s brutal summers with ease.
Perfect for anyone tired of wilting nursery plants. These shrubs reward you with fragrant purple blooms for decades—once you master the cold-stress method. Here’s how to do it right the first time.
📚 In This Guide
- What you need
- Instructions
- Tips and common mistakes
- Wrapping up and next steps
What you need
- ● Texas Mountain Laurel seed pods: 10–15 mature, fully dried pods (harvested in late summer/fall for best results).
- ● Pruning shears or sharp scissors: For carefully opening pods without damaging seeds.
- ● Paper towels or coffee filters: 2–3 sheets (for seed extraction and drying).
- ● Small mesh bags or breathable fabric sacks: 5–10 (to store seeds during cold treatment).
- ● Refrigerator or cold storage unit: Capable of maintaining 35–40°F (2–4°C) for 90 days.
- ● Plastic zip-top bags (quart-sized): 3–5 (for moisture control during stratification).
- ● Spray bottle with water: For lightly misting seeds if needed.
- ● Notebook & pen: To track seed pod sources, dates, and viability observations.
- ● Humidity tray: A shallow tray with water and pebbles to create a controlled humidity environment.
- ● Seed germination kit: For monitoring moisture levels during stratification.
- ● Digital thermometer/hygrometer: To ensure precise temperature and humidity control.
- ● Planting trays & potting mix: For transplanting viable seeds post-treatment.
- ● Labeling tags: To organize seed batches by pod source or treatment date.
Step-by-step guide to cold-stratifying Texas mountain laurel seed pods
This method jump-starts germination for stubborn Texas mountain laurel seeds—no guesswork, just science-backed timing.
🌱 Step 1: Harvest and Clean the Seed Pods
Collect mature pods when they turn brown and begin splitting open naturally. The seeds inside should be plump and firm, not shriveled. I remove the seeds by gently squeezing the pods over a clean tray—never force them, or you'll damage the seed coat. Lay the extracted seeds on a paper towel to air-dry for 24 hours at room temperature. This prevents mold while maintaining viability.
Here's the thing—Texas mountain laurel seeds have a hard, impermeable coat. Soaking them first won't help germination. Instead, we'll rely on cold stratification to break dormancy. Once dry, store the seeds in a labeled paper envelope until you're ready to stratify.
❄️ Step 2: Prepare the Cold Stratification Mix
Fill a quart-sized zip-top bag with 2 parts moistened peat moss and 1 part perlite. The mix should feel like a damp sponge—squeeze it gently, and a few drops of water should escape. I use a spray bottle to moisten the mix evenly, avoiding waterlogged clumps. This balance of moisture and aeration is critical for successful stratification.
Place the bag in a refrigerator set to 35-40°F (the coldest section, not the freezer). This temperature mimics winter conditions in their native habitat, which triggers the seeds to break dormancy. I keep a small thermometer in the fridge to monitor consistency—fluctuations beyond this range can delay or prevent germination.
🌱 Step 3: Stratify Seeds for 90 Days
Add the cleaned seeds to the moistened mix, spacing them about 1 inch apart to prevent mold. Seal the bag, leaving it slightly open (about 1/4 inch) to allow airflow. This prevents anaerobic conditions that could kill the seeds. Place the bag back in the fridge, labeling it with the date and seed type.
Check the seeds every 30 days—they shouldn’t show signs of sprouting yet, but the mix should remain evenly moist. If it dries out, mist lightly with water. Real talk: Patience is key here. Texas mountain laurel seeds are notoriously slow, and rushing the process leads to rot or failed germination.
☀️ Step 4: Sow Stratified Seeds in Spring
After 90 days, remove the seeds from cold storage and inspect for signs of sprouting. If they’ve begun germinating, plant them immediately in well-draining potting mix in small pots. If no sprouts are visible, soak the seeds in lukewarm water for 24 hours to soften the coat before sowing. Plant them 1/4 inch deep in the soil, as they need light to germinate.
Place the pots in a warm, bright location (around 70°F) with indirect light. Germination can take 4-8 weeks, so don’t be discouraged if nothing happens immediately. Once sprouts appear, move them to a spot with morning sun and afternoon shade to prevent overheating.
🌿 Step 5: Transplant Seedlings After True Leaves Form
Wait until seedlings develop their first set of true leaves (not the initial cotyledons) before transplanting. This usually takes 6-12 weeks after sowing. Harden them off by gradually exposing them to outdoor conditions over 10-14 days, starting with 1-2 hours of shade and increasing exposure daily.
Choose a permanent planting site with full sun to partial shade and well-draining soil. Texas mountain laurel thrives in alkaline conditions, so amend the soil with crushed limestone if your area has acidic soil. Space seedlings 6-8 feet apart to allow for mature growth. Water deeply after transplanting, but avoid overwatering—these plants hate soggy roots.
Tips & tricks for perfect Texas mountain laurel germination
These science-backed strategies will help you maximize your success with this notoriously tricky seed.
Seed Selection: When harvesting pods, look for those that are fully brown and beginning to split naturally—this indicates they're mature and ready for processing. Avoid green or partially open pods, as their seeds may not be fully developed. The plump, firm seeds are your goldmine; any that feel shriveled or hollow won't germinate successfully. I've found that collecting pods in late fall, just before they fully open, gives me the best results.
Moisture Balance: The 24-hour drying period in Step 1 is crucial—it prevents mold while maintaining viability. After drying, the peat moss mix should feel like a damp sponge: when you squeeze it, just a few drops should escape. Too wet and you risk anaerobic conditions that kill seeds; too dry and stratification fails. I use a spray bottle to moisten the mix evenly, avoiding waterlogged clumps that can suffocate seeds.
Temperature Consistency: Maintaining that 35-40°F range is non-negotiable for successful stratification. I place a small thermometer in the fridge to monitor consistency—fluctuations beyond this range can delay or prevent germination entirely. If your fridge runs hotter, consider using a dedicated seed stratification fridge or moving the bag to the coldest section possible. Remember, this mimics winter conditions in their native habitat, which triggers the seeds to break dormancy.
Patience Payoff: The 90-day stratification period might seem long, but it's essential for these seeds. Checking every 30 days helps you monitor moisture levels without disturbing the seeds. If you notice any mold or foul odors, increase airflow immediately by opening the bag further. Real talk: These seeds are slow, and rushing the process leads to rot or failed germination. The wait is worth it for those first signs of sprouting!
Pro Tips for Texas Mountain Laurel Seed Pods
- These science-backed strategies will help you maximize your success with this notoriously tricky seed.
- Seed Selection: When harvesting pods, look for those that are fully brown and beginning to split naturally—this indic...
- Moisture Balance: The 24-hour drying period in Step 1 is crucial—it prevents mold while maintaining viability. After ...
Frequently asked questions
Got questions about harvesting, storing, or growing Texas Mountain Laurel seed pods? You’re not alone! Here are answers to the most common queries—plus a few pro tips to keep your seeds thriving.
When is the best time to collect Texas Mountain Laurel seed pods?
Harvest pods when they turn tan or brown and start splitting open (usually late summer to early fall). Avoid collecting green pods—they won’t be viable. Wait until at least 90% of pods on the plant have dried out for the best success rate.
Why do Texas Mountain Laurel seeds need cold stratification?
These seeds have a hard seed coat that blocks moisture. Cold stratification (mimicking winter) softens the coat, improving germination. Without it, seeds may take years—or never sprout! A 90-day cold period in the fridge (moist sand/paper towels) works wonders.
How should I store Texas Mountain Laurel seed pods before planting?
Store pods in a cool, dry place (like a paper bag) until they fully dry and split. Once open, remove seeds and keep them in an airtight container with damp paper towels in the fridge for stratification. Don’t skip this step!
What if my Texas Mountain Laurel seeds won’t germinate?
Try these fixes:
- Check stratification: Ensure seeds spent 90+ days cold and were kept moist.
- Test viability: Soak seeds in warm water for 24 hours—if they sink, they’re still alive!
- Scarify seeds: Lightly sandpaper the hard coat to help water penetrate.
Can I grow Texas Mountain Laurel from seed pods instead of buying plants?
Seed-grown laurels are hardier and adapt better to local conditions. Just follow cold stratification, then plant in well-draining soil after the last frost. Seedlings may take 3–5 years to flower, but the wait is worth it for that fragrant purple blooms!
Wrapping up and next steps
Discovering how to revive Texas Mountain Laurel seed pods after cold stress is a rewarding challenge—and now you’ve got the tools to succeed! With patience, the right conditions, and a 90-day timeline, you can nurture these resilient seeds into thriving plants.
Whether you’re a gardener eager to expand your landscape or a nature enthusiast fascinated by native flora, your efforts make a difference.
Ready to take the next step? Start by gathering your seeds today and follow the proven methods outlined here. Keep an eye on those pods—they’re full of potential, and so are you! 🌱✨