
Propagation
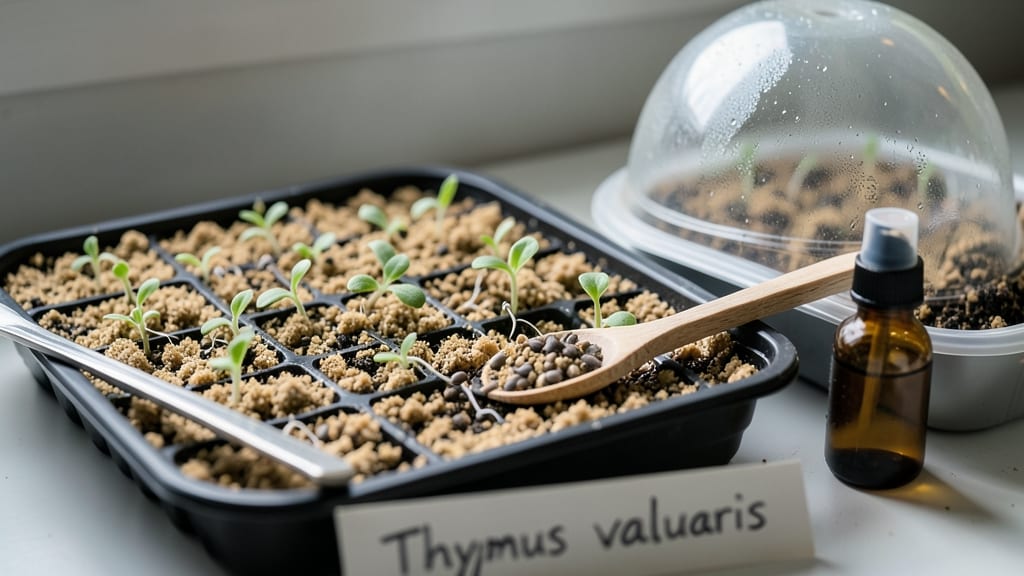
Cold stratification turns thyme seeds from stubborn to sprouting in 2-3 weeks—no more waiting months for those tiny seeds to wake up. 🌱 I’ve struggled with slow thyme germination until I discovered this trick: a simple fridge treatment that mimics winter’s natural signal for seeds to grow.
The key is patience and the right conditions, and once you master it, you’ll have lush thyme plants thriving in your garden or windowsill.
You’ll need just three things: a plastic bag, a damp paper towel, and your fridge. The process is foolproof—no fancy equipment, just science you can do at home. Start with fresh seeds, keep them consistently moist (not soggy), and store them in the fridge for 2-4 weeks.
This mimics the cold period thyme seeds need in nature to break dormancy, and it’s the secret to faster, more reliable germination.
Once the seeds sprout—those first tiny green shoots will appear like magic—you’ll transplant them into well-draining soil and watch them grow into hardy, aromatic plants. The fragrance alone makes it worth the effort, but the real payoff is a kitchen herb garden that keeps giving year after year.
With this method, you’ll avoid the frustration of waiting months or dealing with uneven sprouting.
Works perfectly for both outdoor beds and indoor pots, making it ideal for gardeners with limited space. Whether you’re growing thyme for cooking, pollinators, or just the joy of seeing something grow from seed, this hack will change how you start thyme forever. Ready to give it a try?
📚 In This Guide
- What you need
- Instructions
- Tips and common mistakes
- Wrapping up and next steps
What you need
- ● Thyme seeds: 1–2 teaspoons (about 200–400 seeds, depending on variety). Choose organic, non-GMO seeds if possible for best results.
- ● Cold stratification setup: Small paper towel or coffee filter
- ● Plastic bag with a zip-top closure (quart-sized or larger)
- ● Water spray bottle (with a fine mist setting)
- ● Growing containers: 2–4 small pots (3–4 inches in diameter) with drainage holes or a seed tray with individual cells.
- ● Well-draining potting mix: 2–3 cups of a high-quality, sterile seed-starting mix (avoid garden soil—it can harbor pathogens).
- ● Plastic wrap or clear lid: To create a mini greenhouse effect and retain moisture.
- ● Grow lights or sunny windowsill: A south-facing window or a full-spectrum LED grow light (12–16 hours of light daily).
- ○ Fine-mesh screen or cheesecloth: For straining excess water during stratification (optional but helpful).
- ○ Heating mat: A seedling heat mat (set to 70–75°F) to speed up germination after stratification (optional).
- ○ Humidity dome: Fits over seed trays to maintain moisture levels (optional but recommended for humidity-loving seedlings).
- ● Labeling tags: To track seed varieties and planting dates.
- ● Fertilizer: A balanced, water-soluble fertilizer (5-10-5 ratio) diluted to half-strength for post-germination feeding.
- ● Refrigerator: A standard fridge (34–40°F) for cold stratification (most homes already have this!).
Instructions for thyme seed germination using cold stratification
Here's the foolproof method I use to break through thyme's stubborn germination barrier.
🌱 Step 1: Prepare the Seeds for Cold Treatment
Thyme seeds need a 60-day cold stratification to mimic winter conditions and trigger sprouting. Start by placing your seeds in a sealed plastic bag with a damp paper towel—enough moisture to feel damp but not dripping. I fold the towel into quarters, sprinkle seeds evenly, then roll it into a loose bundle before sealing.
Place the bag in your refrigerator's crispier drawer (around 35-40°F) where humidity stays consistent. Check weekly to ensure the towel remains moist—never soggy. This cold period mimics natural winter conditions and breaks the seed's dormancy. You'll see nothing happen yet, but trust the process—this is where the magic occurs.
⏰ Step 2: Monitor the Cold Stratification Period
After 60 days, remove the seeds from cold storage and let them warm to room temperature for 24 hours. This gradual warming prevents shock to the seeds. I like to leave them on my kitchen counter overnight while I prepare the planting containers.
During this time, you might notice the paper towel developing slight mold—this is normal. Simply rinse the seeds under cool water to remove any fungal growth before planting. The seeds are now ready to germinate, though they may still take 2-4 weeks to sprout after planting. Patience is key here—thyme seeds aren't in a rush.
🌿 Step 3: Plant the Stratified Seeds
Fill small pots (about 2-3 inches deep) with a light, well-draining seed-starting mix. I press the soil down gently to remove air pockets, then make small furrows about ¼ inch deep using a pencil or stick. Place the seeds ¼ inch apart in the furrows—thyme seeds are tiny, so I use a toothpick to handle them carefully.
Cover the seeds lightly with additional soil, then mist the surface with water until evenly moist. Don't water heavily—you want the soil to stay damp but not waterlogged. Place the pots in a warm, bright location (around 70-75°F) where they'll receive indirect light. You'll see the first signs of life within 2-4 weeks, though some seeds may take longer.
☀️ Step 4: Provide Ideal Germination Conditions
Once the seeds begin germinating, move the pots to a location with bright, indirect light. I use a grow light on a timer for 12-14 hours daily to ensure consistent growth. Avoid direct sunlight at this stage—it can scorch the delicate seedlings.
Keep the soil consistently moist by watering gently from the bottom of the pot. You'll know it's time to water again when the top inch of soil feels dry to the touch. Thyme seedlings are slow to establish, so don't rush them. You'll see the first true leaves (not the initial seed leaves) appear within 4-6 weeks after planting. This is your signal that the seedlings are ready for their next phase of care.
✂️ Step 5: Thin and Transplant Seedlings
When seedlings reach about 2 inches tall and have developed 2-3 sets of true leaves, it's time to thin them. Use a small pair of scissors to snip the weakest seedlings at soil level, leaving the strongest one in each pot. This prevents overcrowding and ensures each plant has enough nutrients to grow.
Once the seedlings are established, you can transplant them into larger pots or directly into the garden. Choose a location with full sun (6+ hours daily) and well-draining soil. Thyme is drought-tolerant once established, but keep the soil lightly moist for the first few weeks after transplanting. You'll see new growth within 2-3 weeks, signaling that your thyme is thriving.
Tips & tricks for perfect thyme seed germination
Cold stratification might seem like a waiting game, but these little tweaks will help you maximize your chances of success with thyme seeds.
The 60-Day Rule: Mark your calendar for the exact 60-day cold stratification period—this is non-negotiable for thyme seeds. I like to set a phone reminder every week to check moisture levels. The cold treatment mimics winter conditions, which is exactly what thyme seeds need to break their dormancy. If you're impatient, don't skip this step—it's what separates successful germination from frustration.
Moisture Management: The damp paper towel should feel like a wrung-out sponge—not dripping, not bone-dry. I test this by squeezing gently: one or two drops should come out when you press. Too much moisture encourages mold, while too little prevents proper hydration. This balance is crucial during the entire 60 days in the refrigerator.
Mold Rescue Strategy: If you notice mold developing on the paper towel during cold stratification, don't panic—this is normal! Simply rinse the seeds under cool water, then return them to a fresh, damp paper towel. The mold won't harm your seeds, but removing it prevents potential issues during planting. This quick rinse takes less than a minute and saves your entire batch.
Light Transition: When moving your germinating seeds to brighter conditions after planting, do it gradually. I start with indirect light for the first week, then slowly increase exposure. Direct sunlight can scorch the delicate seedlings, so avoid placing them in full sun until they've developed their first true leaves. Think of it like sunbathing—you wouldn't go from zero to full sun exposure either!
Pro Tips for Thyme Seed Germination
- Cold stratification might seem like a waiting game, but these little tweaks will help you maximize your chances of su...
- The 60-Day Rule: Mark your calendar for the exact 60-day cold stratification period—this is non-negotiable for thyme ...
- Moisture Management: The damp paper towel should feel like a wrung-out sponge—not dripping, not bone-dry. I test this...
Frequently asked questions
How long does thyme seed germination take?
Thyme seeds are notoriously slow—expect germination in 4 to 8 weeks under ideal conditions (warmth, moisture, and cold stratification). Patience is key! If you’ve waited 6+ weeks with no sprouts, try a fresh batch or check seed viability (soak a few in water; if they sink, they’re still good).
Do I really need cold stratification for thyme seeds?
Yes! Thyme seeds require cold stratification to break dormancy. Skip it, and you’ll likely see little to no germination. The hack in our article (chilling seeds for 2–4 weeks) mimics winter conditions, tricking them into sprouting faster. Worth the effort!
What’s the best temperature for germinating thyme seeds?
Once stratified, keep seeds at 70–75°F (21–24°C) for optimal germination. Use a seedling heat mat if your home runs cooler. Avoid extremes—too hot (above 85°F/29°C) can inhibit sprouting, while too cold (below 60°F/15°C) slows growth. A sunny windowsill or grow light works great!
Can I grow thyme from seeds if I don’t have a greenhouse?
Start seeds indoors in small pots or egg cartons with well-draining soil. Use a clear plastic bag to create a mini greenhouse (humidity + warmth = faster sprouts). Once seedlings have 2–3 leaves, transplant them outdoors after the last frost. No greenhouse? A sunny windowsill or basement with a heat mat suffices!
My thyme seeds aren’t sprouting—what went wrong?
Don’t panic! Common issues include:
- Old seeds: Thyme seeds lose viability after 1–2 years. Test freshness or source new seeds.
- Poor moisture: Keep soil consistently damp (not soggy) during germination.
- Lack of light: Seeds need indirect light (or grow lights) post-stratification.
- Fungal issues: If mold appears, reduce moisture and improve airflow.
Wrapping up and next steps
Mastering thyme seed germination through cold stratification is your ticket to a thriving herb garden! 🌱 With patience, the right materials, and a few simple steps, you’ll soon enjoy fresh thyme straight from your own plants.
Whether you’re a seasoned gardener or just starting out, this method makes propagation easier—and more rewarding.
Ready to take the next step? Experiment with different herbs or try growing thyme from cuttings to expand your green thumb skills. Happy gardening! 🌿