
Lawn
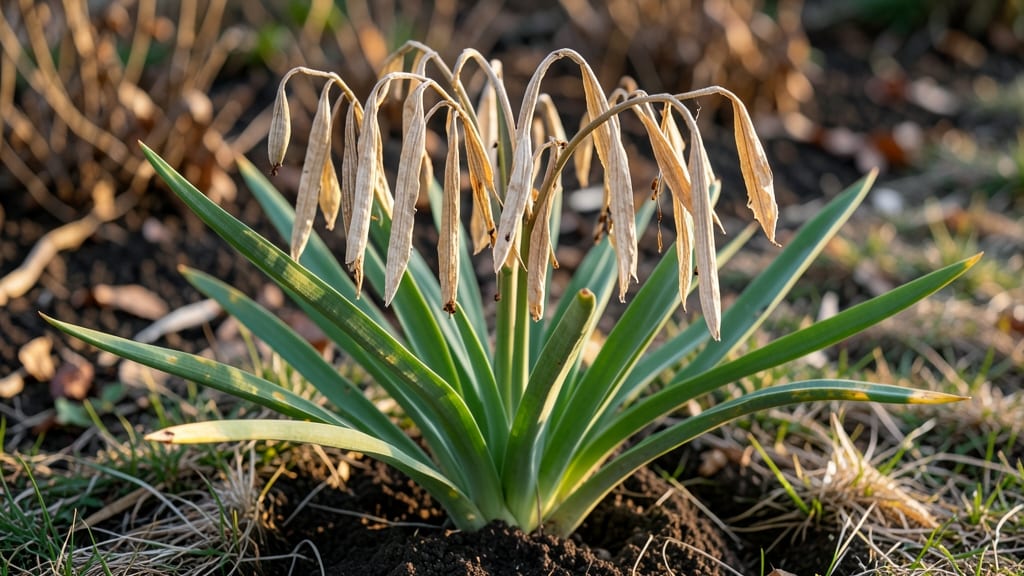
Harvesting gladiolus seed pods means never wrestling with stubborn stems again. 🌿 I learned the hard way that waiting too long turns those pods into brittle, seedless husks—so timing is everything.
The secret? Watch for the pods to turn from green to a papery brown, then snip them cleanly before they split open on their own.
You’ll need just a few simple tools: sharp scissors, a paper bag for collecting, and a little patience. Once you’ve gathered the pods, let them dry indoors for about 2 weeks before cracking them open.
The seeds inside should be plump and dark—anything shriveled or light-colored won’t sprout. This step alone cuts down on wasted effort and frustration.
Planting those seeds is where the magic happens. Scatter them lightly over fresh soil in early spring, barely covering them, and keep the bed moist but not soggy. Within 6-8 weeks, you’ll see those first delicate shoots—proof that your patience paid off.
The key is consistency: gladiolus from seed takes time, but the payoff is worth it.
Here’s the best part: once established, these homegrown glads multiply like crazy, giving you free plants for years. Just avoid overcrowding, and you’ll have a showstopping border that keeps coming back—without the backbreaking work of digging up corms every fall. Ready to try it?
📚 In This Guide
- What you need
- Instructions
- Tips and common mistakes
- Wrapping up and next steps
What you need
- ● Mature gladiolus seed pods – Choose fully browned, papery pods (usually late summer/fall). Aim for at least 5-10 healthy pods for reliable seeds.
- ● Sharp pruning shears or garden scissors – Clean, sterilized to avoid spreading disease. A bypass pruner works best for clean cuts.
- ● Paper grocery bags or breathable seed envelopes – 2-3 bags (1 per 5-6 pods) to prevent moisture buildup.
- ● Permanent marker or label tags – To mark pod varieties (e.g., "Pink Picotee 2023").
- ○ Damp paper towels or seed tray – For short-term seed extraction (optional but helpful for fresh seeds).
- ○ Glove (optional but recommended) – Protects hands from prickly pods and thorns.
- ● Desiccant packets (silica gel) – For long-term seed storage (place 1-2 in sealed containers).
- ● Small paintbrush or cotton swabs – Gently dislodges stubborn seeds from pods.
- ● Spray bottle with water – Helps soften pods for easier seed removal.
- ● Notebook or garden journal – Track pod maturity dates, varieties, and germination notes.
- ● Seed storage containers (airtight) – Mason jars or labeled envelopes for organization.
Step-by-Step guide to harvesting gladiolus seed pods
Here's how to collect seeds without wrestling with stubborn stems or losing your patience.
🌱 Step 1: Identify Mature Seed Pods
Wait until the blooms finish their cycle completely—look for brown, papery pods that feel dry to the touch. These are your signal that seeds are ready. I always check in late summer or early fall when the foliage starts yellowing naturally. Avoid harvesting pods that are still green or plump—they won't contain viable seeds.
Gently twist the pod between your fingers to test readiness. It should separate easily from the stem without resistance. If it resists, give it another week or two. This patience prevents wasted effort on immature pods that won't open properly.
🪴 Step 2: Harvest and Prepare Pods for Drying
Use clean, sharp scissors to cut the pods from the stem, leaving about 1 inch of stem attached. This small stem connection helps the pods stay intact during drying. Place them in a single layer on a mesh screen or paper towel—never stack them, as this creates damp conditions that encourage mold.
Find a warm, dry spot with good air circulation, like a windowsill or ventilated shelf. I avoid direct sunlight here because it can overheat the pods and crack them open prematurely. Check daily for any pods that might have split open—remove seeds immediately if they start spilling out.
⏰ Step 3: Extract and Store Seeds Properly
After 2-3 weeks of drying, the pods should be completely brittle. Gently crush them between your fingers over a clean sheet of paper—this releases the small, flat seeds. You'll notice some empty pods that didn't develop seeds; just discard those. A successful harvest yields about 50-100 seeds per pod, depending on the variety.
Transfer the seeds to an envelope or small paper bag and label it with the variety name and harvest date. Store in a cool, dark place where the temperature stays between 40-50°F. Seeds remain viable for 2-3 years under these conditions, though germination rates drop after the first year.
☀️ Step 4: Plant Seeds at the Right Time
Sow gladiolus seeds in early spring, about 6-8 weeks before your last frost date. Plant them ½ inch deep in well-draining soil with plenty of compost mixed in. Space seeds 1-2 inches apart since they germinate slowly and may take 3-4 weeks to sprout. Keep the soil consistently moist but not soggy during this period.
Here's the thing—gladiolus seeds from pods often produce plants that differ from the parent in color or size. That's why I always save extra seeds from my favorite blooms. Be patient with the first generation; it may take 2-3 years before they reach full flowering size and true-to-type characteristics.
Tips & tricks for perfect gladiolus seed pod harvesting
Here's what nobody tells you about making this process smoother than a summer breeze.
Season Timing: Late summer through early fall is your golden window for harvesting gladiolus seed pods. The key is waiting until the foliage starts showing natural yellowing—this tells you the plant is directing all its energy toward seed production. I've learned the hard way that harvesting too early means immature pods that won't release viable seeds, while waiting too late risks losing pods to wind or animals.
Harvesting Technique: When you're ready to harvest in Step 2, use pruning shears instead of scissors if you have them—they provide cleaner cuts and reduce the chance of crushing the pods. Leave that 1-inch stem attachment as directed, but make sure to cut at a slight angle. This small detail prevents water from pooling where the stem connects, which could rot the pods during drying. I always harvest on a dry morning when dew has evaporated completely.
Drying Strategy: The 2-3 week drying period in Step 3 is where most people go wrong. Place your pods on a mesh screen over a baking sheet to catch any seeds that might fall. This makes cleanup effortless and prevents losing seeds to curious pets or drafts. If you're drying during humid weather, consider using a small fan on low setting to circulate air without creating a breeze that could scatter seeds. Check pods daily—once they start splitting open, remove the seeds immediately to prevent them from drying out completely.
Storage Wisdom: When you're ready to store your seeds in Step 3, add a small packet of silica gel to your storage envelope or bag. This extra step keeps moisture at bay and extends seed viability beyond the 2-3 year mark. I also include a tiny piece of paper with the harvest date and variety name inside the envelope—this prevents mix-ups when you're ready to plant next spring. Store your seeds in the vegetable crisper of your refrigerator if you don't have a cool, dark pantry space.
Pro Tips for Gladiolus Seed Pods
- Here's what nobody tells you about making this process smoother than a summer breeze.
- Season Timing: Late summer through early fall is your golden window for harvesting gladiolus seed pods. The key is wa...
- Harvesting Technique: When you're ready to harvest in Step 2, use pruning shears instead of scissors if you have them...
Frequently asked questions
Got questions about harvesting and working with gladiolus seed pods? You’re not alone! Here are some of the most common queries—plus straightforward answers to keep your gardening game strong.
When are gladiolus seed pods ready to harvest?
Timing is everything! Harvest seed pods when they’re brown and papery but before they split open—usually 6–8 weeks after flowering. If left too long, the seeds scatter, and you lose your harvest. A gentle squeeze should release seeds easily, but avoid over-ripening.
Can I save seeds from hybrid gladiolus varieties?
Probably not—and that’s okay! Many hybrid gladiolus are sterile or produce weak offspring. Stick to heirloom or open-pollinated varieties (like ‘Picasso’ or ‘Black Star’) for reliable seed-saving. If you’re unsure, check the plant tag or ask your local nursery.
What do I do if my seed pods won’t open naturally?
No stress! If pods stay stubbornly closed, try these tricks:
- Dry them indoors: Hang pods upside-down in a paper bag for 1–2 weeks in a warm, dry spot.
- Gently crush: Place pods in a cloth bag and roll a pin over them to release seeds.
- Soak in water: Submerge pods for 24 hours to soften them before squeezing.
How long do gladiolus seeds stay viable?
Fresh is best! Gladiolus seeds retain viability for 1–2 years if stored in a cool, dry place (like a sealed jar in the fridge). After that, germination drops sharply. Label your seeds with the harvest date to track freshness.
Are there easier alternatives to growing gladiolus from seed?
If seed-saving feels like a gamble, consider:
- Dividing corms: Dig up mature corms in fall, separate the “pups,” and replant for identical blooms next season.
- Buying starter corms: Nurseries sell pre-grown corms for foolproof results.
- Propagating from offsets: Smaller corms (offsets) grow into full plants in just a year.
Pro Tip:
Store seeds in silica gel packets or a zip-top bag with a moisture absorber to extend viability. Label everything—trust us, you’ll thank yourself next spring!
Wrapping up and next steps
Harvesting gladiolus seed pods doesn’t have to be a tangled mess—with the right tools and timing, you’ll enjoy a smooth, rewarding process! 🌱 Whether you’re saving seeds for next season or simply tidying up your garden, these steps ensure success while keeping your hands (and flowers) happy.
Now that you’re armed with knowledge, grab those pruners and get ready to turn those spent blooms into future beauty.
Your next step? Mark your calendar for late summer or early fall—when those pods are plump and ready. Happy gardening! 🌸