
Propagation
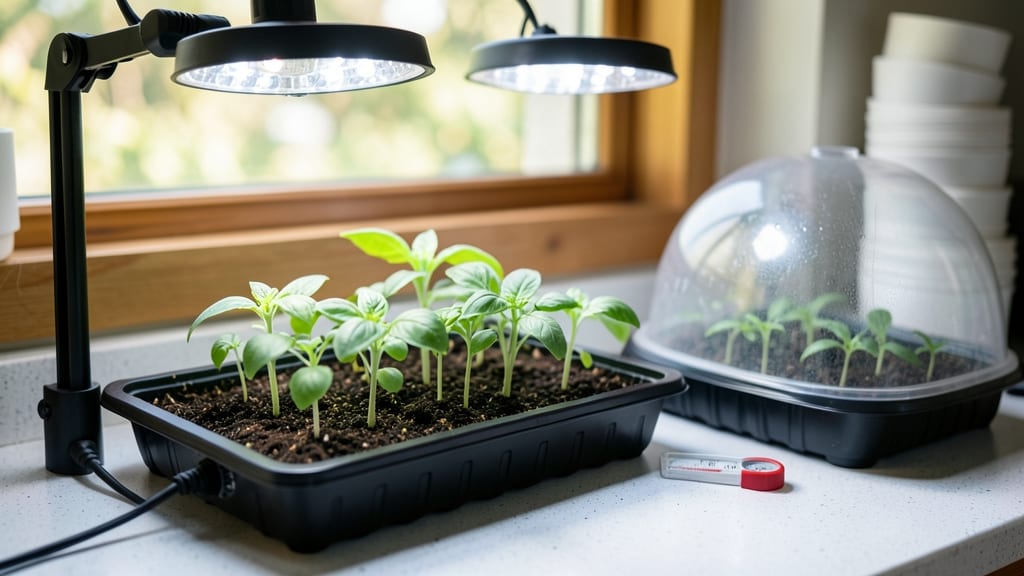
My seed-starting game changed when I discovered heating pads—45-day sprouts instead of 60-day guesswork. 🌱 Those first stubborn pea shoots finally broke through the soil in half the time, and my lettuce seeds that used to flop now pop up like clockwork. The secret?
Mimicking the warmth of spring soil without moving to a greenhouse. You’ll need a basic heat mat (around $20), a thermostat to keep temps steady, and a seed tray with drainage. Most pads run on electricity and maintain 70-85°F—perfect for finicky seeds like tomatoes or herbs.
Just plug it in, set your thermostat, and watch germination rates skyrocket. No more waiting weeks for slow starters to wake up. The payoff? Stronger seedlings that outpace their cold-started cousins by 2-3 weeks. You’ll transplant healthier, more resilient plants that hit the garden running.
Plus, it’s a game-changer for early spring starts or cool climates where soil stays chilly too long. Works for any seed tray, from windowsill setups to full seedling stations. Here’s how to set it up without burning your seeds (or your hands).
📚 In This Guide
- What you need
- Instructions
- Tips and common mistakes
- Wrapping up and next steps
What you need
- ● Heating pad – Choose a seedling heating mat (10" x 20" or larger) with adjustable temperature settings (ideally 65–85°F). Look for models with thermostatic controls for safety.
- ● Seed-starting trays – 1–2 1020-style trays (or equivalent) with cell packs or seedling pots (72–144 cells per tray).
- ● Growing medium – 2–3 cubic feet of sterilized seed-starting mix (avoid garden soil—it’s too dense!).
- ● Seeds – Your chosen varieties (check packet for cold- vs. warm-germination needs).
- ● Spray bottle – For gentle watering (avoid soaking the mix!).
- ○ Clear plastic domes or plastic wrap – To retain moisture during germination (optional but highly recommended).
- ● Grow lights or sunny windowsill – Once sprouts emerge, seedlings need 12–16 hours of light/day.
- ○ Thermometer (optional but helpful) – A soil thermometer to monitor pad temperature (aim for 70–80°F for most seeds).
- ● Humidity tray – A shallow tray with pebbles to elevate seedling trays and boost humidity.
- ● Heat mat with built-in thermostat – For automatic temperature control (safety first!).
- ● Fertilizer (low-dose) – A balanced liquid fertilizer (5-5-5 or 10-10-10) diluted to half-strength for post-germination feeding.
- ● Seedling heat mat with USB port – If your pad isn’t plug-in, a USB-powered option works for travel or small setups.
- ● Labeling system – To track seed varieties, planting dates, and care notes.
Step-by-step instructions for using heating pads for seed starting
Here’s how to use a seedling heating pad to boost germination speed and ensure strong, healthy starts.
🌱 Step 1: Set Up Your Heating Pad and Trays
Place your seedling heating pad on a flat, stable surface—like a shelf or table—where it won’t get bumped or knocked over. Most pads have a built-in thermostat, so set it to the recommended temperature for your seeds (usually 75-85°F). If yours doesn’t have one, use a separate thermostat to monitor soil warmth.
Arrange your seed trays directly on top of the pad, making sure the bottoms of the trays touch the warm surface evenly. I like to use clear plastic trays so I can check moisture levels without lifting them. If your trays are deep, add a thin layer of sterile seed-starting mix first to help distribute heat more evenly.
💧 Step 2: Moisten Soil and Sow Seeds
Before sowing, moisten the seed-starting mix until it’s damp but not soggy—think of a wrung-out sponge. Overwatering now can lead to mold or uneven germination. Use a spray bottle for precision, especially if you’re working with fine seeds like lettuce or carrots.
Sow seeds at the correct depth (usually twice the seed’s diameter) and cover lightly with more mix. Press gently to ensure good seed-to-soil contact. If you’re using a humidity dome, place it on top now—just make sure it doesn’t block light from a grow lamp if you’re using one.
☀️ Step 3: Monitor Temperature and Light
Check the soil temperature daily with a thermometer—most seeds germinate best between 70-85°F. If your pad runs hotter, adjust the thermostat or add a thin layer of insulation (like a piece of cardboard) between the pad and trays to regulate heat. Too much heat can cause seeds to dry out or rot.
Place your setup under grow lights (12-16 hours daily) or in a south-facing window as soon as seeds sprout. Leggy seedlings mean your light is too far away—move it within 2-4 inches of the trays. Watch for the first true leaves (not the initial seed leaves) to appear in 5-14 days, depending on the plant.
⏰ Step 4: Maintain Humidity and Airflow
Once seeds sprout, remove any humidity domes to prevent damping-off disease (a fungal issue that causes seedlings to collapse). Instead, mist the soil lightly with water if it feels dry to the touch. A small fan on low speed nearby helps strengthen stems—just avoid direct airflow on delicate sprouts.
Keep the heating pad on until seedlings have 2-3 true leaves and are growing steadily. After that, you can gradually reduce heat to room temperature over 3-5 days to avoid shocking the plants. Most seeds will be ready for transplanting in 4-6 weeks, depending on the variety.
✂️ Step 5: Harden Off and Transplant
Two weeks before your last frost date, start hardening off seedlings by placing them outside in a sheltered spot for 1-2 hours the first day. Increase exposure by 1 hour daily until they’re spending full days outdoors. This toughens them up for the garden.
Transplant on an overcast day or in the late afternoon to reduce stress. Water deeply at the base to help roots establish. With a heating pad, you’ll have strong, disease-free starts ready to thrive in the garden—no more waiting weeks for slow germination!
Tips & tricks for perfect seed starting with heating pads
Here's what nobody tells you about getting the most out of your seedling warmth setup.
Temperature Consistency: The 75-85°F range is non-negotiable for most seeds, but some like peppers and tomatoes actually prefer the higher end (closer to 85°F). Use a digital thermometer placed directly in the soil—not just on the pad—to verify temperatures. I've seen pads read 80°F on the surface while the soil below stays in the 60s—this can delay germination by days.
Layering Insulation: If your pad runs too hot (above 85°F), don't just turn it down—add insulation. A single layer of cardboard between the pad and trays can drop temperatures by 5-10°F instantly. For extra-sensitive seeds like lettuce, this makes all the difference between quick sprouting and waiting weeks. I keep a stack of cardboard cut to tray size ready for emergencies.
Light Placement: The 2-4 inch rule for grow lights is critical, but here's the secret: position lights so they're closest to the tallest seedlings. As plants grow, the light needs to stay at the same height above the canopy, not the soil. I mark my light stand with a permanent marker at the 2-inch level and adjust as needed—this prevents those leggy, weak stems that collapse when transplanted.
Humidity Transition: That 3-5 day reduction to room temperature is where most people fail. Instead of turning the pad off completely, I reduce it gradually by 5°F each day. This mimics natural temperature shifts and gives seedlings time to adjust. For sensitive plants like basil, I even leave the pad on low (around 70°F) during this transition—it makes all the difference in survival rates.
Pro Tips for Heating Pads For Seed Starting
- Here's what nobody tells you about getting the most out of your seedling warmth setup.
- Temperature Consistency: The 75-85°F range is non-negotiable for most seeds, but some like peppers and tomatoes actua...
- Layering Insulation: If your pad runs too hot (above 85°F), don't just turn it down—add insulation. A single layer of...
Frequently asked questions
Got questions about using heating pads to jumpstart your seed-starting game? You’re not alone! Here are some of the most common queries—and their straightforward answers—to help you grow with confidence.
How warm should a heating pad be for seed starting?
Aim for a consistent 70–80°F (21–27°C) at seed level. Most heating mats are pre-set to this range, but always check the manual. Pro tip: Use a thermometer to monitor temps—some seeds (like peppers or tomatoes) thrive at the higher end, while delicate flowers may prefer the cooler side.
How long should I keep seeds on a heating pad?
Most seeds germinate in 5–14 days with warmth, but timing varies by type. Once sprouts emerge, remove the pad immediately—excessive heat can stress seedlings. Monitor daily: if leaves turn yellow or growth stalls, it’s time to adjust or remove the heat source.
Can I use a regular heating pad instead of a seed-starting mat?
Not ideal! Regular heating pads lack precise temperature control and can overheat seeds. Seed-starting mats are designed with even heat distribution and safety features. If you’re DIY-inclined, a low-wattage ceramic heat emitter (like those for reptiles) can work—but test it first!
What if my seeds aren’t germinating with the heating pad?
Check these first:
- Moisture: Keep soil damp (not soggy)—use a spray bottle.
- Depth: Plant seeds at the correct depth (usually 2x their size).
- Freshness: Old seeds may need a soak in warm water for 12–24 hours.
- Light: Some seeds (like lettuce) need light to germinate—cover them lightly with soil.
Is it safe to leave a heating pad on 24/7?
Yes, but with caution! Most seed-starting mats are thermostatically controlled to prevent overheating. Still, unplug it at night if your home gets warm (above 75°F/24°C) or if you’re away for extended periods. Always place it on a non-flammable surface and avoid covering it with soil.
Wrapping up and next steps
Heating pads for seed starting are a game-changer for gardeners eager to coax life from tiny seeds—especially when you’re racing against a short growing season! 🌱 With the right setup, you can boost germination rates, speed up sprouting, and give your seedlings a head start in just 45 days.
Whether you’re a beginner or a seasoned pro, warmth-controlled sprouting makes the process simpler, more reliable, and far more rewarding.
Now that you’re armed with the how-to’s and pro tips, it’s time to put your newfound knowledge into action!
Start small—try a few trays of your favorite veggies or flowers—and watch your garden thrive. Ready to grow? Grab your heating pad, set up your seedling station, and let the warmth do the work! 🌿✨