
Lawn
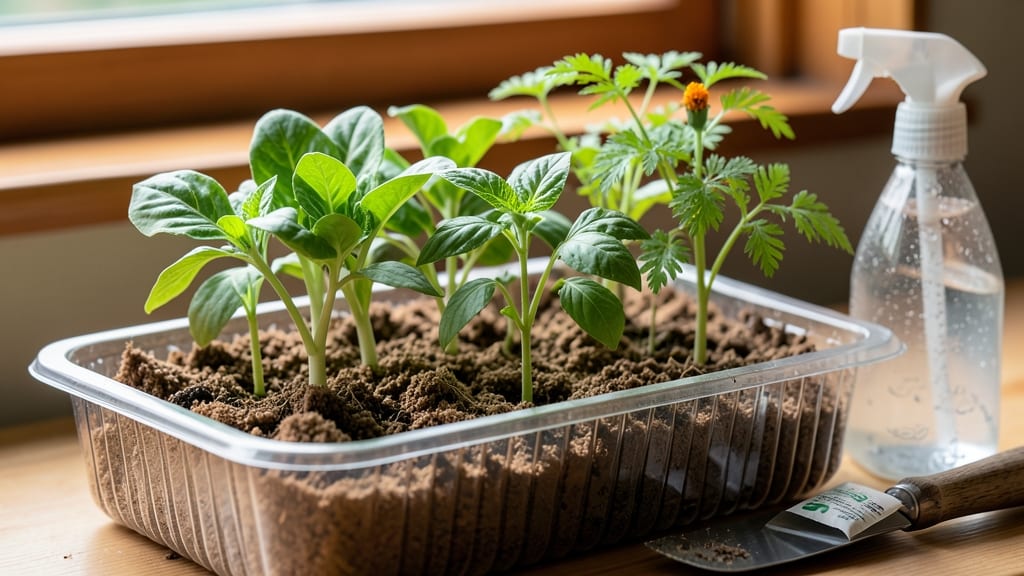
My deep seed trays transformed my seed-starting game from hit-or-miss to foolproof—no more leggy seedlings or weak roots. 🌱 The secret lies in giving roots the space they need to grow strong before transplanting, which means fewer losses and faster growth when they hit the garden.
You only need a few supplies: 6-inch deep trays, quality seed-starting mix, and your favorite seeds. The key is keeping the mix moist but not soggy, and giving seedlings plenty of light from day one.
I’ve started everything from tomatoes to herbs in these trays, and the difference in transplant shock is night and day. By the time you’re ready to move them out, you’ll have stocky, dark-green seedlings with strong root systems that handle the transition like pros.
No more wilting or stunted growth—just healthy plants that take off running in the garden. Works for any garden size, from windowsill setups to greenhouse setups. Here’s how to make it work for you!
📚 In This Guide
- What you need
- Instructions
- Tips and common mistakes
- Wrapping up and next steps
What you need
- ● Deep seed trays: 1-2 trays (10-12" deep, with drainage holes). Opt for plastic or biodegradable options for easy transplanting.
- ● High-quality seed-starting mix: 1 bag (sterilized, peat-free, and well-draining). Avoid garden soil—it’s too dense!
- ● Seeds: Choose fast-growing varieties like grass seed, clover, or microgreens. Check seed packets for depth requirements.
- ● Watering can or spray bottle: With a fine mist setting to avoid disturbing seeds.
- ○ Grow lights or sunny windowsill: A full-spectrum LED grow light (optional but ideal for consistent growth).
- ○ Heat mat (optional but helpful): For cold climates or slow-germinating seeds (set to 70-75°F).
- ● Clear plastic dome or humidity tent: To retain moisture during germination (remove once sprouts appear).
- ● pH testing kit: To ensure your soil mix is in the ideal range (5.8-6.5 for most seeds).
- ● Fertilizer (low-dose): A balanced, water-soluble fertilizer (5-10-5 ratio) for later stages.
- ● Seedling labels: To track varieties and planting dates.
- ● Tray liner or newspaper: For easy cleanup and moisture control.
- ● Fan (small, adjustable): To promote airflow and prevent damping-off disease.
How to use deep seed trays for fast, reliable sprouting
Here’s the simple method I use to get seedlings off to a strong start—no guesswork, just consistent results.
🌱 Step 1: Prepare the Tray and Soil
Fill your deep seed tray with sterile seed-starting mix—never garden soil, as it’s too dense and can harbor diseases. I like to press the mix down lightly with my fingers until it’s firm but still loose enough for roots to grow. This prevents air pockets that could delay germination. Moisten the mix with warm water until it feels like a damp sponge—not soggy, just evenly damp throughout.
Tap the tray gently on the table to settle the soil evenly. A flat, firm surface ensures seeds make good contact with the mix. If you’re planting multiple trays, keep them in a shallow tray of water to maintain moisture while you work—this saves time and keeps the mix consistent.
🌱 Step 2: Plant Seeds at the Correct Depth
Check the seed packet for depth guidelines, but a good rule of thumb is to plant seeds twice as deep as their diameter. For tiny seeds like lettuce, this might be just a sprinkle; for larger seeds like beans, aim for ½ inch deep. I use a toothpick to make small holes—it’s precise and avoids disturbing the soil too much.
Drop seeds into the holes and cover lightly with the same mix. Don’t pack it down; just pat it gently so the seeds stay in place. Label each section of the tray immediately—after a week, identical sprouts will look the same, and you’ll forget which variety is which!
💧 Step 3: Provide Warmth and Moisture for Germination
Cover the tray with a clear plastic lid or humidity dome to trap warmth and moisture. Seeds germinate fastest at 70-75°F, so if your space runs cooler, place the tray on a seedling heat mat. You’ll see sprouts in 5-10 days, depending on the plant type—just watch for the first tiny green shoots breaking through the soil.
Check moisture daily but resist the urge to water until you see condensation on the lid. Overwatering now can drown seeds before they sprout. Once 50% of seeds have germinated, remove the lid immediately—trapped humidity invites damping-off, a fungal disease that collapses seedlings overnight.
☀️ Step 4: Move to Light for Strong Growth
The moment seedlings emerge, they need 12-16 hours of bright light daily. A south-facing window rarely provides enough intensity, so I use a grow light positioned 2-4 inches above the tray. Raise it as seedlings grow to maintain that gap—too close, and leaves will scorch; too far, and they’ll stretch leggy.
You’ll know light is right when seedlings grow compact and dark green, with leaves close together. If they stretch tall and pale, move the light closer. Rotate the tray a quarter turn daily so plants grow straight instead of leaning toward the light.
⏰ Step 5: Thin and Harden Off for Transplanting
When seedlings have 2-3 true leaves, thin them to the strongest one per cell. Use scissors to snip weak seedlings at soil level—this prevents disturbing roots of the ones you’re keeping. Water gently after thinning to settle the soil around remaining plants.
Two weeks before your last frost date, start hardening off by placing the tray outside in a sheltered spot for 1-2 hours the first day. Gradually increase time over 10-14 days, letting them adjust to wind and sun. Once they tolerate a full day outside without wilting, they’re ready for the garden.
Tips & tricks for perfect seedling sprouting
These small adjustments can make all the difference between struggling seedlings and sturdy, thriving plants.
Soil Consistency Matters: In Step 1, when pressing down the sterile seed-starting mix, aim for firmness similar to a damp sponge—squeeze it gently, and it should hold its shape but still crumble slightly. This balance prevents air pockets that starve roots while maintaining proper drainage. I learned this the hard way after watching seeds rot in overly compacted soil.
Lighting Precision: For Step 4’s 12-16 hours of light, I recommend using a timer for your grow light to automate this critical window. Position it 3 inches above the tray initially, then raise it gradually as seedlings grow. Watch for leaves touching the light—this is your cue to move it up immediately to prevent scorching. The goal is even, golden-green leaves, not pale, stretched seedlings.
Germination Timing: The 5-10 day germination window in Step 3 can feel like an eternity, but patience pays off. Mark your calendar when you plant—most seeds need consistent warmth (70-75°F) day and night to sprout reliably. If your space runs cooler, a simple seedling heat mat under the tray makes all the difference. Trust me, the first green shoots breaking through are worth the wait!
Hardening Off Hack: When starting the 1-2 hour outdoor sessions in Step 5, I place my trays in dappled shade rather than full sun. This gradual introduction to UV rays prevents sunburn while still letting seedlings acclimate. After 3-4 days of this treatment, they’ll be ready for more direct sunlight during their hardening period.
Pro Tips for Deep Seed Trays
- These small adjustments can make all the difference between struggling seedlings and sturdy, thriving plants.
- Soil Consistency Matters: In Step 1, when pressing down the sterile seed-starting mix, aim for firmness similar to a ...
- Lighting Precision: For Step 4’s 12-16 hours of light, I recommend using a timer for your grow light to automate this...
Frequently asked questions
Got questions about deep seed trays? You’re not alone! Here are some of the most common concerns—plus quick, practical answers to help you get started with confidence.
What’s the best soil-to-seed ratio for deep seed trays?
Fill your trays about 2/3 full with a lightweight, well-draining seed-starting mix. Press gently to remove air pockets, then sprinkle seeds on top—usually 1/4 inch deep for most grass seeds. Avoid overcrowding; aim for 10-15 seeds per square foot to prevent competition.
How long until I see sprouts in deep seed trays?
Timing varies by seed type, but most grass seeds sprout within 7–21 days if kept moist and warm (65–75°F). Check daily for moisture—consistency is key! Cool temps or dry soil can delay germination. For faster results, use a heat mat or place trays near a sunny window.
Do I need to water deep seed trays differently?
Yes! Use a mist or spray bottle to avoid displacing seeds. Water gently until moisture seeps through the bottom (but don’t let them sit in water). After germination, reduce frequency—keep soil evenly moist, not soggy. A tray with drainage holes helps prevent root rot.
Can I reuse deep seed trays after one use?
Clean trays with a 10% bleach solution (1 part bleach to 9 parts water) to kill pathogens, then rinse thoroughly. Sterilization is critical to avoid fungal diseases. For extra longevity, store trays in a dry place and avoid stacking heavy items on them.
What if my seeds aren’t germinating in deep trays?
Troubleshoot with these steps:
- Check moisture: Soil should feel like a damp sponge.
- Verify depth: Seeds buried too deep may fail to sprout.
- Test temperature: Use a heat mat if below 60°F.
- Inspect seeds: Old or low-quality seeds may not germinate.
Wrapping up and next steps
Deep seed trays are your secret weapon for stress-free, high-success sprouting—whether you're growing lawns, flowers, or veggies. With the right setup, you’ll enjoy faster germination, stronger seedlings, and fewer headaches.
Now that you’re armed with the best materials and answers to common questions, it’s time to roll up your sleeves and get planting!
🌱 Next step: Start small with a tray or two, experiment with your favorite seeds, and watch your green thumb grow. Happy gardening! 🌿