
Picking
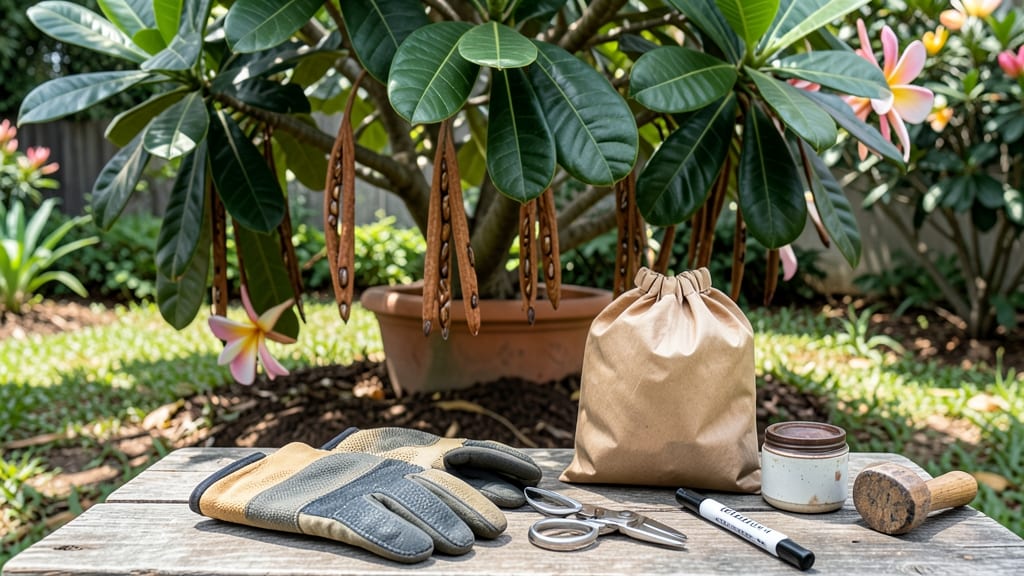
Harvesting plumeria seed pods at the right moment means the difference between viable seeds and dried husks. 🌺 The pods turn from green to a papery brown when they're ready—usually in late summer or early fall, depending on your climate.
If you wait too long, the seeds inside lose their ability to sprout, but harvest too early, and you'll end up with underdeveloped seeds that won't germinate.
You only need two tools: a pair of clean pruning shears and a paper bag for collecting the pods. The twist-and-pull method is gentle on both the plant and the seeds—simply grasp the pod at its base, give it a slight twist, and pull firmly.
If it doesn't come free easily, it's not ready yet. Once harvested, let the pods dry in a warm, shaded spot for about a week before opening them to extract the seeds.
What you'll end up with are plump, brown seeds that look like tiny beans. These are your future plumeria plants, and with proper storage in a cool, dry place, they'll stay viable for up to a year.
The key is patience—plumeria seeds can take 3-6 months to germinate, but once they do, you'll have a tropical beauty growing in your garden.
Common mistakes include harvesting pods that are still green or storing them in damp conditions, which can cause mold. If you're in a cooler climate, consider sowing the seeds immediately after harvest to avoid winter dormancy issues.
With the right timing and care, you'll have a whole new generation of fragrant plumeria blooms in just a few years.
📚 In This Guide
- What you need
- Instructions
- Tips and common mistakes
- Wrapping up and next steps
What you need
- ● Mature plumeria seed pods: Choose fully brown, dry pods (usually 3–6 months old) that have split open naturally or are close to doing so.
- ● Sharp, clean pruning shears or scissors: A pair with sterilized blades (70% isopropyl alcohol works) to avoid contamination.
- ○ Disposable gloves (optional but recommended): Nitrile or latex gloves to protect hands from sap and potential irritation.
- ● Paper towels or newspaper: For drying and cleaning seeds post-harvest.
- ● Small bowl or container: A shallow, wide-mouth dish (like a ceramic bowl or plastic tray) to collect seeds.
- ● Permanent marker or label tags: To mark seed varieties or harvest dates if you’re saving multiple types.
- ● Paper bags or breathable seed envelopes: For short-term storage (1–2 weeks) until planting or drying.
- ● Spray bottle with water: For lightly misting pods if they’re stubbornly stuck to the plant.
- ● Hand lens or magnifying glass: To inspect seed viability (look for plump, intact seeds—discard shriveled or hollow ones).
- ● Seed drying tray: A mesh screen or cooling rack to air-dry seeds for long-term storage.
- ● Hair dryer (cool setting): For speeding up drying if you’re in a humid climate.
- ● Notebook: To log pod maturity, seed count, or germination notes for future reference.
Step-by-Step instructions for harvesting plumeria seed pods
Here's how to collect and prepare plumeria seeds—timing and technique make all the difference.
🌿 Step 1: Identify and Wait for Mature Seed Pods
Plumeria seed pods start green and firm, but they only contain viable seeds when they turn brown and papery dry—usually 3-4 weeks after flowering. Don’t rush this stage; immature pods won’t open properly and may rot if harvested too soon. Gently squeeze a pod—if it feels hollow and brittle, it’s ready.
Look for pods that have split open naturally along one seam—these are the ones to harvest. If a pod is still closed, leave it on the plant. Overripe pods crumble easily, so work quickly once you spot them. I like to harvest on a dry, sunny morning when humidity is low, as damp pods can mold before you even get them indoors.
✂️ Step 2: Gently Twist and Pull the Pods Off
Use a clean, sharp pair of pruning shears to snip the stem just above where the pod meets the branch—this prevents tearing the plant tissue. Avoid cutting into the wood itself, as open wounds invite fungal infections. Once the pod is free, twist it gently with your fingers to separate any stubborn fibers still attached.
Place the pods in a paper bag (not plastic) to allow airflow while preventing debris from falling inside. Label the bag with the harvest date—this helps track germination timing later. If you’re harvesting multiple pods, spread them out on a tray to dry further before processing, as crowding can trap moisture.
🌱 Step 3: Extract Seeds and Prepare for Storage
Once pods are completely dry, crack them open by pressing firmly along the natural seam with your thumbs. You’ll find flat, papery seeds inside—each one is a potential new plumeria plant. Remove any blackened or shriveled seeds, as these won’t germinate. Healthy seeds should feel firm and slightly plump, with a smooth, glossy surface.
Store the viable seeds in an airtight container with a moist paper towel at the bottom to maintain humidity. Keep them in a cool, dark place (around 65-70°F) until you’re ready to plant. Seeds stay viable for 6-12 months under these conditions, but germination rates drop after the first year.
⏰ Step 4: Stratify Seeds for Better Germination (Optional but Recommended)
For faster and more reliable germination, stratify the seeds by placing them in a ziplock bag with slightly damp sphagnum moss (not soaking wet). Seal the bag and refrigerate for 4-6 weeks. This mimics the natural winter dormancy period and breaks seed dormancy, often doubling your germination success rate.
After stratification, plant the seeds ¼ inch deep in a well-draining seed-starting mix kept at 75-80°F. Cover the tray with plastic wrap to retain moisture, but remove it daily for 10 minutes to prevent mold. Germination can take 3-8 weeks, so patience is key—don’t give up if nothing sprouts in the first month.
Tips & tricks for perfect plumeria seed pod harvesting
Timing and technique are everything when harvesting plumeria seed pods—these tricks will help you maximize your yield and seed viability.
Timing is Everything: The 3-4 week wait for mature pods is non-negotiable. I learned this the hard way after harvesting green pods that never produced viable seeds. Check pods daily during the final week—they should split open naturally along one seam. If you see pods starting to crumble or turn black, harvest immediately as they'll lose viability quickly. A dry, sunny morning is ideal for harvesting to prevent mold from humidity.
Harvesting Technique: When using pruning shears in Step 2, make the cut just above where the pod meets the branch—this prevents damaging the plant tissue. I've found that twisting the pod gently after cutting helps release any stubborn fibers without tearing. For large harvests, work in small batches to keep pods from drying out too quickly in hot conditions. Never use a knife near the wood as it creates wounds that attract fungal infections.
Seed Selection: In Step 3, when you're cracking open the pods, look for seeds that are firm and plump with a smooth, glossy surface. Discard any seeds that appear blackened or shriveled—they won't germinate. Healthy seeds should feel slightly resistant when pressed between your fingers. I've had the best success when I've removed all questionable seeds immediately, as even a few bad ones can affect the entire batch's viability.
Storage Wisdom: The cool, dark storage conditions (around 65-70°F) are crucial for maintaining seed viability for up to 12 months. I store my seeds in small glass jars with a moist paper towel at the bottom—this creates the perfect humidity without making the seeds soggy. Label each jar with the harvest date so you can track germination timing later. If you notice condensation inside the container, open it to air out for a few hours to prevent mold growth.
Pro Tips for Harvest Plumeria Seed Pods
- Timing and technique are everything when harvesting plumeria seed pods—these tricks will help you maximize your yield...
- Timing is Everything: The 3-4 week wait for mature pods is non-negotiable. I learned this the hard way after harvesti...
- Harvesting Technique: When using pruning shears in Step 2, make the cut just above where the pod meets the branch—thi...
Frequently asked questions
Got questions about harvesting plumeria seed pods?
Here are some of the most common ones—plus quick, practical answers to keep your process smooth and successful!
When is the best time to harvest plumeria seed pods?
Harvest pods when they turn light brown and feel dry to the touch—usually 4–6 weeks after flowering. Avoid harvesting when pods are green or still firm; seeds won’t be mature enough. If left too long, pods may split open naturally, scattering seeds prematurely.
How do I know if the seeds inside are still viable?
Viable plumeria seeds are plump, firm, and dark brown (almost black). If they’re shriveled, hollow-sounding, or moldy, they’ve lost viability. For extra peace of mind, soak seeds in water for 24 hours—good seeds sink, while bad ones float.
Can I harvest seed pods in rainy or humid weather?
Harvesting in dry conditions is ideal to prevent mold or rot. If rain is unavoidable, work quickly and let pods dry indoors for 1–2 days before opening. Humidity can also speed up spoilage, so store harvested pods in a paper bag (not plastic) for airflow.
What if my plumeria pods don’t open naturally? Do I have to force them?
Some varieties need a gentle twist-and-pull to release seeds—just like the article describes! If pods resist, let them dry longer (up to 2 weeks) or place them in a warm, sunny spot to encourage natural splitting. Avoid cutting pods open; this can damage the seeds inside.
Are there alternatives if my plumeria doesn’t produce seed pods?
If your plant skips flowering or podding, try grafting (using a cutting from a pod-producing tree) or buying seeds online from reputable sellers. Some plumeria varieties are self-pollinating, while others need cross-pollination—planting multiple varieties nearby can help!
Wrapping up and next steps
Harvesting plumeria seed pods is a rewarding way to propagate these fragrant beauties—and now you’ve got the know-how! With patience and a gentle touch, you can collect viable seeds to grow your own thriving plumeria plants. 🌱✨
Ready to take the next step? Start by planting your seeds in well-draining soil and providing a warm, humid environment. Keep an eye on their progress, and soon you’ll be enjoying the sweet scent of homegrown plumeria!