
Propagation
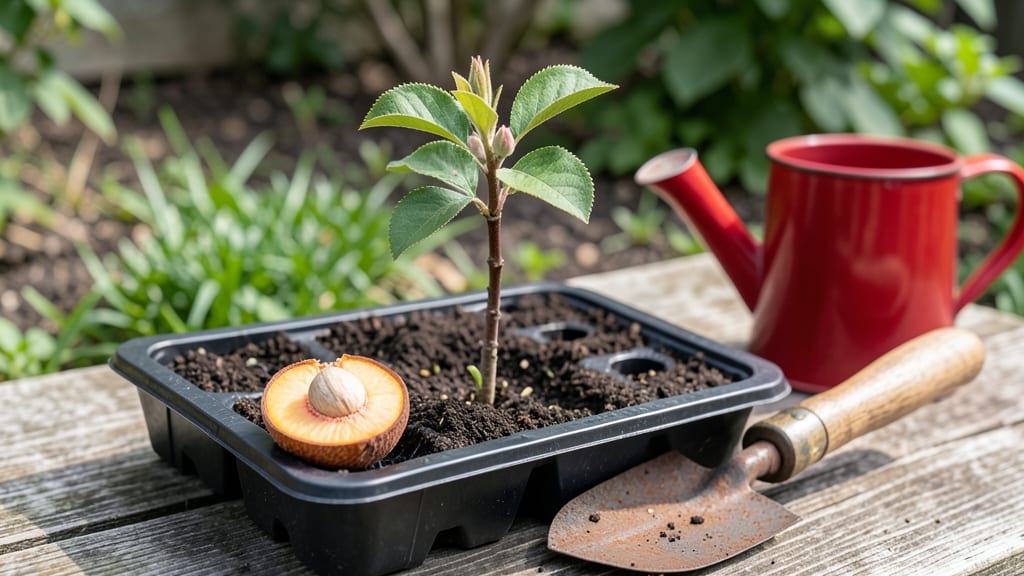
Growing a peach tree from a single seed pit is the ultimate gardener's patience test—and the payoff is worth every year. 🌱 The first time I cracked open a peach to find that tiny stone, I never imagined it could become a tree, let alone one that might bear fruit someday.
But here's the secret: that little pit holds the potential for a tree that could live for decades, with the right care starting now.
The process begins with cold stratification, mimicking winter's natural way of breaking seed dormancy. You'll need a damp paper towel, a sealed plastic bag, and your fridge's crisper drawer for about 8-12 weeks.
This isn't just waiting—it's preparing that seed for its first real challenge: sprouting roots when you plant it in soil. Most gardeners skip this step and wonder why their pit never germinates, but trust me, this is where the magic starts.
Once those first roots peek through, you'll transplant into a pot with well-draining soil, keeping it in bright light but out of direct sun until it's strong enough to handle the great outdoors.
The real wait begins here: it could take 3-5 years before you see flowers, and another 2-3 years after that for fruit—but when that first peach appears, you'll understand why the journey matters. The tree itself becomes a living piece of your garden's history.
This isn't a quick harvest, but it's a project that teaches resilience. You'll learn about seasons, soil, and the slow art of growing something from nothing.
Even if the fruit never matches store-bought peaches, the satisfaction of growing a tree from a single stone is its own reward—and the first tree might just inspire you to plant more. Let's get those pits germinating!
📚 In This Guide
- What you need
- Instructions
- Tips and common mistakes
- Wrapping up and next steps
What you need
- ● Fresh peach pit: A single, undamaged pit from a ripe, organic peach (avoid store-bought pits treated with fungicides).
- ● Small pot or container: 4–6 inches in diameter with drainage holes (plastic or terracotta).
- ● Well-draining potting mix: A blend of 50% peat moss or coconut coir, 30% perlite or vermiculite, and 20% sand (sterilized).
- ● Watering can or spray bottle: For gentle hydration (avoid overwatering!).
- ● Plastic wrap or humidity dome: To create a mini greenhouse effect.
- ● Patience: Germination can take 4–8 weeks (or longer)!
- ● Sterilized knife or scissors: For carefully cracking open the pit (if needed).
- ● Heat mat or warm location: (e.g., near a sunny window or under grow lights) to speed up germination.
- ● Grow lights: LED or fluorescent bulbs (12–16 hours/day) for seedlings after sprouting.
- ● Fertilizer (balanced, 10-10-10): Diluted to half-strength for young seedlings (start after 3–4 months).
- ● Garden twine or stakes: For supporting the tree as it grows (outdoor planting stage).
- ● Climate: Peach trees thrive in USDA Zones 5–9 (cold-hardy varieties may need winter protection).
- ● Sunlight: A full-sun location (6+ hours/day) for outdoor planting.
- ● Space: Mature trees need 15–20 feet of width (dwarf varieties: 8–10 feet).
- ● Time: Fruit-bearing can take 3–5 years (or longer from seed!).
Step-by-Step instructions for growing a peach tree from a seed pit
Here’s how to turn a single peach pit into a tree—it’s a long game, but the payoff is worth it.
🌱 Step 1: Extract and Prepare the Seed Pit
Start with a fresh, fleshy peach—avoid dried or shriveled fruit. Cut the pit open carefully with a knife, then scoop out the large, flat seed inside. Rinse it under cool water to remove any remaining fruit residue. The seed is ready when it’s clean and dry to the touch.
Place the seed between two paper towels, dampened just enough to feel slightly damp but not soggy. Fold the towels around it and tuck them into a sealed plastic bag. Store the bag in a warm spot—like on top of your fridge—where the temperature stays around 70-75°F. Check it daily; the towels should stay moist but never dripping.
💧 Step 2: Stratify the Seed for Germination
Peach seeds need a cold period to break dormancy. After 4-6 weeks in warm storage, transfer the seed to a sealed container filled with moist sphagnum moss or a mix of sand and peat. Bury the seed 1 inch deep in the medium, then place the container in the refrigerator for 8-12 weeks.
Keep the moss or mix consistently moist—never let it dry out completely. This cold stratification mimics winter conditions, signaling the seed it’s safe to sprout. Once 2-3 weeks into stratification, you might see a tiny taproot emerge. That’s your cue it’s ready for the next step.
☀️ Step 3: Plant the Germinated Seed
After the cold treatment, plant the seed in a 4-inch pot filled with a mix of potting soil and perlite (half and half). Bury it ½ inch deep, leaving the root tip just covered. Water lightly until the soil feels evenly damp, but avoid oversaturating it.
Place the pot in a bright, indirect light spot—like a sunny windowsill away from direct afternoon sun. The seedling will emerge in 2-4 weeks, often as a single, delicate shoot. Once the first true leaves appear (not the initial seed leaves), move it under a grow light for 12-14 hours daily to prevent leggy growth.
🌿 Step 4: Transplant and Care for the Sapling
When the seedling reaches 6-12 inches tall and has 4-5 sets of leaves, transplant it into a 1-gallon pot with well-draining soil. Choose a spot with full sun (6+ hours daily) if moving outdoors. Water deeply after transplanting, then let the top inch of soil dry out between waterings.
Fertilize lightly with a balanced 10-10-10 fertilizer diluted to half strength every 4-6 weeks during the growing season. Prune any leggy or weak growth to encourage a sturdy trunk. In its first year, focus on root and trunk development—fruit won’t appear for 5-7 years, so patience is key.
⏰ Step 5: Overwinter and Prepare for Fruit
Before the first frost, move the sapling indoors to a cool (40-50°F) but bright spot. Reduce watering but keep the soil slightly moist. In early spring, return it to outdoor conditions gradually, hardening it off over 1-2 weeks by exposing it to increasing sunlight.
By year 3-4, you’ll see blossoms—though they may not bear fruit. Peach trees grown from seed are often not true to the parent tree’s variety, so fruit may differ in size, flavor, or even color. Keep pruning to shape the tree and protect it from pests like peach tree borers by applying neem oil if needed.
Tips & tricks for growing a peach tree from a seed pit
Here's what I learned the hard way after trying (and failing) to grow a peach tree from seed more than once.
Seed Selection Matters: Not all peach pits will sprout successfully. Choose pits from fully ripe, fresh peaches—avoid those from store-bought fruit that's been sitting for weeks. The seed inside should be plump and firm, not shriveled or cracked. If you're unsure, test multiple pits since germination rates can be unpredictable.
Moisture Balance is Key: During the warm storage phase (Step 1), the paper towels should feel damp like a wrung-out sponge—not dripping, not dry. I learned this after watching seeds rot from too much moisture or fail to sprout from being too dry. Weigh the bag daily to ensure it stays consistently moist but never soggy. This balance is critical for breaking dormancy.
Stratification Timing: The 8-12 weeks in cold storage (Step 2) is non-negotiable for peach seeds. I tried skipping this step once and waited months for germination—nothing happened. If you're impatient, check for taproot emergence around the 2-3 week mark, but don't move the seed until the full cold treatment is complete. Patience here pays off with reliable sprouting.
Light Transition Strategy: When moving your seedling from indirect light to grow lights (Step 3), do it gradually over 3-4 days. I made the mistake of moving mine directly under full grow light intensity and ended up with a leggy, weak seedling. Start with just 2-3 hours of grow light daily, then increase to the full 12-14 hours as the plant acclimates.
Pro Tips for Peach Tree From Seed Pit
- Here's what I learned the hard way after trying (and failing) to grow a peach tree from seed more than once.
- Seed Selection Matters: Not all peach pits will sprout successfully. Choose pits from fully ripe, fresh peaches—avoid...
- Moisture Balance is Key: During the warm storage phase (Step 1), the paper towels should feel damp like a wrung-out s...
Frequently asked questions
Growing a peach tree from a seed pit is exciting but comes with questions! Here are answers to the most common ones to help you succeed:
How long does it take for a peach seed to sprout?
A peach pit typically sprouts in 2–6 weeks when kept warm (70–80°F) and moist. Patience is key—some seeds take longer, especially if stored improperly. Once sprouted, the seedling may take 3–5 years to bear fruit, so plan ahead!
Can I plant the seed directly in the ground?
No—peach pits need stratification (cold treatment) to break dormancy. Start indoors in winter (see our guide) or refrigerate the pit for 4–6 weeks before planting. Direct outdoor planting often fails due to poor germination rates.
Will my homegrown peach tree produce fruit like the parent?
Probably not! Seed-grown trees are unpredictable—fruit may differ in size, flavor, or even ripening time. For consistent results, graft a known variety onto your seedling later. Think of it as a fun experiment rather than a guaranteed orchard!
Why did my seedling turn yellow or wilt?
Yellowing leaves or wilting often signal overwatering, root rot, or poor drainage. Let the soil dry slightly between waterings and use a well-draining pot. If pests (like aphids) appear, rinse with soapy water or use neem oil.
Can I grow a peach tree from a store-bought peach pit?
Yes! Just ensure the peach isn’t from a hybrid variety (check the label). Seed pits from grocery-store peaches often work, but avoid heavily treated or waxed fruit. Rinse the pit thoroughly before planting to remove residue.
Do I need to protect my young tree in winter?
Seedlings are delicate—mulch the base with straw or leaves to insulate roots. In harsh climates, wrap the trunk with burlap or use a frost cloth. Avoid heavy snow buildup, which can damage branches.
Still stuck? Drop your question in the comments—we’re happy to help!
Wrapping up and next steps
Growing a peach tree from a seed pit is a rewarding journey that connects you to nature’s patience and beauty.
While it may take years before your tree bears fruit, the process is worth every moment—especially when you witness those first delicate blossoms or sweet peaches ripening on your own tree! 🌱✨
Now that you’re armed with the knowledge, why not start today? Grab a peach pit, follow the steps, and nurture your future orchard. And remember: even if not every seed grows into a fruitful tree, the adventure—and the lessons—are priceless.