
Propagation
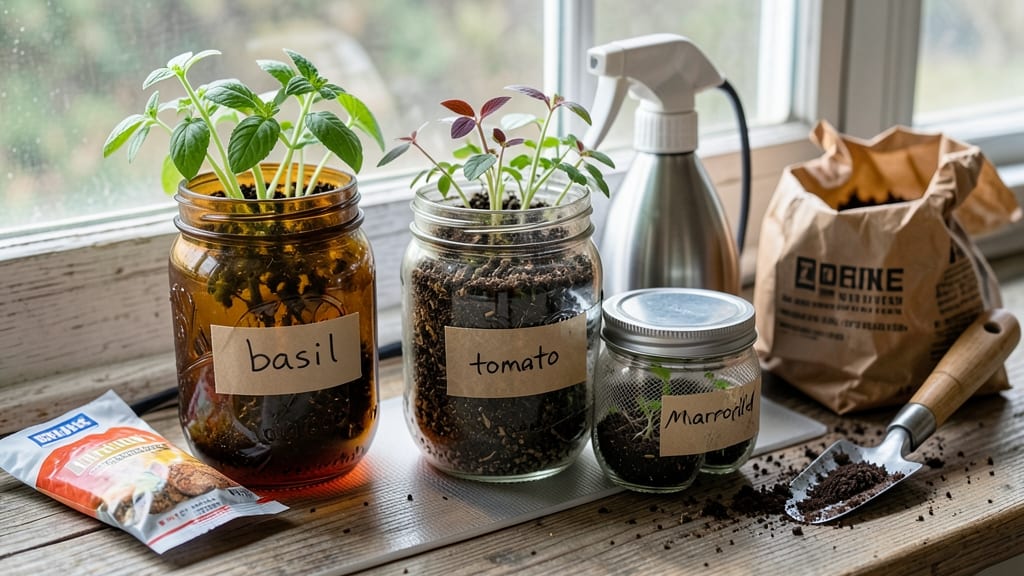
Starting seeds in old jars turns trash into healthy little green machines—no fancy equipment needed. 🌱 I’ve saved hundreds of dollars by repurposing pasta sauce jars, jam containers, and even baby food jars into perfect seed starters, and the results are just as strong as store-bought trays.
The best part? You skip the plastic waste and get a zero-waste system that’s easy on your wallet and the planet. Just clean, sterilize, and cut the jars—no special tools required.
My first batch of basil grew so fast, I had fresh leaves for pesto in just three weeks, and the roots stayed strong enough to transplant without shock.
Condensation inside the jars keeps humidity high, but that’s actually a good thing—it mimics a greenhouse. You’ll just need to crack the lids daily to prevent mold, and watch as those tiny seeds burst into life right before your eyes.
The only real challenge is remembering to rotate them for even light exposure.
This method works for any seed—veggies, herbs, or flowers—whether you’re a city dweller with a sunny windowsill or a backyard gardener looking to cut costs. Here’s how to get started without a single new purchase.
📚 In This Guide
- What you need
- Instructions
- Tips and common mistakes
- Wrapping up and next steps
What you need
- ● Old jars: Clean, food-grade glass jars with lids (mason jars, pasta sauce jars, or jam jars work great!). Aim for 4–12 jars, depending on your seed-starting goals.
- ● Seed starting mix: A sterile, well-draining potting mix (avoid garden soil—it’s too dense!). A 10–20 quart bag covers most small starts.
- ● Seeds: Choose fast-growing varieties (like herbs, lettuce, or flowers) or hardier plants (tomatoes, peppers) for longer starts. Check seed packets for spacing needs!
- ● Spray bottle: A 16–32 oz bottle for gentle watering (avoid over-saturating those tiny roots!).
- ● Labels & marker: Small tags or masking tape + a permanent marker to track seedlings (trust us, you’ll forget what’s what!).
- ● Scissors or knife: For cutting drainage holes in jar lids (if needed) or trimming excess labels.
- ● Tray or saucer: A shallow container to catch drainage and hold jars (a baking sheet or old tray works!).
- ● Grow lights or sunny windowsill: Seedlings need 12–16 hours of light daily. A cheap LED grow light (~$20–$40) saves the day if natural light is lacking.
- ● Heat mat: For slow germinators like peppers or tomatoes (keeps soil 70–85°F—check your seed packets!).
- ● Humidity dome: DIY with plastic wrap or buy a small propagation dome to retain moisture.
- ● Fertilizer: A balanced, water-soluble fertilizer (like 10-10-10) at half-strength once seedlings sprout their first true leaves.
- ● Twine or rubber bands: To secure labels or create makeshift supports for taller seedlings.
Step-by-step instructions for seed starting in old jars
Turn your recycling bin into a thriving nursery with these simple, zero-waste techniques.
🪴 Step 1: Prepare and Sterilize Your Jars
Start by selecting clean, food-grade jars with lids—mason jars work perfectly. Remove any labels and scrub the inside and outside with warm, soapy water to eliminate bacteria or residue. I like to sterilize them further by boiling lids and jar mouths in water for 5 minutes—this prevents damping-off disease that can kill seedlings before they even sprout.
Let the jars cool completely before use. The reason for sterilization becomes clear when you see how quickly seedlings can rot in contaminated soil. Once cool, place the jars in a tray or shallow container to catch any drainage. This setup keeps your workspace tidy and prevents messes.
🌱 Step 2: Add Drainage and Fill with Moistened Soil
Place a small piece of broken pottery or mesh over the jar opening to create drainage while keeping soil in place. This mimics how professional seed-starting trays work. Fill each jar ¾ full with your seed-starting mix—don’t pack it down, just let it settle naturally. The goal is loose, airy soil that lets roots spread easily.
Moisten the soil until it feels like a damp sponge—squeeze a handful and it should hold together without dripping. Overwatering now leads to compacted soil later. I tap the jar gently on the table to settle the mix evenly. This ensures seeds make good contact with moist soil for quick germination.
🌱 Step 3: Sow Seeds at the Correct Depth
Follow the packet instructions for planting depth—usually twice the seed diameter. For tiny seeds like lettuce, sprinkle them on the surface and press lightly. Larger seeds like beans go ½ inch deep. I use a toothpick to create small holes when needed, which helps place seeds precisely without disturbing the soil.
Cover seeds lightly with additional soil (or just press them in for surface sowers). Mist the surface with water until evenly moist but not soggy. A spray bottle gives you control—no heavy watering that washes seeds away. Label each jar immediately with the seed type and date. Trust me, you’ll forget which is which after a week!
☀️ Step 4: Provide Warmth and Light for Germination
Place jars in a warm spot—70-75°F is ideal for most seeds. A sunny windowsill or seedling heat mat works well. Keep the soil consistently moist by misting daily, but avoid letting it dry out completely. You’ll see tiny sprouts in 5-14 days, depending on the seed type.
Once seedlings emerge, move them to bright light immediately. A south-facing window or grow light 2-3 inches above prevents leggy growth. Watch for the first true leaves (not the initial seed leaves)—this tells you the seedling is established and ready for stronger light. I rotate jars daily to ensure even growth toward the light source.
💧 Step 5: Care for Seedlings Until Transplanting
Water when the top ½ inch of soil feels dry—this prevents overwatering while keeping roots hydrated. Use a small watering can or spray bottle to avoid disturbing seedlings. Fertilize lightly with a diluted seedling formula 2 weeks after germination to encourage strong growth without burning tender roots.
When seedlings develop 2-3 sets of true leaves, they’re ready for transplanting. Gently remove them by sliding a knife around the soil edge, then transfer to larger containers or the garden. The jar’s compact size makes this easy—just tip it upside down and tap gently to release the seedling intact.
Tips & tricks for perfect seed starting in old jars
These simple tricks will help you avoid common pitfalls and grow strong, healthy seedlings every time.
Sterilization Secret: That 5-minute boil for jar sterilization isn't just about cleanliness—it's your first line of defense against damping-off disease. I've seen seedlings rot overnight in unsterilized jars, so don't skip this step. For extra protection, you can also wipe the inside with rubbing alcohol after boiling. This double defense gives you the best chance for healthy starts.
Soil Settlement Strategy: When filling jars to the ¾ mark, resist the urge to pack down the soil. The natural settling that happens when you gently tap the jar creates just the right air pockets for root development. I find tapping it 5-6 times on the table works perfectly. This loose structure prevents waterlogging while still holding seeds in place for germination.
Lighting Technique: That 2-3 inch distance from grow lights isn't arbitrary—it's the sweet spot for preventing leggy seedlings. I use a simple ruler to measure and adjust as seedlings grow. If you notice them stretching toward light, lower the lights by ½ inch. This balanced light exposure helps create sturdy plants ready for transplanting.
Transplanting Hack: The jar's compact size makes transplanting surprisingly easy. After sliding a knife around the soil edge, I find tapping the jar gently on the table while holding the seedling's base releases the entire root ball intact. This minimizes root disturbance and gives your seedlings the best chance to establish in their new home.
Pro Tips for Seed Starting Old Jars
- These simple tricks will help you avoid common pitfalls and grow strong, healthy seedlings every time.
- Sterilization Secret: That 5-minute boil for jar sterilization isn't just about cleanliness—it's your first line of d...
- Soil Settlement Strategy: When filling jars to the ¾ mark, resist the urge to pack down the soil. The natural settlin...
Frequently asked questions
Got questions about repurposing old jars for seed starting? You’re not alone! Here are some of the most common concerns—and their zero-waste solutions.
Can I use any old jar, or do I need to sterilize them first?
Most clean, food-grade jars (like pasta sauce or jam containers) are safe to reuse—but sterilization is key to prevent mold or damping-off. Give them a quick soak in a 1:9 bleach-to-water solution (1 minute), rinse well, and air-dry. For extra peace of mind, bake them at 200°F for 20 minutes before planting.
When is the best time to start seeds in jars?
Timing depends on your climate and plant type! For cool-season crops (like lettuce or peas), start 6–8 weeks before the last frost. Warm-season veggies (tomatoes, peppers) need a head start 8–12 weeks early or wait until after frost. Check your local frost dates—Almanac’s gardening calendar is a great tool!
What if my jar doesn’t have drainage holes? Can I still use it?
No holes? No problem. Use a paper towel or coffee filter as a makeshift liner at the bottom, then fill with a well-draining mix (like 50% potting soil + 50% perlite or vermiculite). Water from the top and bottom-drain by placing the jar in a shallow tray of water for 10 minutes—then let excess drain completely.
How do I transition seedlings from jars to the garden without shocking them?
Hardening off is your secret weapon! Start 1–2 weeks before transplanting by moving jars to a sheltered outdoor spot for a few hours daily, gradually increasing time. On the day of transplant, water the soil well and dig a hole slightly larger than the jar’s diameter. Gently slide the jar out (don’t pull!) and plant the root ball at the same depth it was in the jar.
My seedlings look leggy or weak—what went wrong?
Leggy seedlings usually mean too little light or overcrowding. Move jars to the sunniest window (south-facing is ideal) or use a grow light 6–12 inches above for 12–16 hours/day. If they’re touching the jar lid, it’s time to thin or transplant to give them room to stretch toward the light.
Wrapping up and next steps
Starting seeds in old jars isn’t just a clever way to reuse—it’s a zero-waste, budget-friendly way to give your plants the best possible start! 🌱 With a little creativity and these simple steps, you’ll transform forgotten glassware into thriving seedling nurseries while keeping your garden goals (and your wallet) happy.
Now that you’re armed with tips and tricks, why not grab those jars and get growing? Try your hand at a few easy seeds like herbs or flowers, and soon you’ll be sharing your green-thumb success with neighbors (and maybe even trading seedlings!).