
Lawn
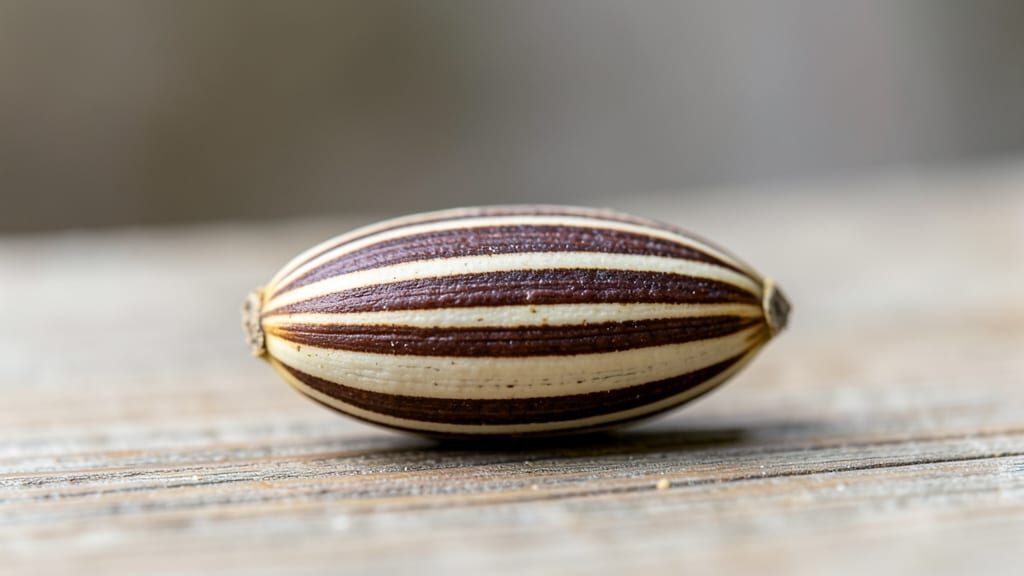
That tiny sunflower seed holds a universe of potential—its hard shell guards a delicate embryo ready to burst into towering beauty. 🌻 Understanding what's inside transforms your planting from guesswork to science-backed success, and I've cracked the code after years of trial-and-error with sunflower seedlings.
The seed's anatomy explains why proper prep matters: the seed coat needs breaking down (scarification or soaking) to let water reach the embryo, while the cotyledons store energy for those first critical days.
Plant too deep, and the seedling starves trying to surface; too shallow, and it dries out before sprouting. I've learned these lessons the hard way—my first batch of sunflowers emerged at wildly different times because I ignored the seed's internal needs.
You'll end up with uniform, strong seedlings that emerge within 7-14 days when planted at the right depth (½ inch) in warm soil (70°F+).
The key is patience during the first week—consistent moisture without drowning the seed—and watching for those cotyledons to split the soil, signaling the real growth has begun. Those first leaves are your reward for respecting the seed's hidden architecture.
This method works for both garden plots and containers, and the same principles apply to other large seeds like beans and peas. Once you understand what's happening inside that shell, every sunflower you grow becomes a testament to how much nature relies on us getting the basics right.
Let's get those seeds ready to grow!
📚 In This Guide
- What you need
- Instructions
- Tips and common mistakes
- Wrapping up and next steps
What you need
- ● Mature sunflower pods: 3–5 fully dried, brown pods (harvest when back of the head turns yellow and seeds rattle inside).
- ○ Sharp kitchen knife or pod splitter: A serrated utility knife (like a Victorinox Fibrox) or a sunflower pod splitter tool (optional but game-changing!).
- ● Cutting board or sturdy surface: A plastic or wooden board (avoid glass—safety first!).
- ● Paper towels or newspaper: For cleanup and seed drying (use unbleached to avoid chemical residue).
- ● Small bowl or container: For collecting seeds (a glass jar with lid works great for storage).
- ● Tweezers or seed picker: For delicate seed extraction (especially for tiny or stubborn seeds).
- ● Fine-mesh strainer: To sift out seed debris or chaff after splitting.
- ● Rubbing alcohol (70% isopropyl) and cotton swabs: For sterilizing tools if reusing them (prevents mold!).
- ● Labeling tags or masking tape: To mark seed varieties or harvest dates.
- ● Patience: Let pods dry completely (1–2 weeks post-harvest) to avoid moldy seeds.
- ● Dry, well-ventilated workspace: Humidity is the enemy of seed viability!
- ● Basic knife skills (or YouTube tutorials): If new to pod splitting, watch a quick sunflower seed extraction video for technique tips.
How to extract and grow sunflower seeds from store-bought pods
Here's how I turn grocery-store sunflower seeds into healthy plants—no fancy tools needed.
🌱 Step 1: Harvest and Dry the Seeds Properly
Pick fully mature sunflower heads when the petals drop and the back turns brown. I twist the stem to detach the head, then hang it upside down in a dry, dark place for 2-3 weeks. This lets moisture evaporate evenly without mold. Check daily—seeds are ready when they rattle inside the pod and the outer shell turns hard and papery.
If you're impatient (like me), spread the heads on newspaper in a warm, dry spot. Stir them occasionally to prevent uneven drying. Overdrying makes seeds brittle, so stop when they feel heavy in your hand but still separate cleanly when squeezed.
✂️ Step 2: Split the Pods and Clean the Seeds
Use a butter knife or your fingers to gently pry open the dried pods. I place a bowl underneath to catch seeds and debris. Avoid crushing the seeds—just separate the tough outer casing. Discard any blackened or shriveled seeds immediately; they won’t sprout. Healthy seeds should be plump, tan, and slightly glossy.
Spread the seeds on a clean towel to air-dry for 12 hours. This prevents rot when planting. I label them with the harvest date—fresh seeds sprout faster and grow stronger. Store extras in a paper envelope in the fridge for up to 6 months if you want to save them for later.
💧 Step 3: Soak Seeds to Speed Up Germination
Fill a shallow dish with lukewarm water and add the seeds. Let them soak for 8-12 hours. This softens the outer shell, which can slow down germination. I use a plate instead of a bowl so seeds don’t sink to the bottom and get waterlogged. After soaking, drain them well—excess moisture causes rot.
Place the seeds on a paper towel in a single layer. Fold the towel loosely and set it in a warm spot (70-75°F). Mist lightly every 12 hours to keep them moist but not soggy. You’ll see tiny white roots emerge in 24-48 hours—that’s your signal they’re ready to plant!
🌿 Step 4: Plant in Well-Drained Soil
Fill small pots with light, sandy soil (or mix regular potting soil with perlite). Plant seeds ½ inch deep, spacing them 6 inches apart if sowing directly in the garden. I use biodegradable pots so I can transplant seedlings without disturbing roots. Water gently until the soil is moist but not dripping.
Place the pots in a sunny spot (6+ hours of direct light daily). Keep the soil consistently moist—not soggy—until seedlings sprout. Thin to the strongest plant per pot if multiple seeds germinate. Once the first true leaves appear (7-10 days), move to a larger container or outdoor garden bed.
☀️ Step 5: Support and Maintain for Strong Growth
Sunflowers need sturdy support—I drive a 3-foot stake into the soil next to each plant when they’re 12 inches tall. Tie the stem loosely with soft cloth or twine as it grows. Avoid tight ties that can girdle the stem. Water at the base deeply 2-3 times per week, especially during dry spells.
Watch for pests like aphids or birds—cover young plants with floating row fabric if needed. Mature sunflowers rarely need fertilizer, but a balanced 10-10-10 applied at planting helps if your soil is poor. Harvest seeds when the back of the flower turns brown and the petals fall—just like the ones you started with!
Tips & tricks for perfect sunflower seed extraction and growth
These simple tricks will help you avoid common pitfalls and maximize your sunflower seed success.
Drying Strategy: In Step 1, the 2-3 week drying time is crucial for seed viability. I've found that placing the sunflower heads in a paper bag with small holes punched in it speeds up drying while preventing mold. Check daily by gently squeezing a pod—it should feel firm but not brittle. If you're in a humid climate, consider using a fan on low to circulate air around the heads. This helps maintain consistent moisture levels without over-drying.
Seed Selection: When cleaning seeds in Step 2, don't overlook the importance of seed quality. Healthy seeds should be plump and tan with a slight sheen. I've learned to discard any seeds that are shriveled, discolored, or have cracks—these won't sprout. For best results, use a fine-mesh strainer to separate seeds from debris after splitting the pods. This makes the air-drying process in Step 2 much more efficient and prevents contamination with plant matter that could harbor mold.
Germination Conditions: The 8-12 hour soak in Step 3 is your secret weapon for faster germination. I've discovered that using distilled water instead of tap water can improve results, especially if your tap water has high mineral content. After soaking, place the seeds on a paper towel in a sealed plastic bag with a few drops of water—this creates a humid environment that mimics natural conditions. Check for root emergence every 12 hours as specified, but be gentle when handling the seeds to avoid damaging the delicate roots.
Planting Depth: When planting in Step 4, the ½ inch depth recommendation is perfect for most climates, but adjust slightly based on your soil type. Sandy soils can be planted slightly deeper (⅔ inch), while heavy clay soils should have seeds planted just ¼ inch deep. I've found that using a small wooden skewer to create planting holes makes the process more precise and prevents overcrowding. This is especially helpful when working with multiple seeds in a small pot.
Pro Tips for Sunflower Seed Inside
- These simple tricks will help you avoid common pitfalls and maximize your sunflower seed success.
- Drying Strategy: In Step 1, the 2-3 week drying time is crucial for seed viability. I've found that placing the sunfl...
- Seed Selection: When cleaning seeds in Step 2, don't overlook the importance of seed quality. Healthy seeds should be...
Frequently asked questions
Got questions about splitting sunflower seed pods and harvesting those golden treasures inside? You’re not alone! Here are some of the most common queries—plus straightforward answers to keep your seed-saving game strong.
How do I know when sunflower seed pods are ready to harvest?
Sunflower seed pods are ready when the back of the head turns yellow or brown, and the petals droop or fall off. If you tap the pod and hear seeds rattling inside, that’s your cue! Harvest on a dry day to prevent mold. Pro tip: Wait until at least 70% of the seeds are mature—some may take longer.
Can I speed up the drying process for sunflower seeds?
After harvesting, lay the pods in a single layer on a tray in a warm, dry, well-ventilated spot (like a garage or attic) for 1–2 weeks. Avoid direct sunlight—it can overheat and crack the shells. For faster drying, use a dehydrator at 95°F (35°C) for 4–6 hours.
What if my sunflower seeds won’t split open naturally?
If pods are stubborn, try these tricks:
- Freeze them: Place pods in a sealed bag and freeze overnight. The cold shock often loosens the shells.
- Soak them: Submerge pods in warm water for 24 hours to soften the husk.
- Gently crack them: Use a hammer or rolling pin (wear gloves!) to tap the base of the pod until it splits.
Warning: Avoid crushing seeds—you’ll damage the embryo inside!
Can I save seeds from sunflowers grown from store-bought seed?
Yes, but with a catch! Store-bought sunflowers are often hybrid varieties, meaning their seeds may not grow true to type (i.e., they might not produce identical plants). For reliable heirloom seeds, choose open-pollinated varieties like ‘Russian Mammoth’ or ‘Autumn Beauty.’ If you’re experimenting, save seeds anyway—they might still yield fun surprises!
How should I store sunflower seeds long-term?
Store seeds in an airtight container (like a glass jar) in a cool (50–60°F/10–15°C), dark place for up to 2 years. Add a silica gel packet or a few grains of rice to absorb moisture. Pro tip: Label your seeds with the variety and harvest date—future-you will thank you!
Wrapping up and next steps
Growing sunflower seeds from inside their pods is a rewarding journey—one that teaches patience, care, and the joy of nurturing life from something as simple as a seed! 🌻 Whether you're a gardening newbie or a seasoned green thumb, every split pod and sprouted seed is a small victory.
Now that you’re equipped with the right tools and knowledge, it’s time to roll up your sleeves and watch those sunflowers bloom.
Ready to take the next step? Start with just one pod—experiment, observe, and refine your technique. Before you know it, you’ll be harvesting your own seeds or admiring towering sunflowers that once began as tiny, hidden treasures inside those pods. Happy growing! 🌱