
Planting
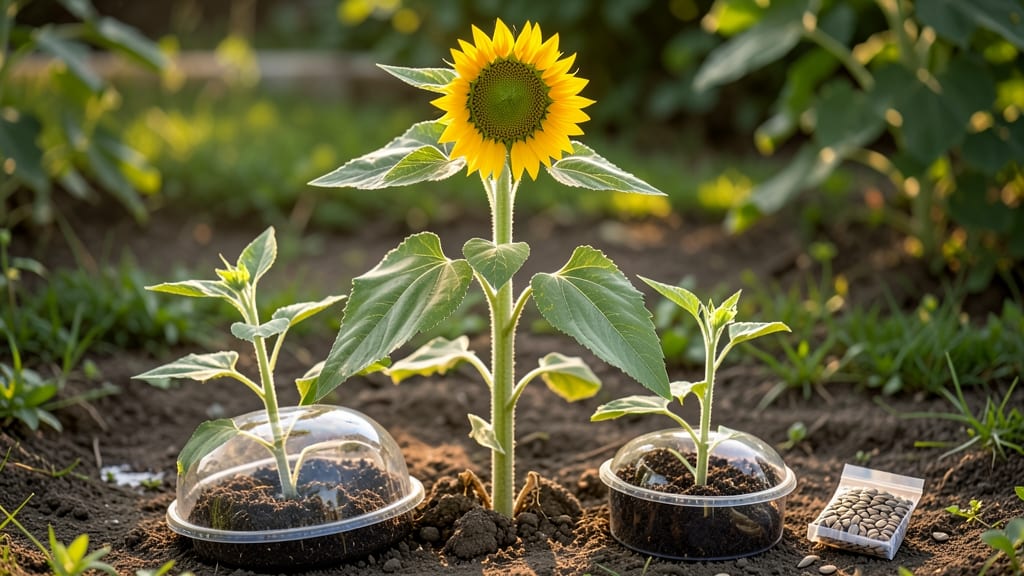
Watching a seed grow into a plant is like witnessing nature’s quietest magic—something I’ve seen transform my kitchen windowsill into a mini jungle. 🌱 The secret isn’t luck; it’s understanding the three simple stages every seed goes through: waking up, breaking free, and reaching for the light.
My first attempt ended with a sad, wilted sprout, but now I’ve cracked the code to reliable germination that even my black thumb can’t mess up.
You’ll need just five things: the right seeds, a container with drainage, soil that’s damp but not soggy, warmth (think 65–75°F), and patience. Most beginners overcomplicate it—watering too much or burying seeds too deep—but the basics are shockingly simple.
Even my grandma’s sunflower seeds, planted last spring, shot up faster than I expected once I got the conditions right.
By day 10, you’ll see tiny roots pushing through the soil, followed by the first green leaves breaking the surface—proof the seed has won its battle against the dark.
With proper light (12–16 hours daily) and consistent care, those seedlings will grow into sturdy plants ready for transplanting in just 4–6 weeks. The best part? Every stage teaches you how plants really work.
This method scales from a single tomato seed to a whole tray of herbs—perfect for small spaces or ambitious gardeners. The key is paying attention to what the plant needs, not what you think it needs. Let’s turn those tiny seeds into something you can actually eat—or admire.
📚 In This Guide
- What you need
- Instructions
- Tips and common mistakes
- Wrapping up and next steps
What you need
- ● Seeds: Choose fast-growing varieties (e.g., radish, bean, or marigold) for quick results. (10–20 seeds, depending on your container size.)
- ● Growing Medium: Seed Starting Mix: Lightweight, sterile blend (e.g., Pro-Mix or FoxFarm Seedling Mix). (1–2 cups per 6-inch pot.)
- ● Alternative: Coconut coir or damp paper towels (for sprouting).
- ● Containers: Biodegradable Pots: 2–3 inch diameter (e.g., Jiffy Pellets).
- ● Trays/Flats: With drainage holes (e.g., 1020 trays).
- ● DIY Option: Egg cartons or plastic cups with drainage punched in.
- ● Watering Tools: Spray Bottle: For gentle misting (e.g., 16 oz. spray bottle).
- ○ Watering Can: With a fine rose nozzle (optional for larger setups).
- ● Trowel or Scoop: Small hand trowel for planting seeds (e.g., 2-inch metal trowel).
- ○ Heat Mat (Optional): For warm-season seeds (e.g., 10x20" heat mat). (Maintains 70–85°F for faster germination.)
- ○ Grow Lights (Optional): LED or fluorescent (e.g., 12–18" full-spectrum bulb). (12–16 hours/day for seedlings.)
- ○ Humidity Dome (Optional): Clear plastic cover for trays (e.g., 1020 tray dome).
- ● Labels & Marker: To track seed types (e.g., plant tags + permanent marker).
- ● Location: Warm, bright spot (e.g., south-facing windowsill or under grow lights).
- ● Temperature: Ideal range: 65–75°F (check seed packet for specifics).
- ● Patience: Germination time varies (e.g., 3–14 days for most seeds).
- ○ Safety Gear (Optional): Gloves if handling soil with additives (e.g., compost tea).
How to watch a seed transform into a thriving plant
Here's how I turn tiny seeds into strong young plants—every time. No fancy tools, just patience and the right conditions.
🌱 Step 1: Choose the Right Seeds and Prepare Them for Planting
Start with fresh, high-quality seeds from a reputable source. I always check the packet for planting depth and spacing—those numbers are your roadmap. Some seeds, like tomatoes, need a warm, moist environment to germinate, while others, like lettuce, prefer cooler temperatures. If your seeds require scarification (scratching the seed coat) or stratification (cold treatment), follow those instructions precisely. For most seeds, though, a simple soak in lukewarm water for 12 hours softens the outer shell and speeds up germination.
Here's the thing—don't rush this step. If you're unsure whether your seeds need pre-treatment, a quick online search for your specific variety will save you weeks of waiting. I like to soak seeds in a small bowl of water, then drain them and let them sit on a paper towel overnight. This keeps them hydrated without drowning them. You'll know they're ready when they look slightly plump and firm to the touch.
💧 Step 2: Plant Seeds at the Correct Depth and Keep Them Moist
Fill your seed-starting containers with moistened seed-starting mix—never garden soil, as it compacts and blocks airflow. Press the mix down lightly so it's firm but not packed. The key here is depth: plant seeds at a depth equal to 2-3 times their diameter. For tiny seeds like basil, that’s just a sprinkle on top, while larger seeds like beans need to go 1 inch deep. I use a toothpick to make small holes and drop seeds in one at a time—planting too many in one spot leads to weak, crowded seedlings later.
After planting, water gently with a spray bottle until the soil looks evenly damp but not soggy. The surface should feel moist to the touch, like a wrung-out sponge. Cover the container with a clear plastic dome or wrap it in plastic wrap to trap warmth and humidity. Place it in a warm spot—70-75°F is ideal for most seeds. Check daily but resist the urge to water again until the soil feels dry to the touch about ½ inch below the surface. Overwatering now will suffocate your seeds before they even sprout.
☀️ Step 3: Provide Warmth and Light for Germination
The moment you see the first signs of life—tiny green shoots pushing through the soil—remove the plastic cover immediately. This prevents damping-off, a fungal disease that turns seedlings to mush overnight. Place your seedlings under a grow light or in a south-facing window where they’ll get 12-14 hours of light daily. Without enough light, seedlings stretch toward the sun (called "legginess") and become weak. You’ll spot leggy growth when stems look thin and pale, with leaves spaced far apart.
Keep the soil consistently moist but never waterlogged. I like to use a spray bottle for the first week to avoid disturbing the delicate sprouts. If your seeds haven’t sprouted in 2-3 weeks, they may need more warmth or moisture. Some seeds, like okra, take longer—4-6 weeks—so don’t give up too soon. Once you see first true leaves (the second set after the initial cotyledons), it’s time to transition to a more structured care routine.
🌿 Step 4: Support Early Growth with Proper Care
When seedlings have 2-3 sets of true leaves, it’s time to thin them if they’re crowded. Use scissors to snip unwanted seedlings at soil level—pulling can disturb roots. Leave the strongest seedling in each cell, the one with the most vibrant leaves and sturdy stem. If you’re growing in a shared pot, space plants 2-3 inches apart to give them room to grow. This might seem harsh, but crowded seedlings compete for nutrients and light, leading to weak, stunted plants.
Now’s the time to introduce a balanced fertilizer (like 10-10-10) at half strength. I mix it into the water and apply it once every 2 weeks. Watch for signs of over-fertilizing—yellowing leaves or crispy edges mean you’ve gone too heavy. Keep the soil lightly moist, watering when the top inch feels dry. Avoid wetting the leaves to prevent fungal diseases. If you notice any yellow or wilted leaves, it’s often a sign of overwatering or poor drainage—check your pots for drainage holes and adjust your watering habits.
⏰ Step 5: Transition to Independent Growth
About 4-6 weeks after germination, your seedlings should be ready for their next phase. If you’re hardening them off for outdoor planting, start by placing them outside in a sheltered spot for 1-2 hours the first day. Gradually increase their outdoor time over 10-14 days, so they adjust to wind, sun, and temperature fluctuations. You’ll know they’re ready when they can handle a full day outside without wilting. Transplant on a cloudy day or in the late afternoon to reduce stress.
For container-grown plants, this is the time to upgrade to slightly larger pots if needed. I always check the roots—if they’re circling the bottom of the pot, it’s time to repot. Use the same seed-starting mix and water thoroughly after transplanting. Keep an eye out for pests like aphids or spider mites, which love tender new growth. A spray of neem oil or insecticidal soap can save your plants if you catch the problem early. With consistent care, your seedlings will soon transform into robust, self-sufficient plants ready for harvest or further growth.
Tips & tricks for perfect seed germination
Common pitfalls—and how to sidestep every one when nurturing seeds into plants.
Pre-Treatment Precision: The 12-hour soak in lukewarm water is your secret weapon for breaking dormancy, but timing matters. I've learned the hard way that leaving seeds too long can cause them to rot—especially delicate varieties like lettuce. After soaking, drain them thoroughly and pat dry with a paper towel. This step prevents waterlogging while keeping them hydrated. For seeds that require stratification (like some perennials), place them in a sealed bag with slightly damp peat moss and refrigerate for the recommended weeks before planting.
Depth is Everything: Planting seeds at the correct depth—2-3 times their diameter—is non-negotiable. I once planted basil seeds too deep (thinking "deeper means safer"), and they never sprouted. For tiny seeds like basil, just press them gently into the surface. For larger seeds like beans, use a toothpick to create holes at 1 inch deep. A good rule: if you can't see the seed, it's likely too deep. Mark your seed trays with a pencil to track planting dates—this helps you remember which seeds need thinning or transplanting.
Light and Legginess: Those 12-14 hours of light daily are crucial, but quality matters more than quantity. If your seedlings start stretching toward the light with thin, pale stems (legginess), they're not getting enough light. Move them closer to your grow light or window. I keep my grow lights 2-3 inches above seedlings and raise them as plants grow. For window-grown seedlings, rotate trays daily so all sides get even light exposure. Leggy seedlings can recover if you bury them deeper when transplanting, but prevention is always better.
Hardening Off Strategy: The gradual 10-14 day transition from indoor to outdoor conditions is where many beginners fail. Start with just 1-2 hours on day one in a sheltered spot. I place my seedlings in a shaded area under a porch or patio cover. Watch for wilting—this is your cue to bring them back inside for another day. On cloudy days, you can extend their outdoor time more quickly. The goal is to toughen their cell walls so they can handle the elements without shock. Transplant on a cloudy day or late afternoon to give them a fighting chance against midday sun.
Pro Tips for Seed Grows Into A Plant
- Common pitfalls—and how to sidestep every one when nurturing seeds into plants.
- Pre-Treatment Precision: The 12-hour soak in lukewarm water is your secret weapon for breaking dormancy, but timing m...
- Depth is Everything: Planting seeds at the correct depth—2-3 times their diameter—is non-negotiable. I once planted b...
Frequently asked questions
Got questions about how a seed grows into a plant? You’re not alone! Here are some of the most common queries—and straightforward answers—to help you along the way.
How long does it take for a seed to grow into a plant?
Germination time varies by plant type. Fast growers like radishes or beans may sprout in 3–10 days, while slower seeds (e.g., trees or roses) can take weeks to months. Check your seed packet for specifics—patience is key!
What’s the best temperature for seed germination?
Most seeds thrive between 65–75°F (18–24°C), but some (like peas) prefer cooler temps. Use a seedling heat mat if your home runs cold, or place trays near sunny windows. Avoid extremes—too hot or cold can stall growth.
How much water does a seed need to sprout?
Keep soil consistently moist but not soggy. Overwatering drowns seeds; underwatering dries them out. A spray bottle or gentle watering can works best. Test moisture by touching the soil—it should feel damp like a wrung-out sponge.
Why isn’t my seed sprouting? Troubleshooting tips!
Common culprits: old seeds (test viability), poor soil (use sterile potting mix), lack of light (or warmth), or depth issues (some seeds need light to germinate). If nothing happens in 2–3 weeks, try again with fresh seeds!
Can I grow plants from seeds indoors without sunlight?
Yes! Use a grow light (LED or fluorescent) 12–16 hours/day. Place it 2–4 inches above seedlings and adjust as they grow. South-facing windows work too, but supplement with lights for consistent growth.
Still stuck? Drop your question in the comments—we’re happy to help your green thumb grow!
Wrapping up and next steps
Watching a tiny seed transform into a thriving plant is nothing short of magical—and now, you’re ready to make it happen! 🌱 The key to success lies in patience, consistency, and a little love for the process.
Whether you’re growing herbs for your kitchen or flowers for your garden, every seed has the potential to bloom with the right care.
So, grab your gloves, roll up your sleeves, and take that first step. Start with just one seed, follow the steps you’ve learned, and let nature do the rest. Before you know it, you’ll be surrounded by greenery, and your green thumb will be stronger than ever!